ZenCAM Wireless Camera Kit Installation Guide
How to install the ZenCAM wireless camera kit: the wireless camera on the trailer and the wireless receiver in the cab, connected to your ZenCAM.
Written By Support Team
This guide shows how to install the ZenCAM wireless camera kit on a tractor and trailer. The kit has two parts:
Wireless camera: mounts on the rear of the trailer and sends video wirelessly.
Wireless receiver: mounts in the cab and connects to your ZenCAM, which records and displays the video.
For the dashcam itself (SIM card, SD card and windshield mounting), see the ZenCAM installation guide.
Before you start
ZenCAM wireless camera kit (wireless camera and wireless receiver)
Fuse tap (add-a-circuit) that matches the tractor's fuse type
Ring terminal and wire for the ground connection
Multimeter or test light
The fuse panel diagram for the exact make and model year of the tractor
Isopropyl alcohol wipes, and screws or 3M adhesive for the receiver
A phone with the Veyes app, or a laptop, to check the live view
How the kit pairs: one power circuit, one ground
The camera and receiver pair automatically when they are switched on together. For this to work reliably, both units must be on the same power circuit and share a common ground. Sharing only the ground, or only the power, is not enough.
The receiver is powered by the ZenCAM through its camera cable.
The receiver's signal wire connects to the same circuit that powers the trailer camera. This is the pairing handshake.
Both units are grounded to a common ground.
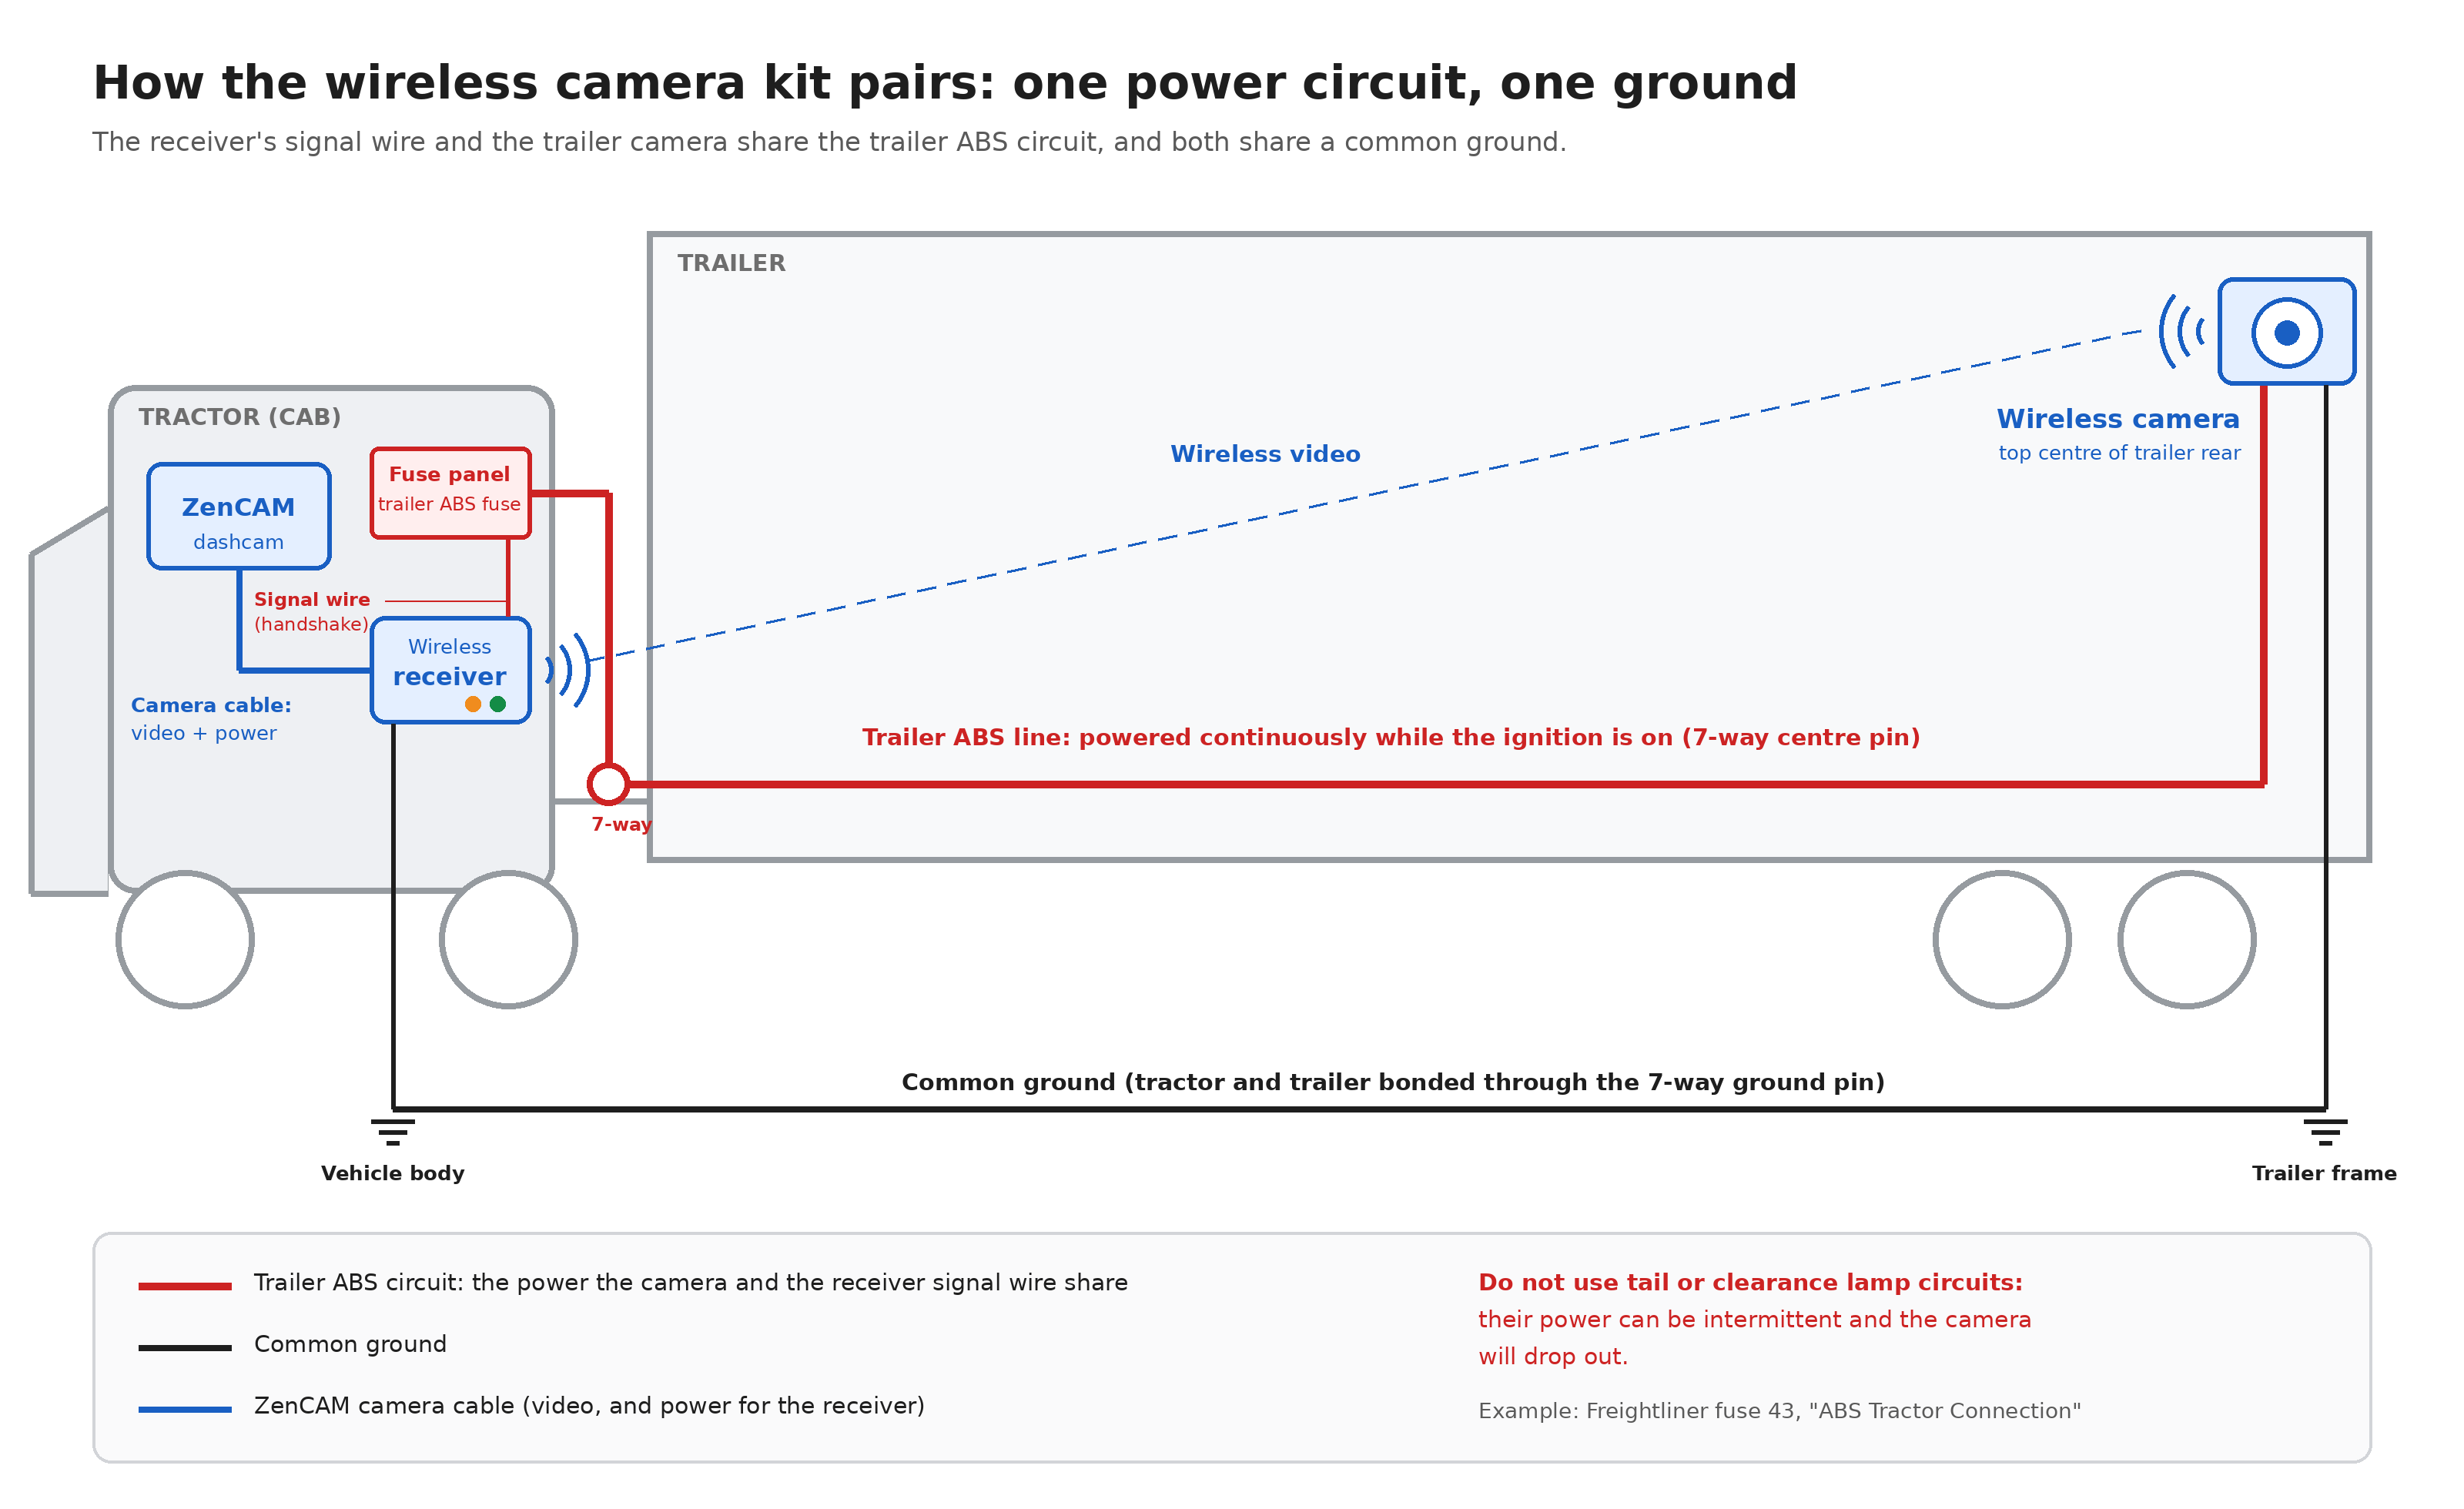
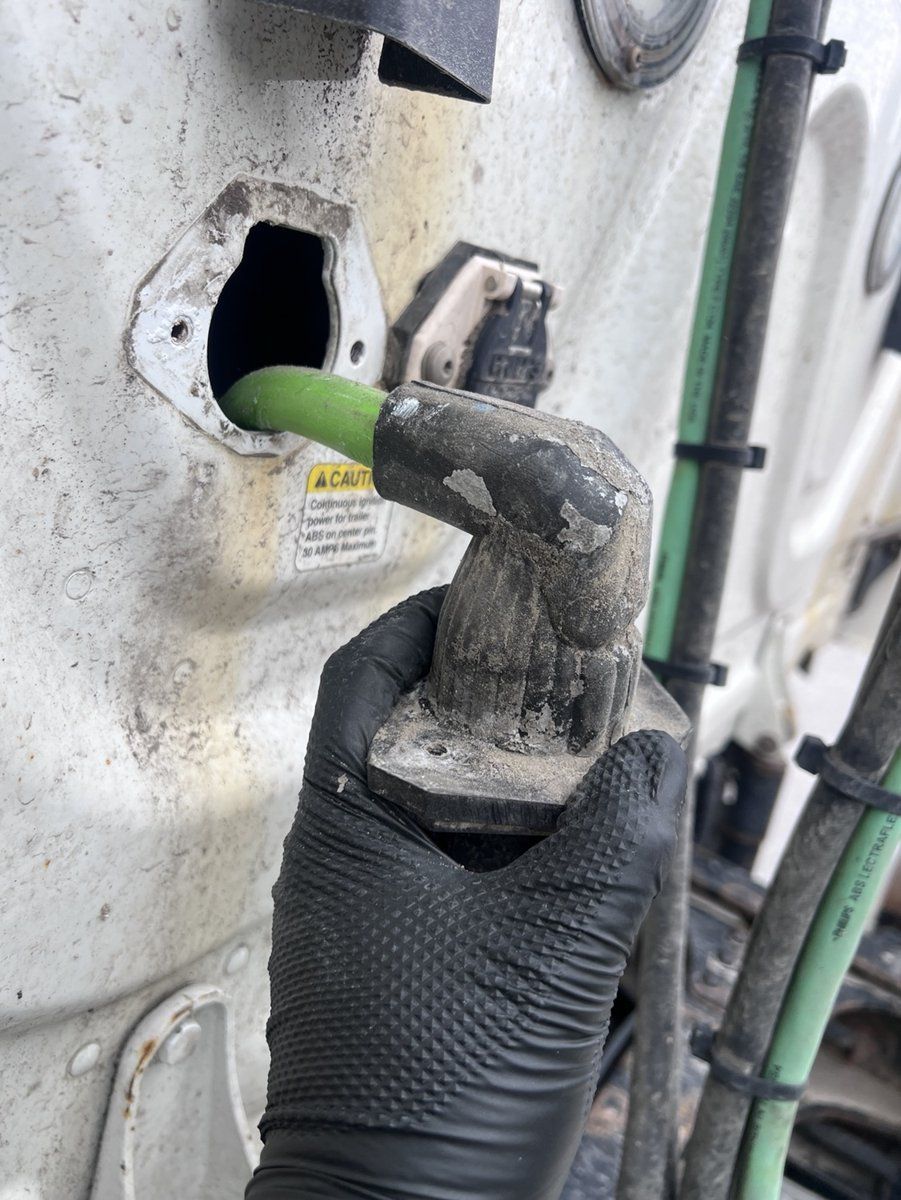
Recommended circuit: the trailer ABS line. On North American tractors, the trailer ABS line is the only tractor-to-trailer circuit that is powered continuously whenever the ignition is on (FMVSS 121). It runs to the trailer on the centre pin of the 7-way connector. Because it is not switched by the lights or brakes, both units stay powered together for the whole trip.
Do not power the camera from the tail lamp or clearance lamp circuits. That power can be intermittent and the camera will drop out.
Step 1: Connect the receiver to your ZenCAM
The receiver takes the place of a wired rear camera. Its camera cable plugs into a ZenCAM camera input, which carries the video and powers the receiver. Choose the option that matches your installation.
Option A: ZenCAM with Power Box Plus or Standard Power Box
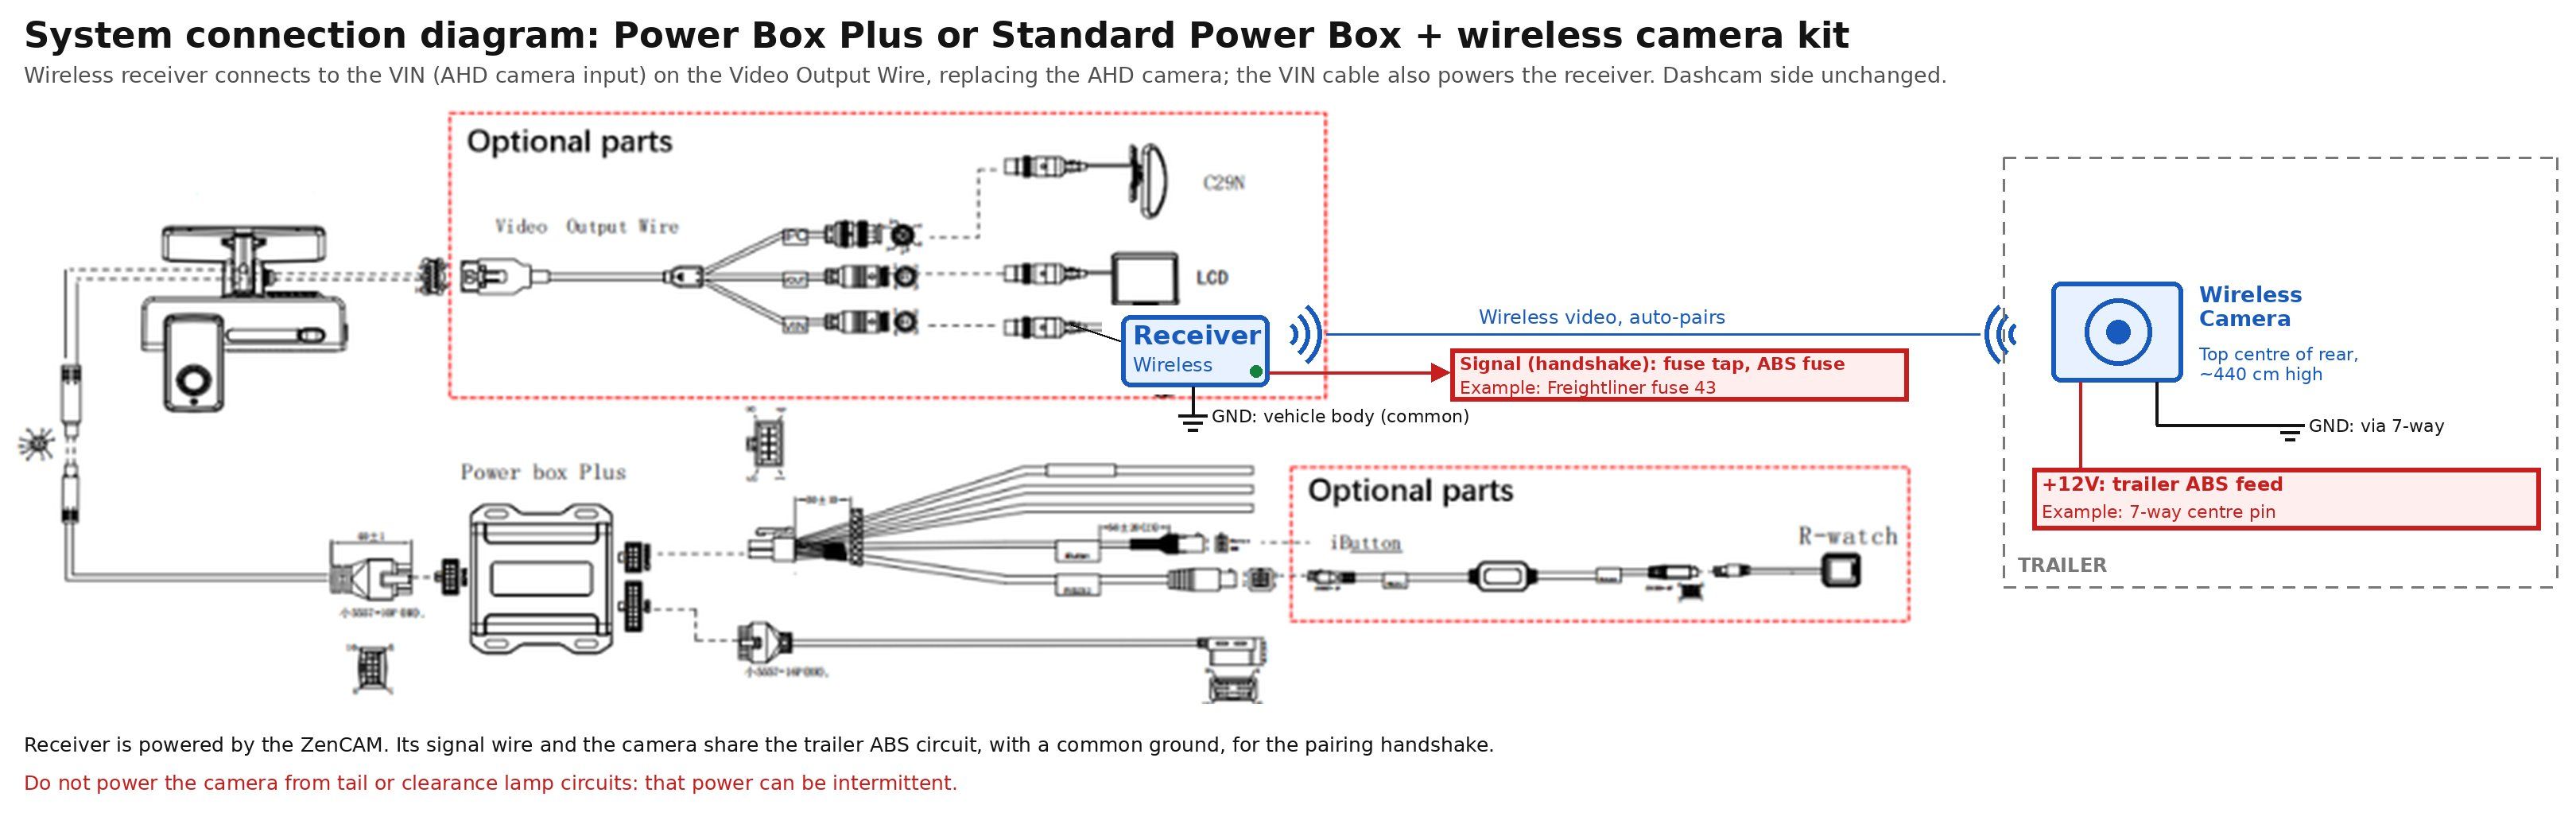
Plug the receiver into the VIN (AHD camera input) branch of the Video Output Wire, where the optional AHD camera would go.
Option B: ZenCAM with Power Box Max
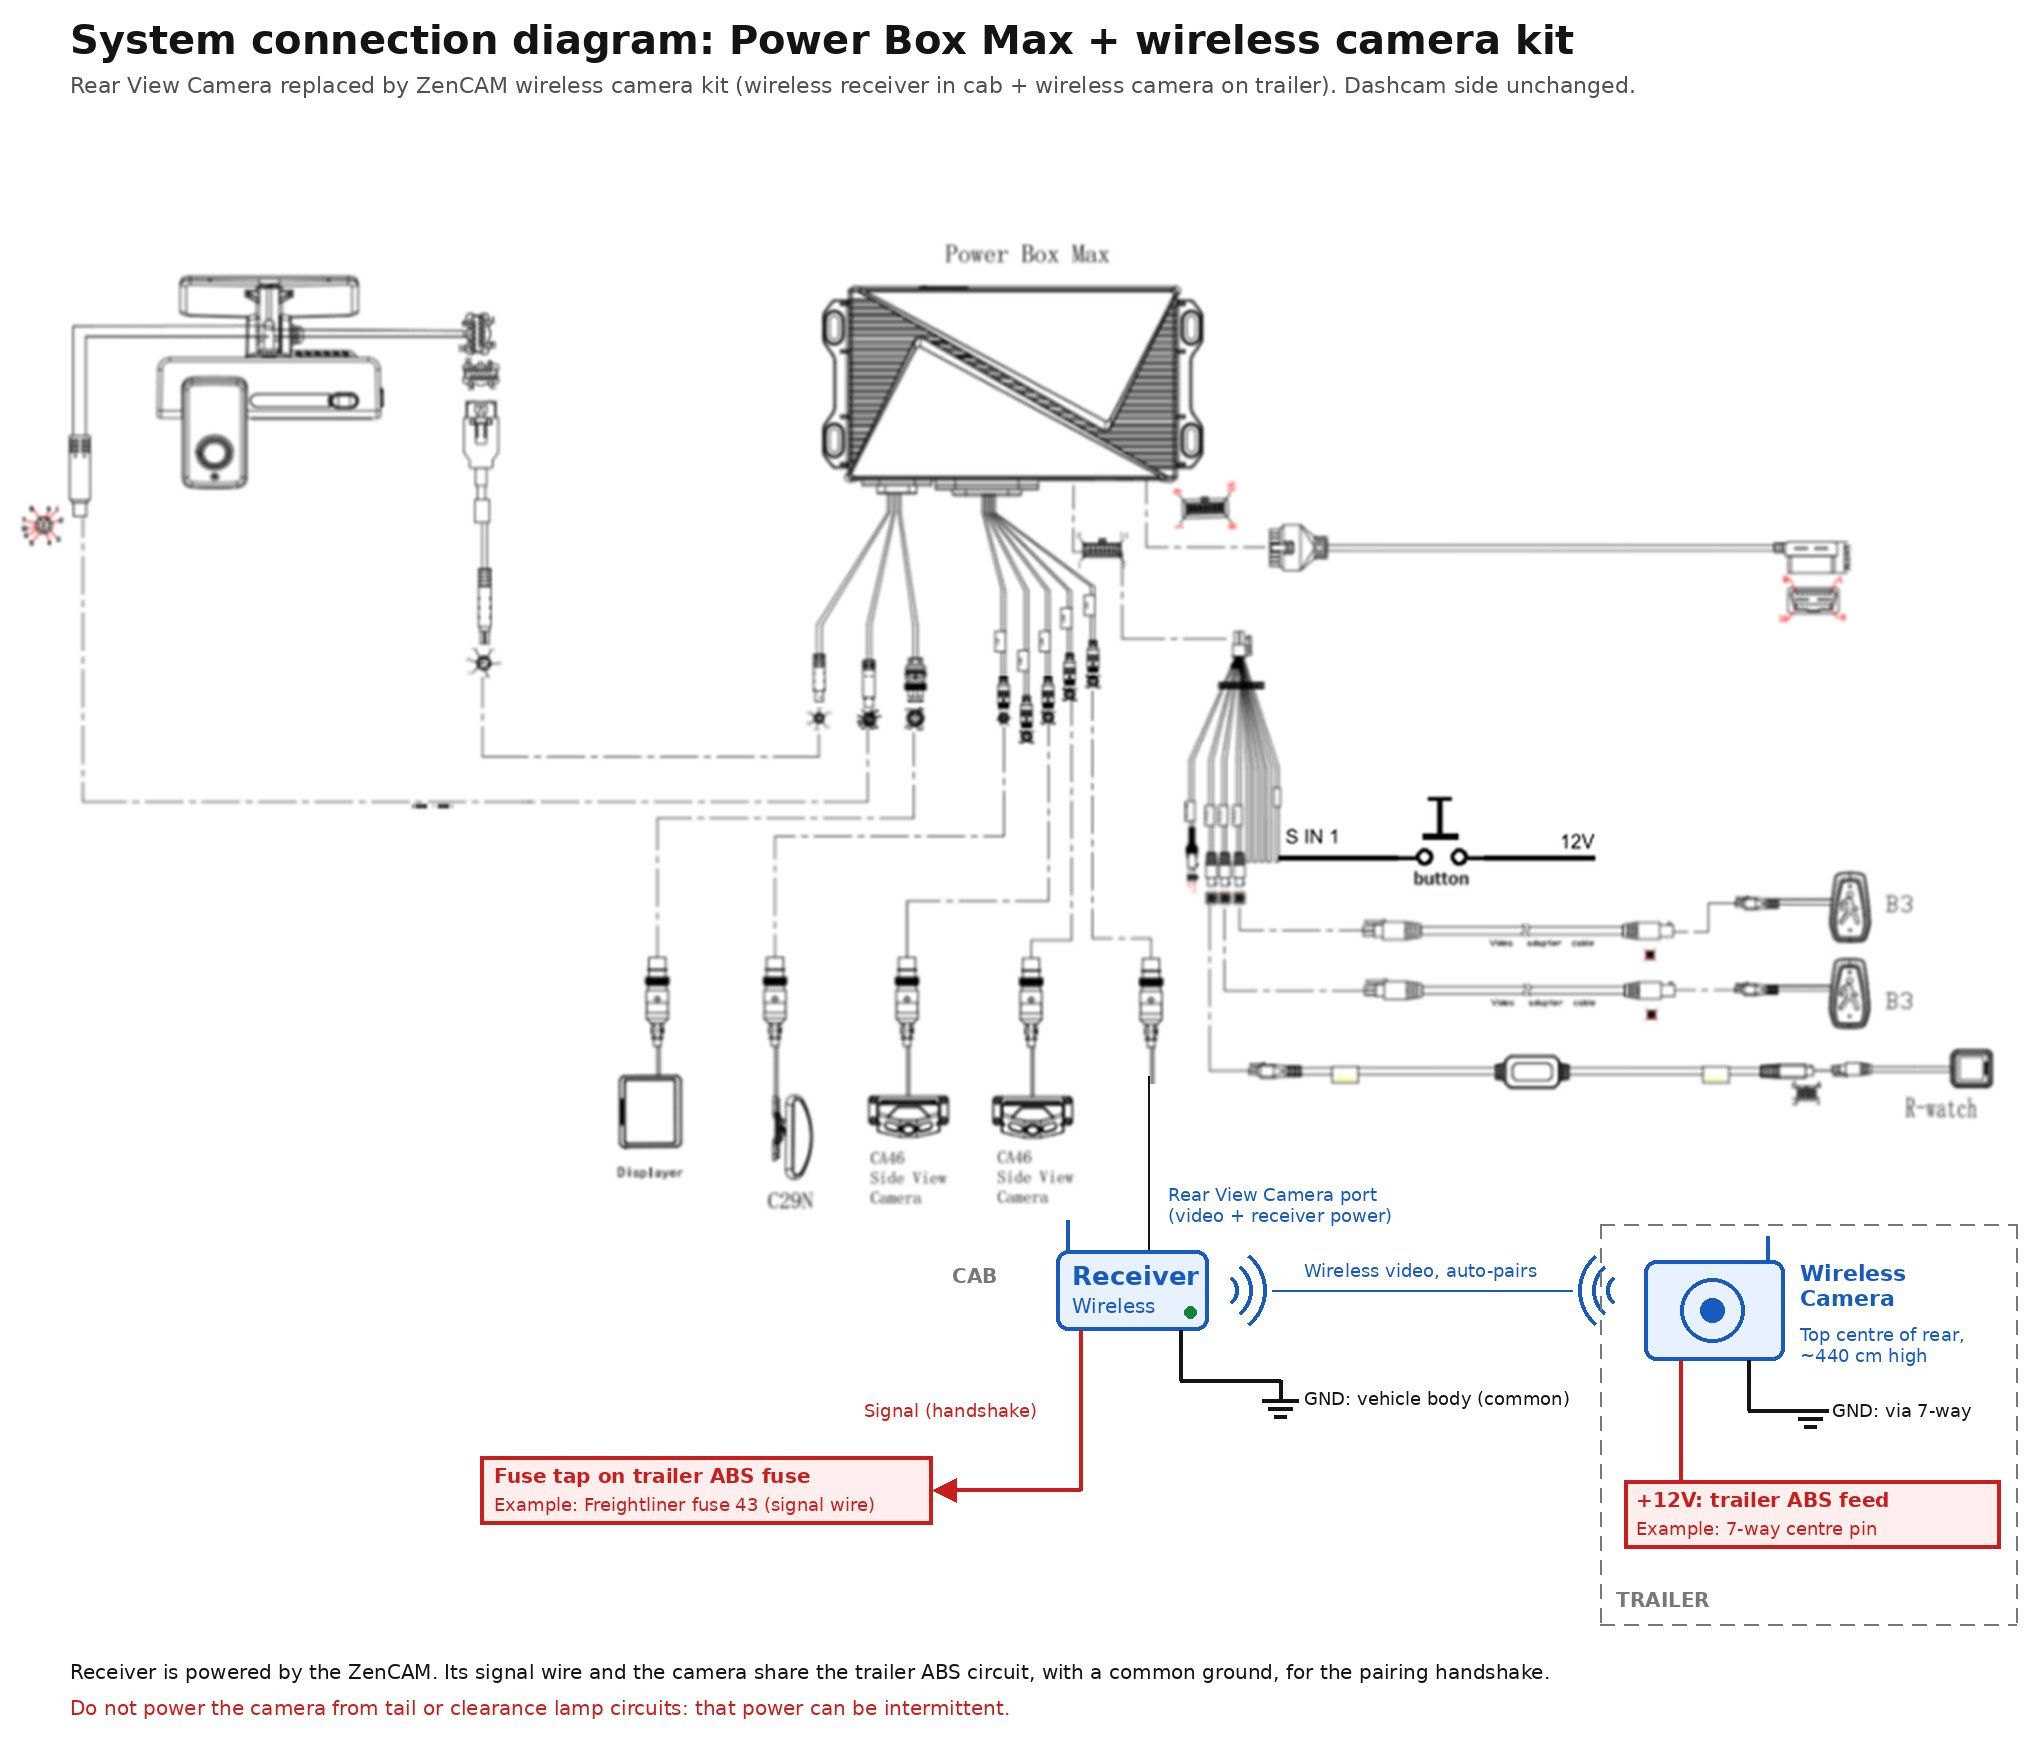
Plug the receiver into the Rear View Camera port on the Power Box Max, in place of the wired rear camera.
Step 2: Connect the receiver's signal and ground wires (tractor)
Turn the ignition off and open the tractor's fuse panel.
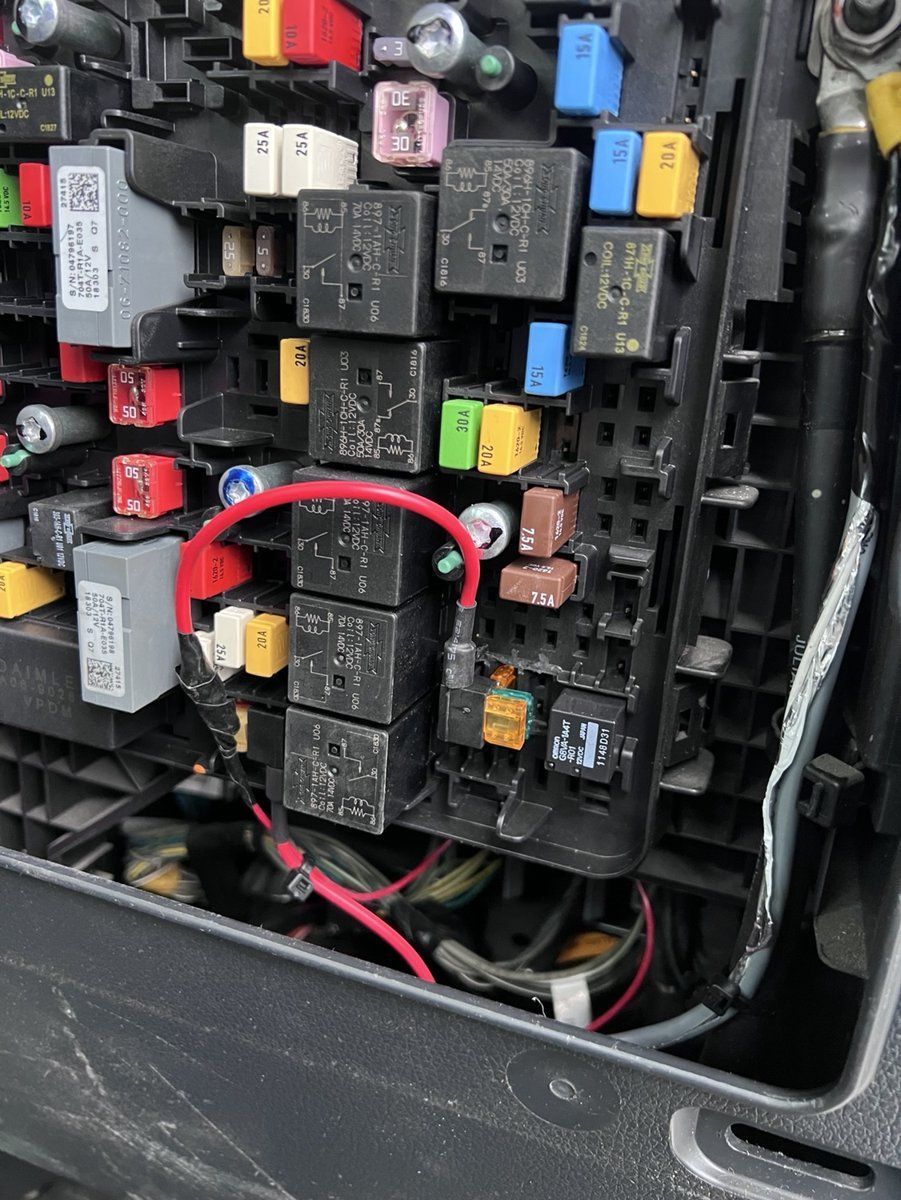
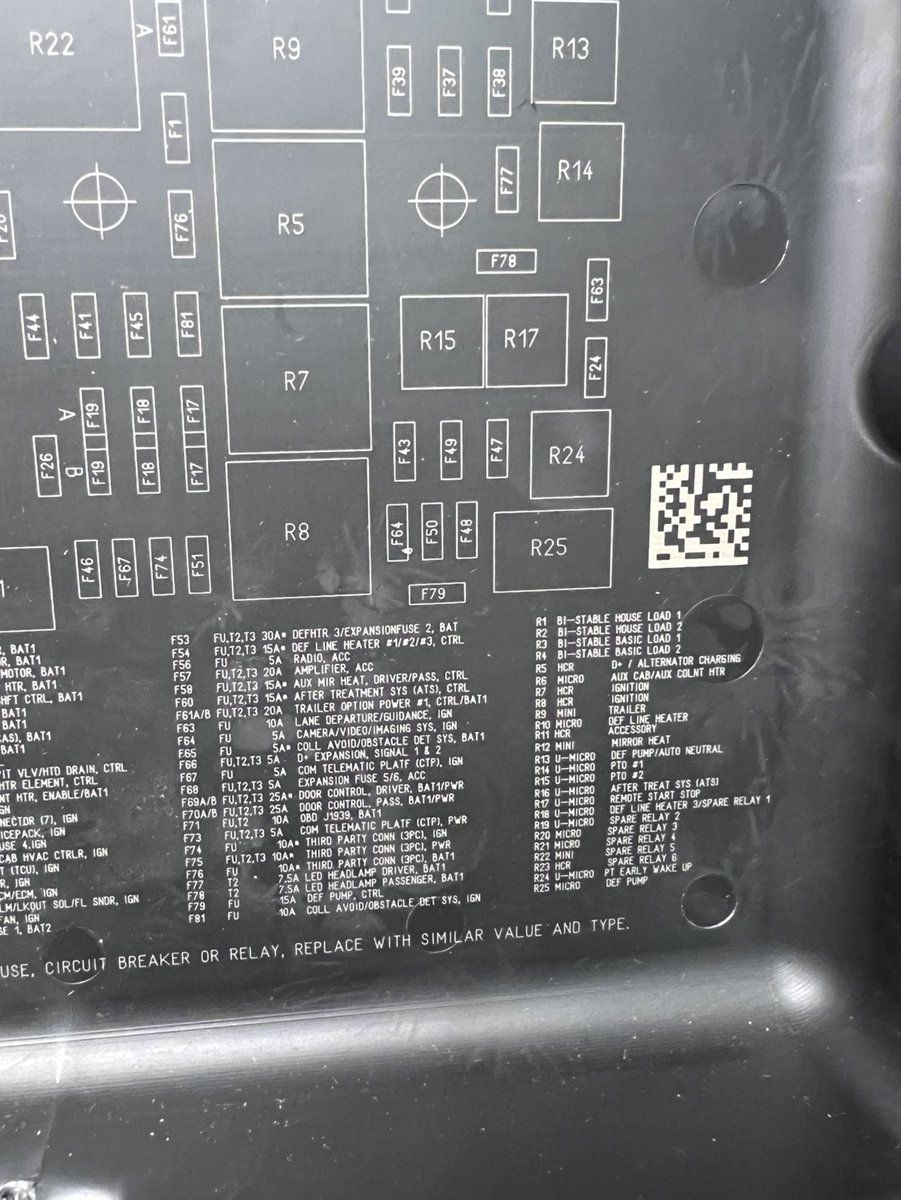
Find the fuse for the trailer ABS line (the "ABS tractor connection").
Example, Freightliner: fuse 43, labelled "ABS Tractor Connection". Confirm against the label on each truck, as layouts can vary by model year.
Other makes: find the dedicated trailer ABS fuse on that model's fuse panel diagram. Do not guess.
With the ignition on and the trailer connected, use the multimeter to confirm the fuse has power.
Install the fuse tap in the trailer ABS fuse position and connect the receiver's signal wire to it.
Connect the receiver's ground wire to bare metal on the vehicle body.
Route the wiring away from moving parts and secure it with cable ties.
Step 3: Mount the receiver in the cab
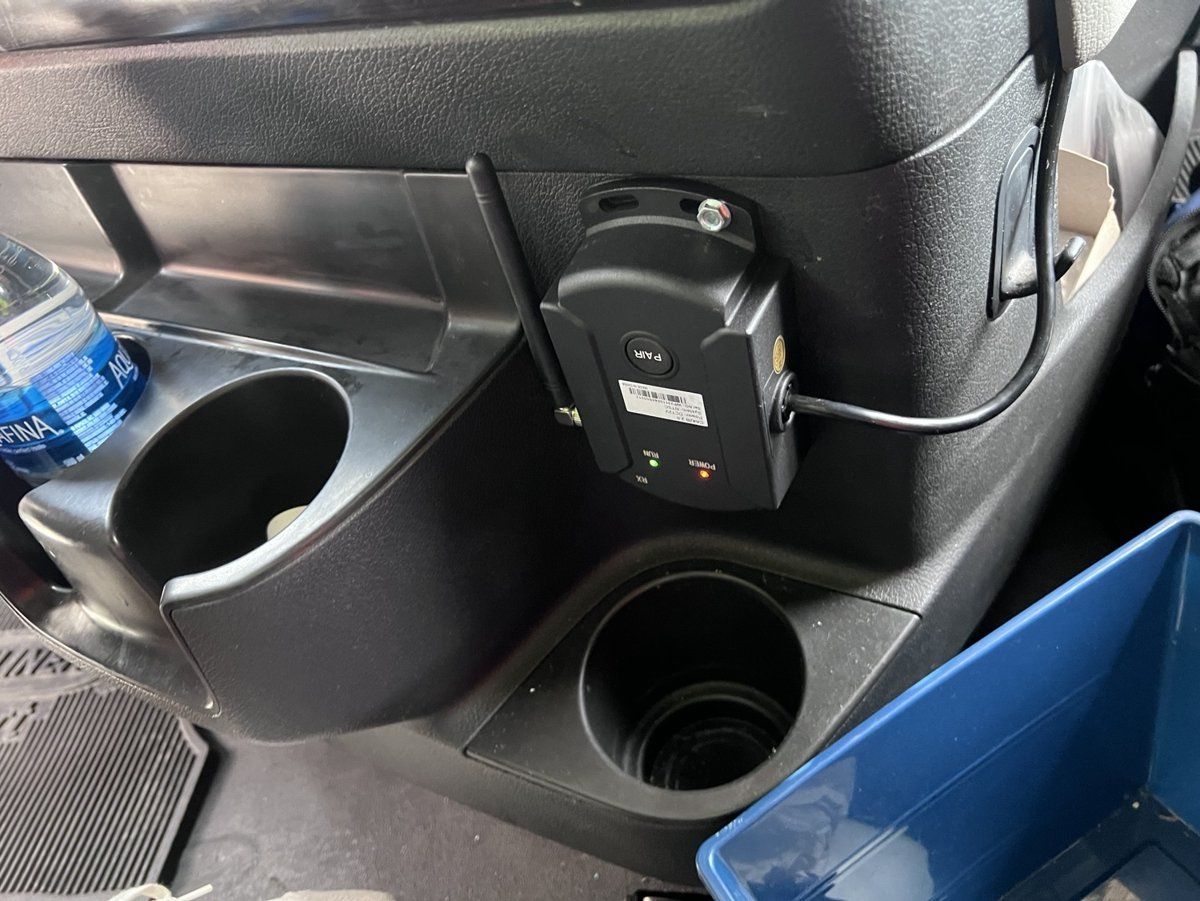
Choose a spot on the centre console (preferred) or the wall behind the driver.
Clean the surface with alcohol, then fix the receiver with screws or the 3M adhesive.
Keep the antenna pointing up, the RUN and POWER lights visible, and the PAIR button reachable.
Step 4: Install the camera on the trailer
Power: connect the camera to the trailer ABS feed. Example: the feed from the 7-way connector's centre pin. Before tapping it, check that the centre pin is not also wired to auxiliary equipment such as a lift gate, dump valve or sliding undercarriage; some older trailers are wired this way.
Ground: connect the camera's ground to the trailer frame. The trailer frame shares the tractor's ground through the 7-way connector's ground pin, so the camera and receiver have a common ground.
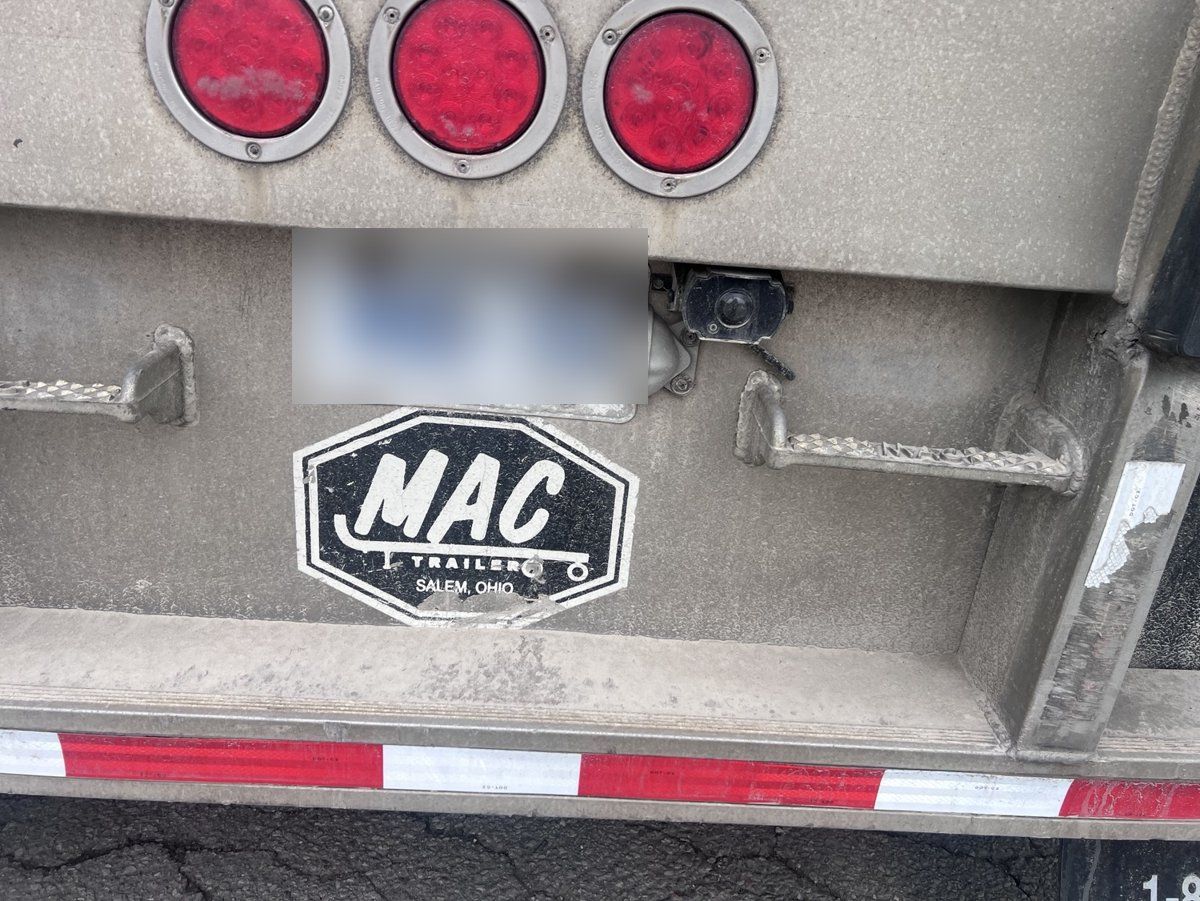
Mount: the best position is the top centre of the trailer rear, about 440 cm (14.4 ft) from the ground and within 15 cm (6 in) of centre. Allow for door swing. A lower position, about 150 cm (5 ft) high, also works.
Aim: tilt the lens so part of the trailer body shows at the bottom of the image. Raise it slightly if a lift gate or spare tire blocks the view.
Step 5: Check the installation before you leave the vehicle
Turn the ignition on with the trailer connected. The receiver POWER light comes on.
The receiver RUN light flashes for about 5 seconds while the units pair, then stays on.
The live view shows the trailer camera, with part of the trailer body at the bottom of the image.
The image stays steady, with no flicker, for a few minutes with the engine running.
Turn the ignition off, then on again. The RUN light goes solid again without pressing PAIR.
Record the vehicle number, trailer number, the fuse used, the connection option (A or B) and the camera channel.
Need help?
If the camera does not pair or the image drops out, see ZenCAM Wireless Camera Kit Troubleshooting, or contact ZenduIT support.
Was this helpful?
Still need help? Ask the team