How to Connect a PTO Input to the ZenCAM PLUS
Wire a PTO (power take-off) signal to one of the ZenCAM PLUS sensor inputs and set it up in the Veyes App. Works with the Standard Power Box, the Diagnostics Box and the Power Box Max.
Written By Vishal Singh
This article explains how to connect a PTO (power take-off) signal to the ZenCAM PLUS and set up the input in the Veyes App. It works with the Standard Power Box, the Diagnostics Box and the Power Box Max.
1. Wiring Diagram

The diagram shows an example installation. The PTO connection to the sensor inputs is the same with the Standard Power Box, the Diagnostics Box or the Power Box Max.
1. ZenCAM PLUS
Light duty vehicles:
- Adhere the camera to the center of the windshield, directly under the rear view mirror.
- Clean the mounting surface with rubbing alcohol before mounting.
Heavy duty vehicles:
- Adhere the camera to the center of the windshield, in the top 2 inches of the wiper path.
- Clean the mounting surface with rubbing alcohol before mounting.
- If the center of the windshield blocks the driver's view, the camera can be offset toward the passenger side. The maximum offset is 4 inches.
- Keep the camera as vertical as possible.
2. Power Box
- The PTO input works with the Standard Power Box, the Diagnostics Box and the Power Box Max.
- Fix the power box to the vehicle chassis with the double-sided tape.
- For power box wiring, follow the ZenCAM PLUS Installation Guide for your power box.
3. Power Harness
- Red wire to constant power (+).
- Orange wire to ignition power (+).
- Black wire to chassis ground (−).
PTO input:
- The cable has 3 sensor inputs (S1, S2, S3).
- Connect the PTO signal to any one free sensor input.
- Note which sensor input you used. You will enable the same sensor in the Veyes App.
- Make sure the connection is secure so it can't come loose while driving.
4. Video In/Out Cable
- Used for the auxiliary cameras.
2. Check the PTO Signal with a Multimeter
Before setting up Veyes, measure the PTO signal with a multimeter, first with the PTO engaged and then disengaged. This tells you which trigger to select:
- Voltage present when the PTO is engaged (+12/24 V): use trigger High.
- Voltage drops to 0 V / ground when the PTO is engaged: use trigger Low.
The input reads 0–36 V. Above 3.9 V reads as High and below 3.9 V reads as Low.
3. Veyes App Configuration
Connect to the camera
- Press the camera button twice to start Wi-Fi AP mode.
- Connect your phone or tablet to the camera's Wi-Fi network (it starts with 003F, 00D2 or 0071).
- Open the Veyes App and log in with username admin. For the password, contact support at support@zenduit.com or +1 (855) 936-3848 x 2.
Step 1: Open the sensor settings
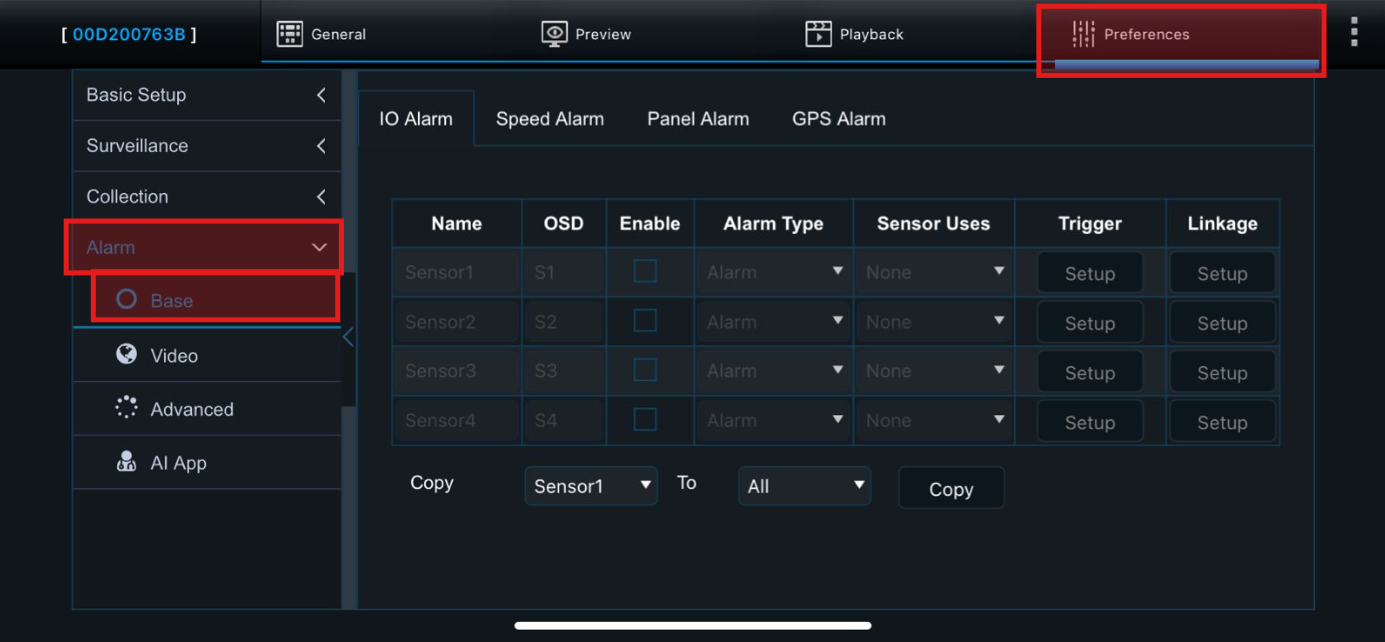
Go to Preferences → Alarm → Base.
Step 2: Enable the sensor
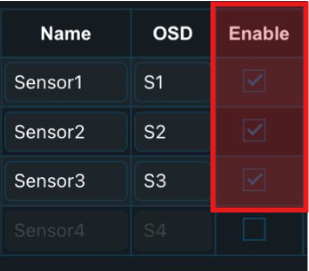
Enable the sensor the PTO is wired to (S1 = Sensor1, S2 = Sensor2, S3 = Sensor3). You can name it PTO and set the OSD to PTO.
Step 3: Set the Alarm Type
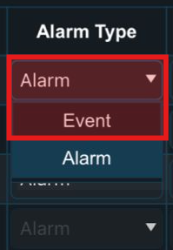
In Alarm Type, select Event.
Step 4: Set the trigger
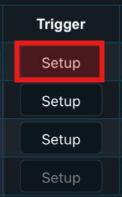
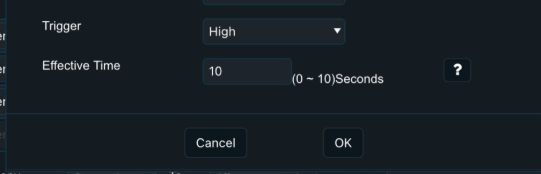
In the Trigger column, tap Setup on the PTO sensor row and set:
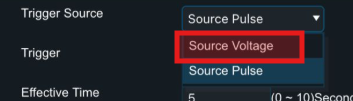
- Trigger Source: Source Voltage
- Trigger: High or Low, based on your multimeter test
- Effective Time: 10 seconds
Step 5: Set the linkage (only if a monitor is installed)
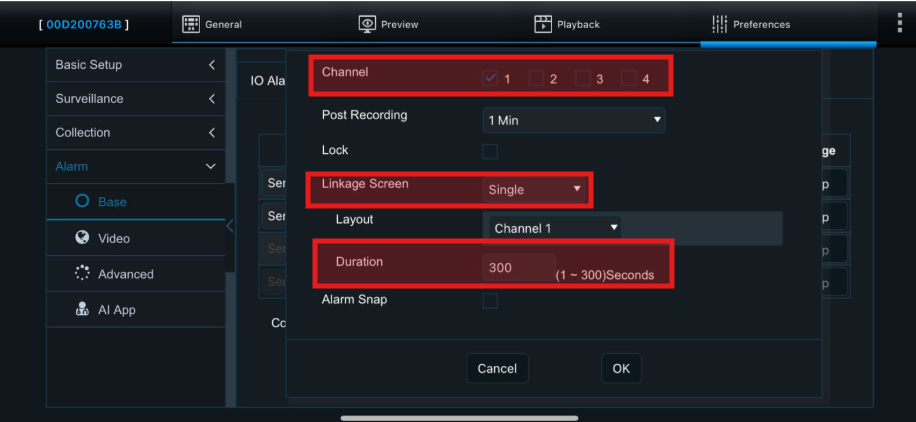
The linkage is only needed if the vehicle has a monitor and you want it to show a camera view when the PTO is engaged. If no monitor is installed, skip this step.
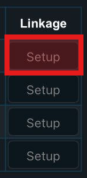
If you are using a monitor: in the Linkage column, tap Setup on the PTO sensor row. Select the camera channels, set Linkage Screen to Single and the duration to 300 seconds, then tap OK.
Step 6: Save and test the input
- Tap Save.
- Go to General → Basic Info and check the IO status.
- Engage the PTO and confirm the sensor changes state, then disengage it and confirm it changes back.
- If nothing changes, measure the signal at the sensor wire again and check the High/Low trigger setting.
Important: Activate the Correct Sensor
The sensor you enable in the Veyes App must match the sensor input the PTO is wired to. If the PTO is connected to sensor input 1 (S1), you must enable Sensor1. If it is connected to S2, enable Sensor2, and if it is connected to S3, enable Sensor3. If the wrong sensor is enabled, the PTO input will not work.
For more help, contact support at support@zenduit.com or +1 (855) 936-3848 x 2.
Was this helpful?
Still need help? Ask the team