Create a route
Create a route to define the path, stops and waypoints a shuttle follows.
Written By Vishal Singh
Create a route to define the path, stops and waypoints a shuttle follows; once saved, the route is available for scheduling, live tracking, ETAs and reporting.
Steps
Go to Routes, then click Create Route.
Enter a Route Name. It's the only field you fill in by hand.
Click Add Stop, then either click the stop on the map or search for its address. Set the stop's dwell time under Stop Duration: how long the shuttle waits there.
Repeat for each stop. Drag the handle to reorder stops, or click the red minus to remove one.
To make the shuttle follow a specific path between stops, click Add Waypoint, then click the map where the route should pass. Waypoints need no address or dwell time.
Check the route on the map. It updates as you add stops and waypoints.
Click Proceed to Schedule Configuration to set when the route runs. See Schedule a route and assign vehicles.
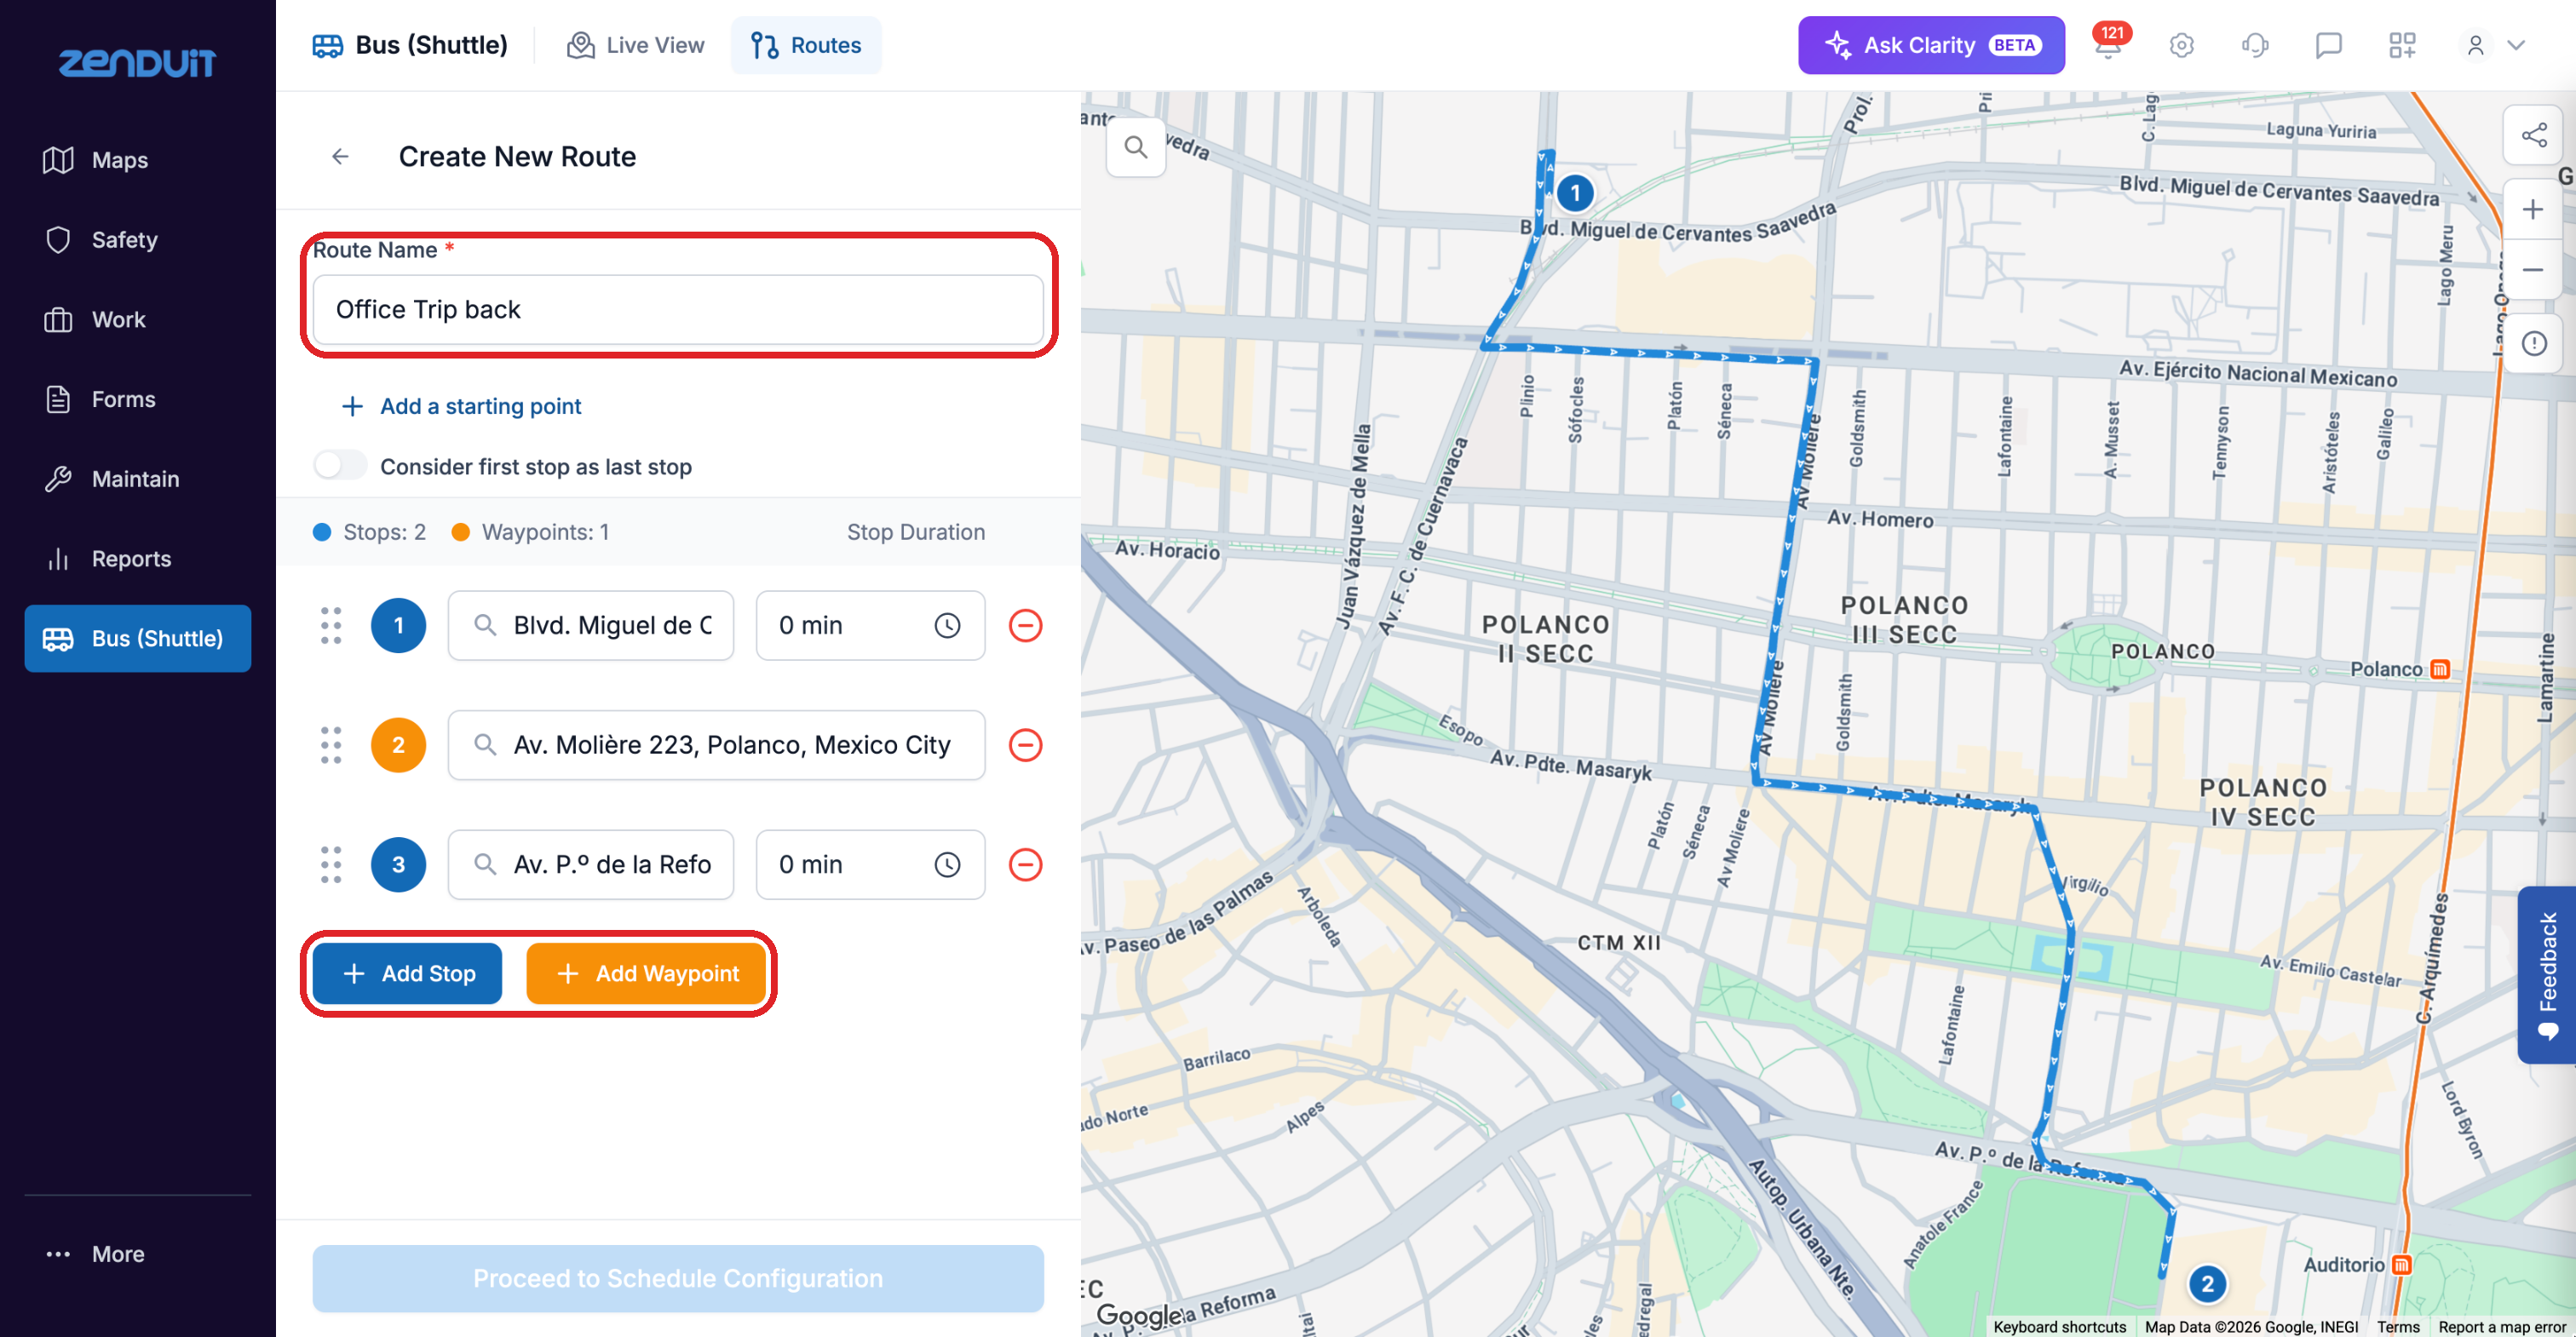
Create New Route: two stops with their dwell time, drawn on the map.
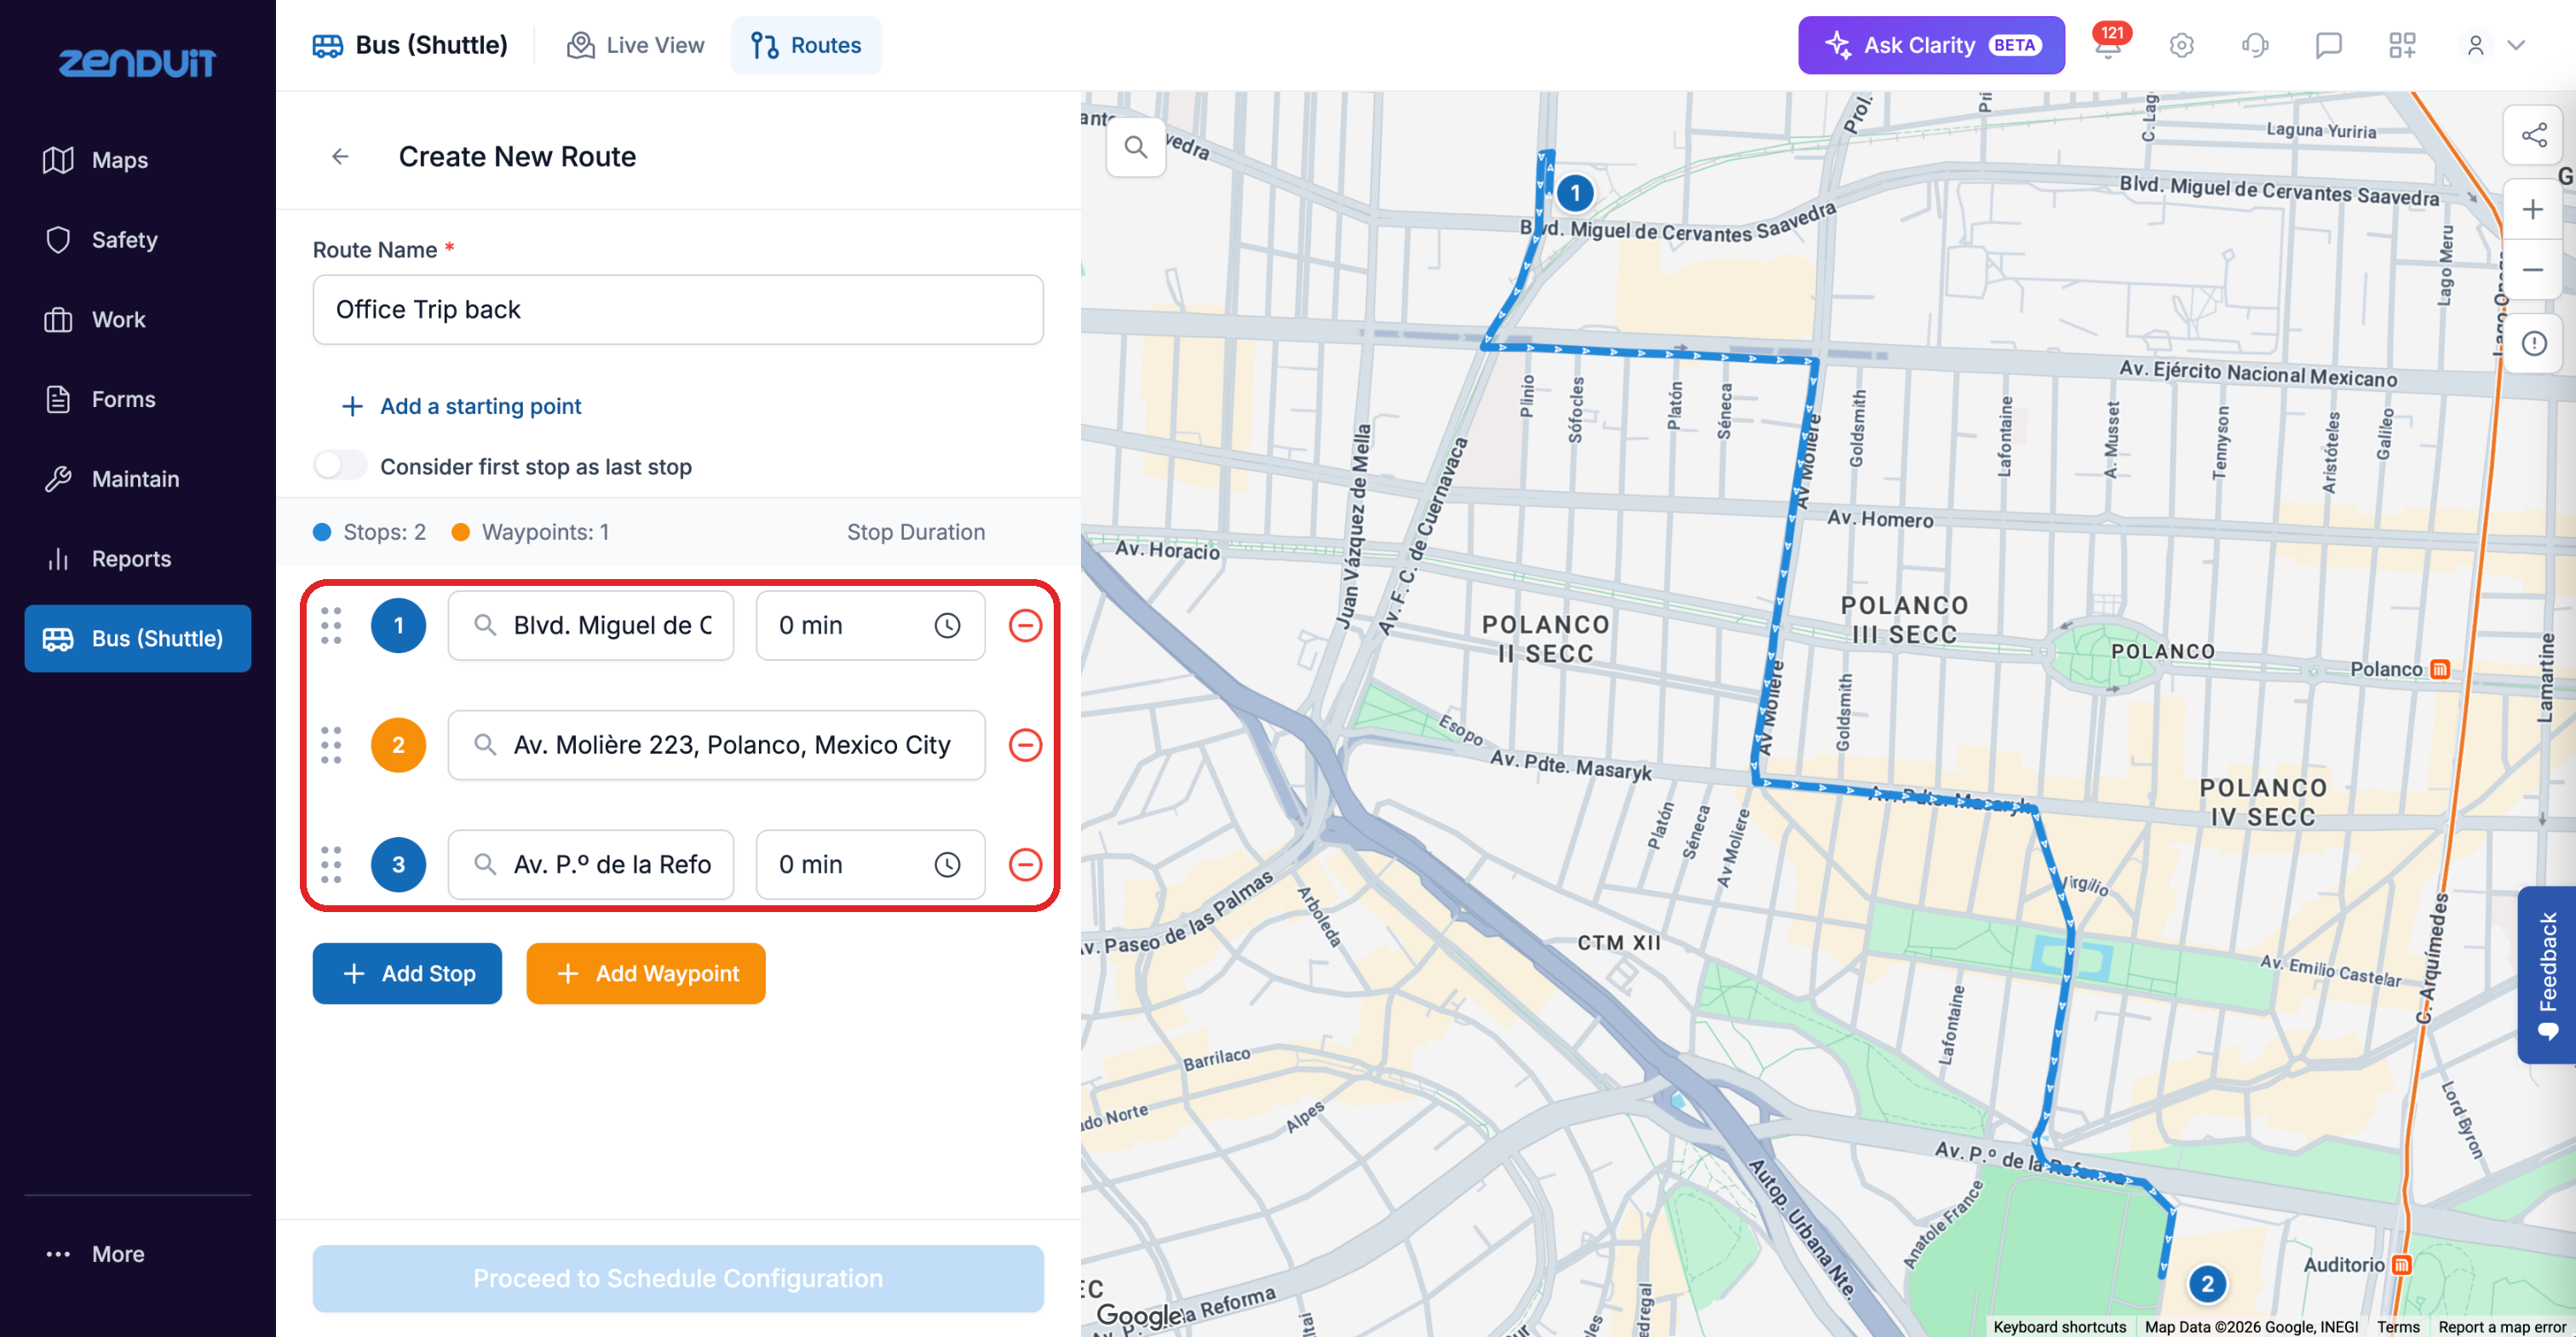
Stops (blue) have an address and a dwell time. Waypoints (orange) are placed on the map and have no dwell time.
Save a new stop location
When you add a stop at an address that isn't saved as a location yet, the Add Stop Location window opens.
Enter a Name for the location.
Choose a Location Type, for example Collection Site, Customer, Depot / Yard, Home, Maintenance Shop or Office.
Check the Address.
Click Save.
The location is saved with a 250 m geofence around it, the only detail filled in automatically, so you can reuse it in other routes. To see or change its details, go to Maps > Locations in the main menu. You can add more details to the location there if you want.
The Locations list shows each location's Name, Address, Location Type, Groups, Linked Account, Primary Contact, Contact Name and Current Inventory. Click the arrows next to Name, Address, Location Type, Contact Name or Current Inventory to sort by that column.
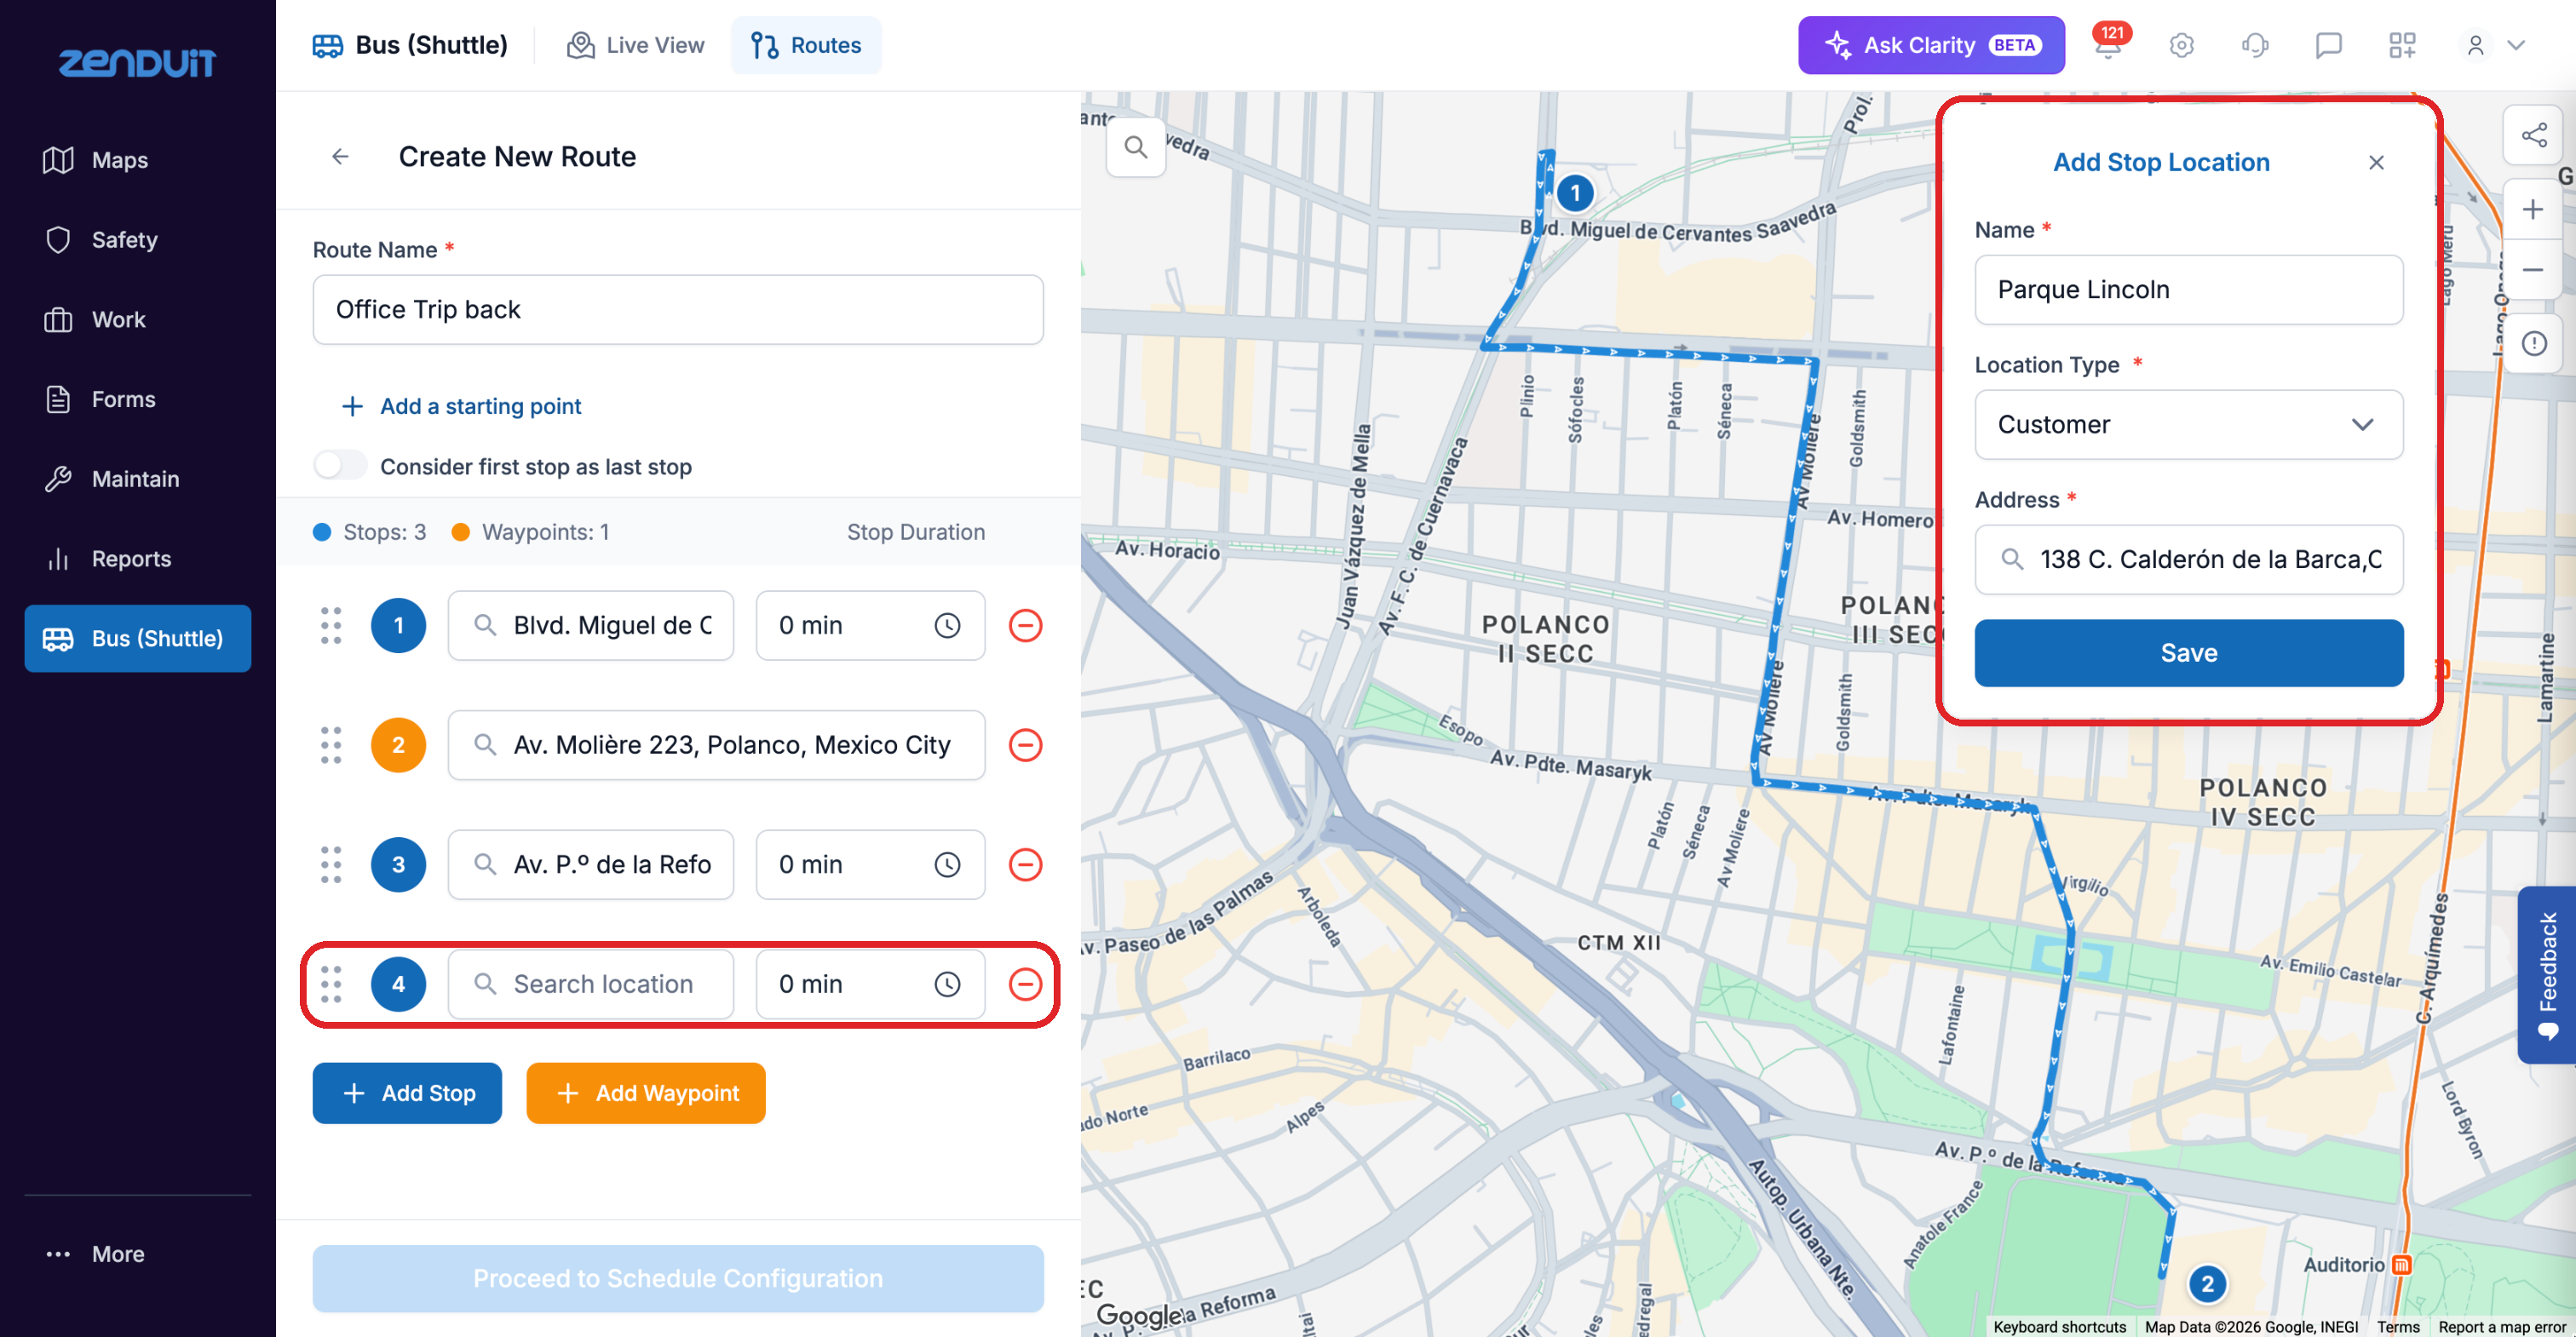
Add Stop Location: name the location, choose its type and confirm the address.
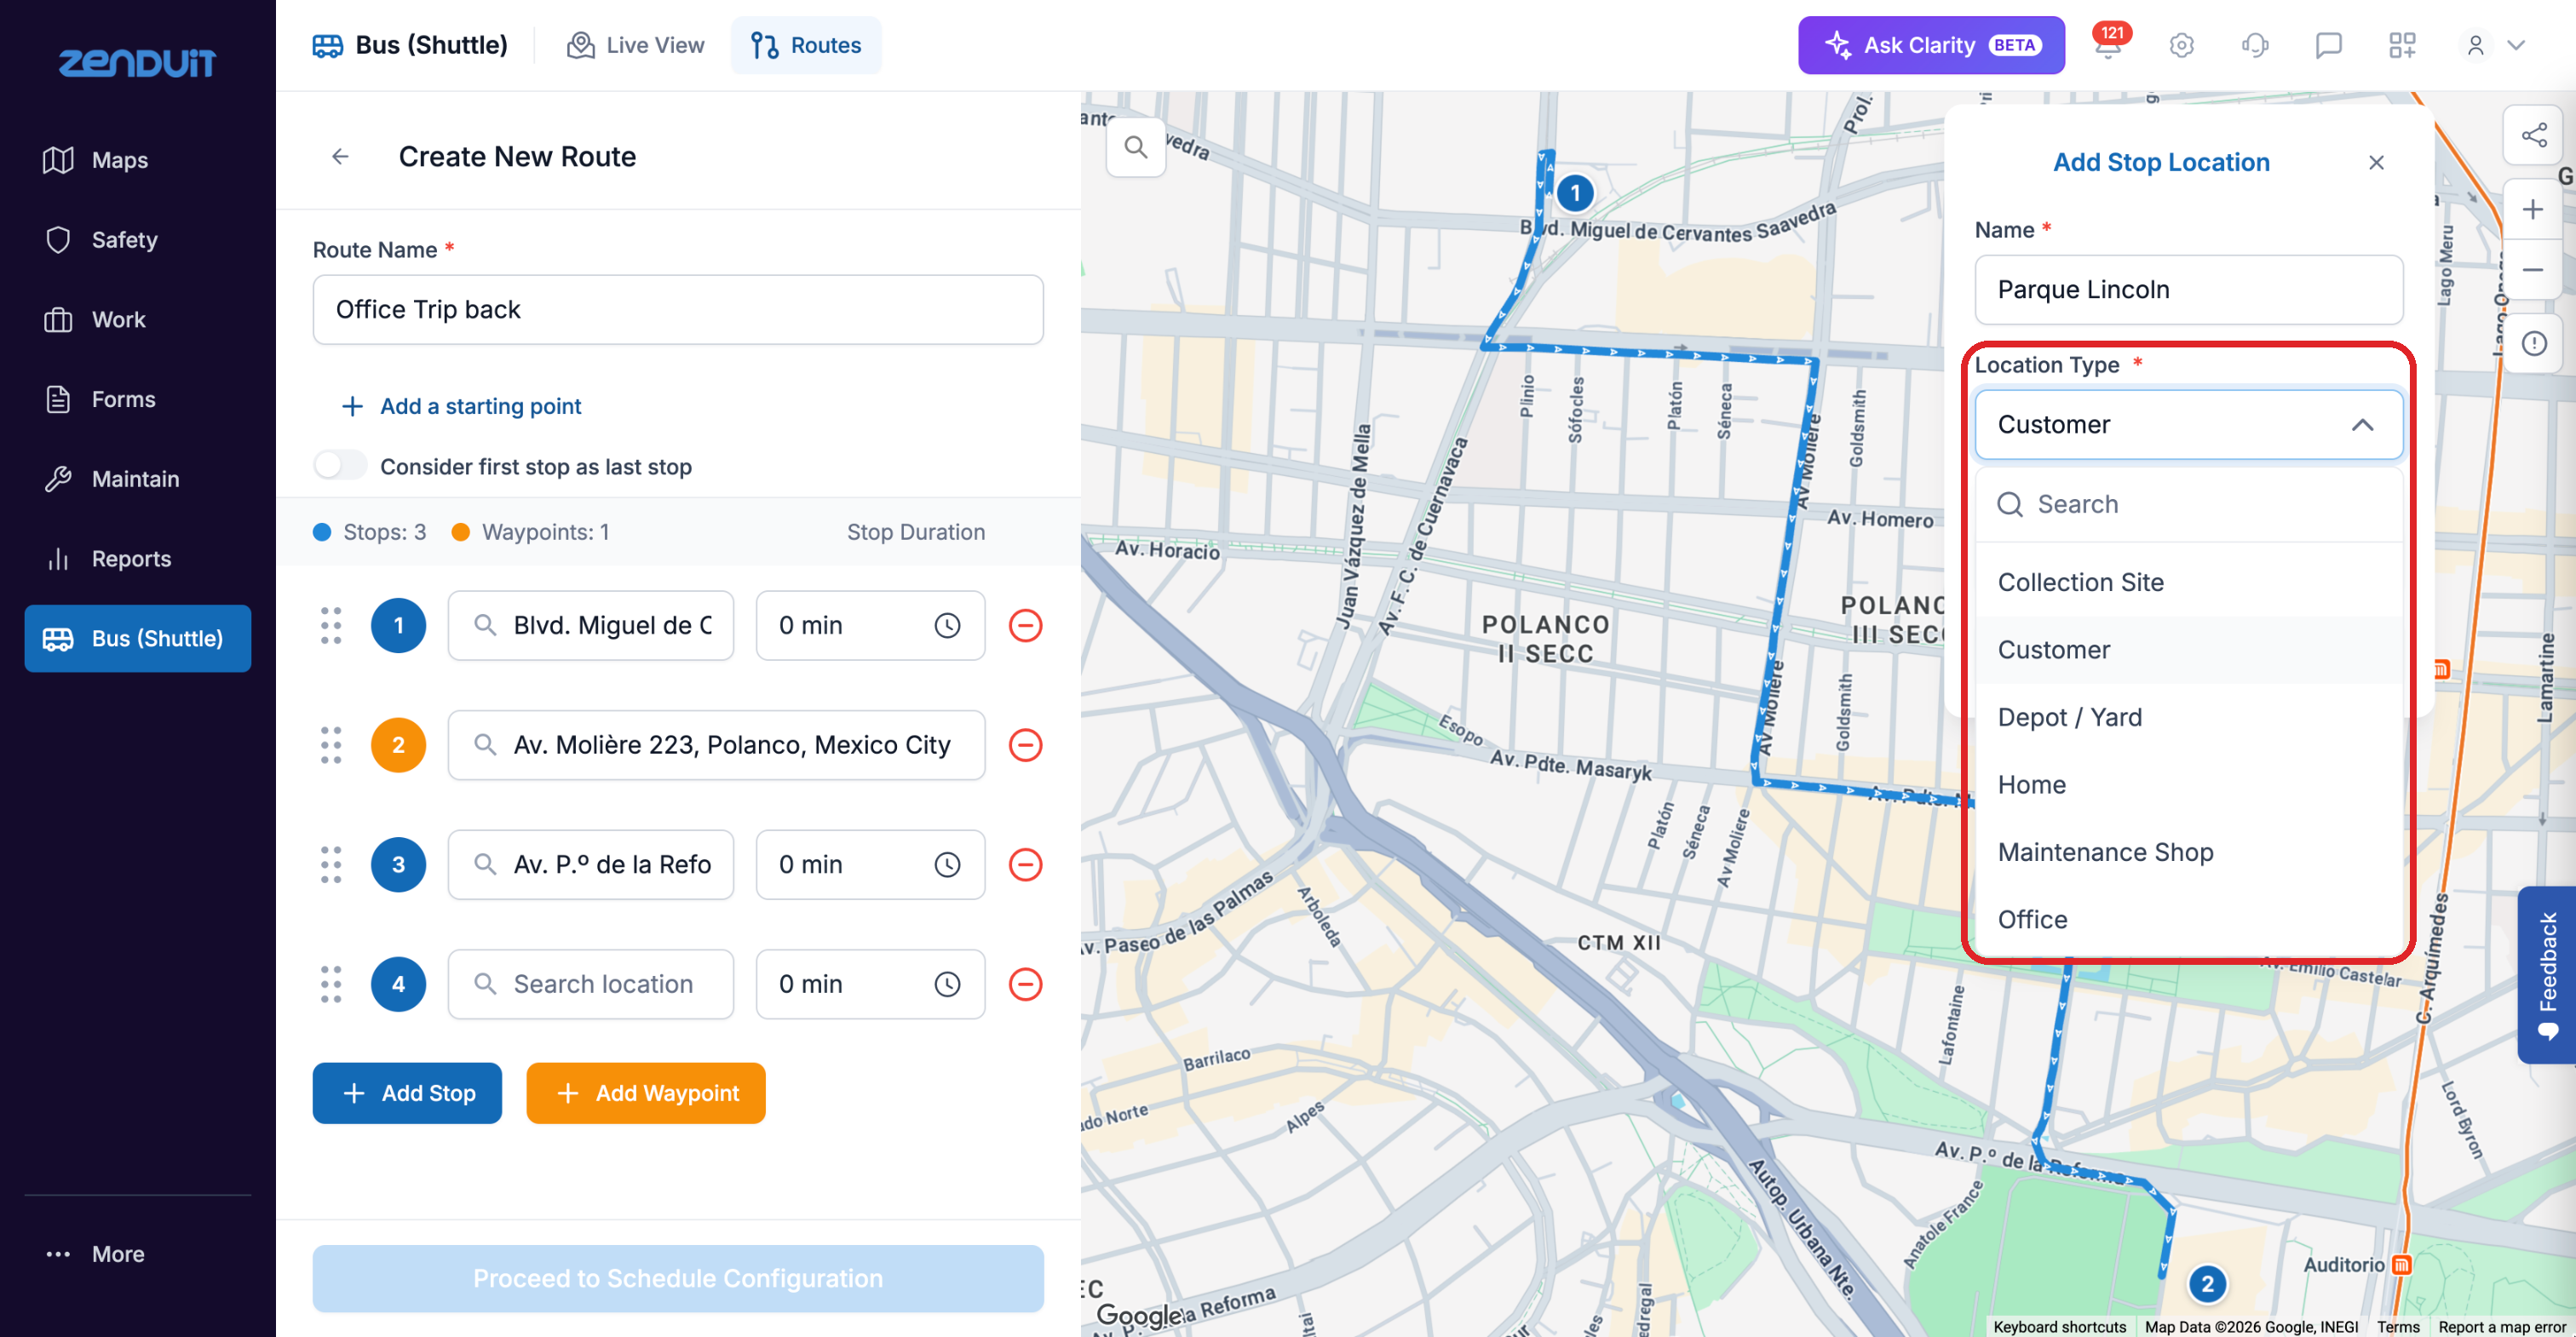
Location Type options.
Next steps
Schedule the route and assign vehicles.
Open the route in the Route Library to see its details.
Tips
Already have routes in Google Earth? Import them from a KMZ file instead of recreating them.
Saved locations can be reused as stops in other routes, so you don't have to enter the address again.
Was this helpful?
Still need help? Ask the team