Schedule a route and assign vehicles
A schedule tells ZenShuttle when a route runs: operating days, departure times, and a vehicle for each departure.
Written By Vishal Singh
A schedule tells ZenShuttle when a route runs: set the operating days and departure times, and assign a vehicle to each departure so trips are generated automatically.
Steps
After you create the route, click Proceed to Schedule Configuration. The Schedule & Service step opens.
Under Weekly Schedule, turn on each day the route runs. Days left off show No service.
For each day, set the departure time and choose a vehicle in Assign vehicle.
To add another departure on the same day, click the three dots next to the day, then Add departure.
To use the same schedule on other days, click the three dots next to the day, then Copy to days… and choose the days.
Under Ends, choose when the schedule ends: Never to keep it running, On to end it on a specific date, or After to end it after a set number of occurrences.
Click Save schedule.
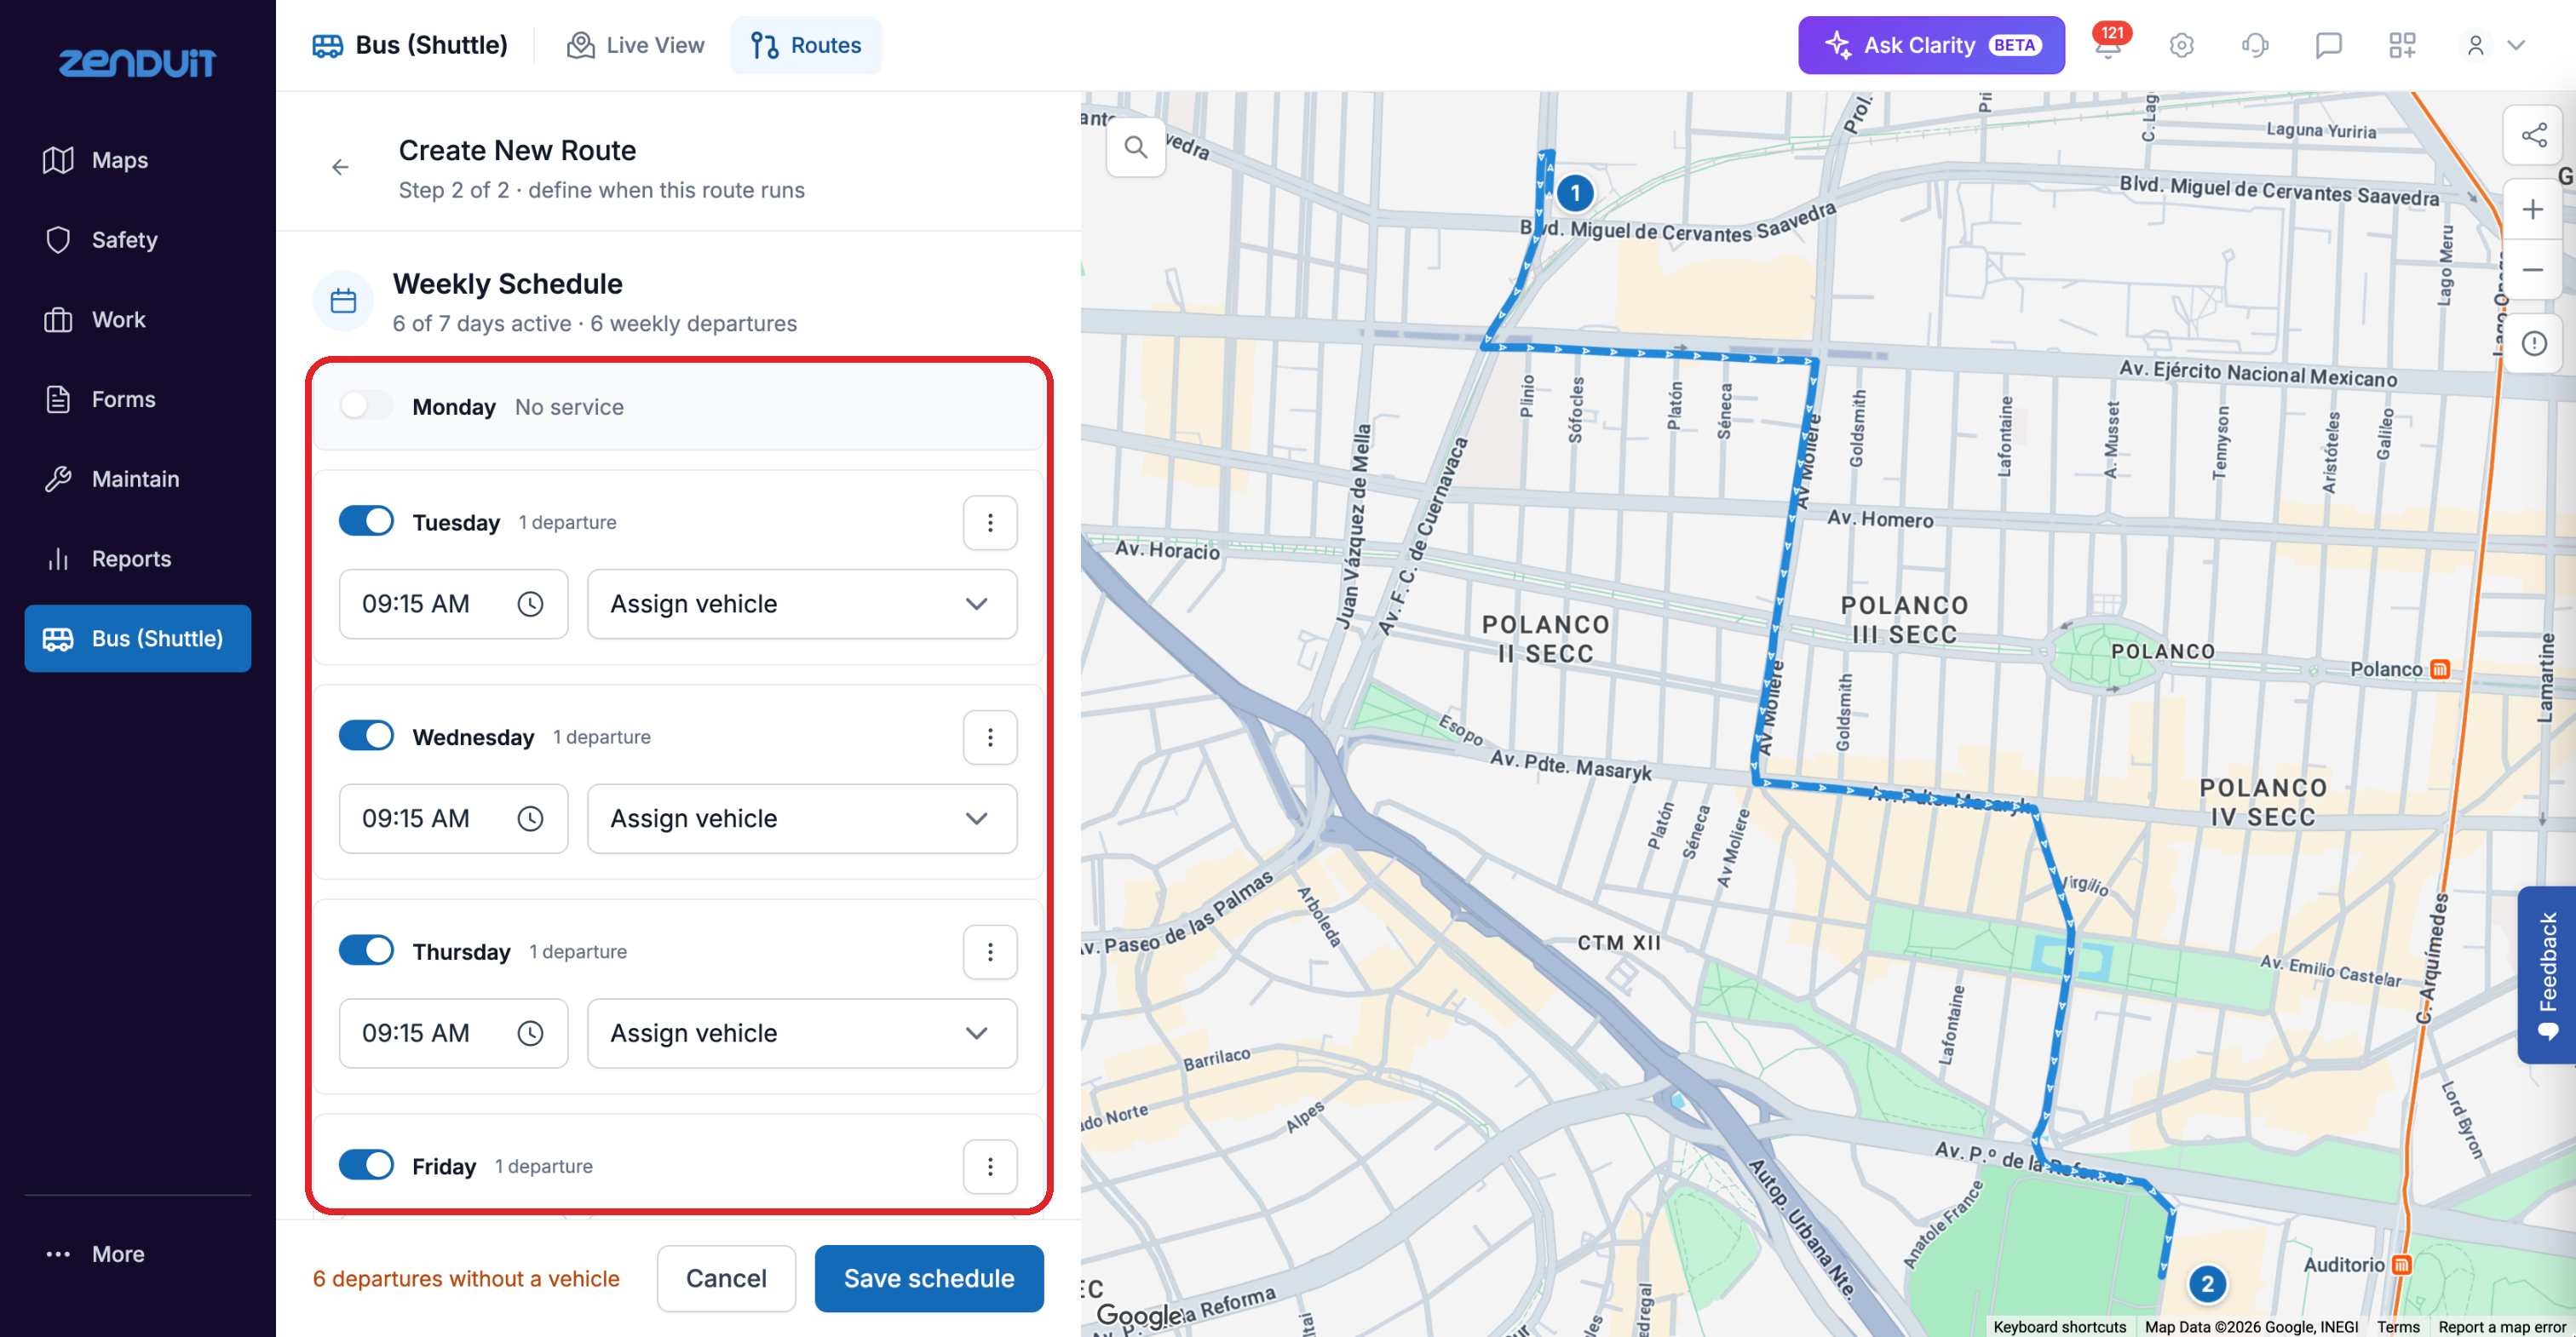
Schedule & Service: turn days on, then set each departure time and vehicle.
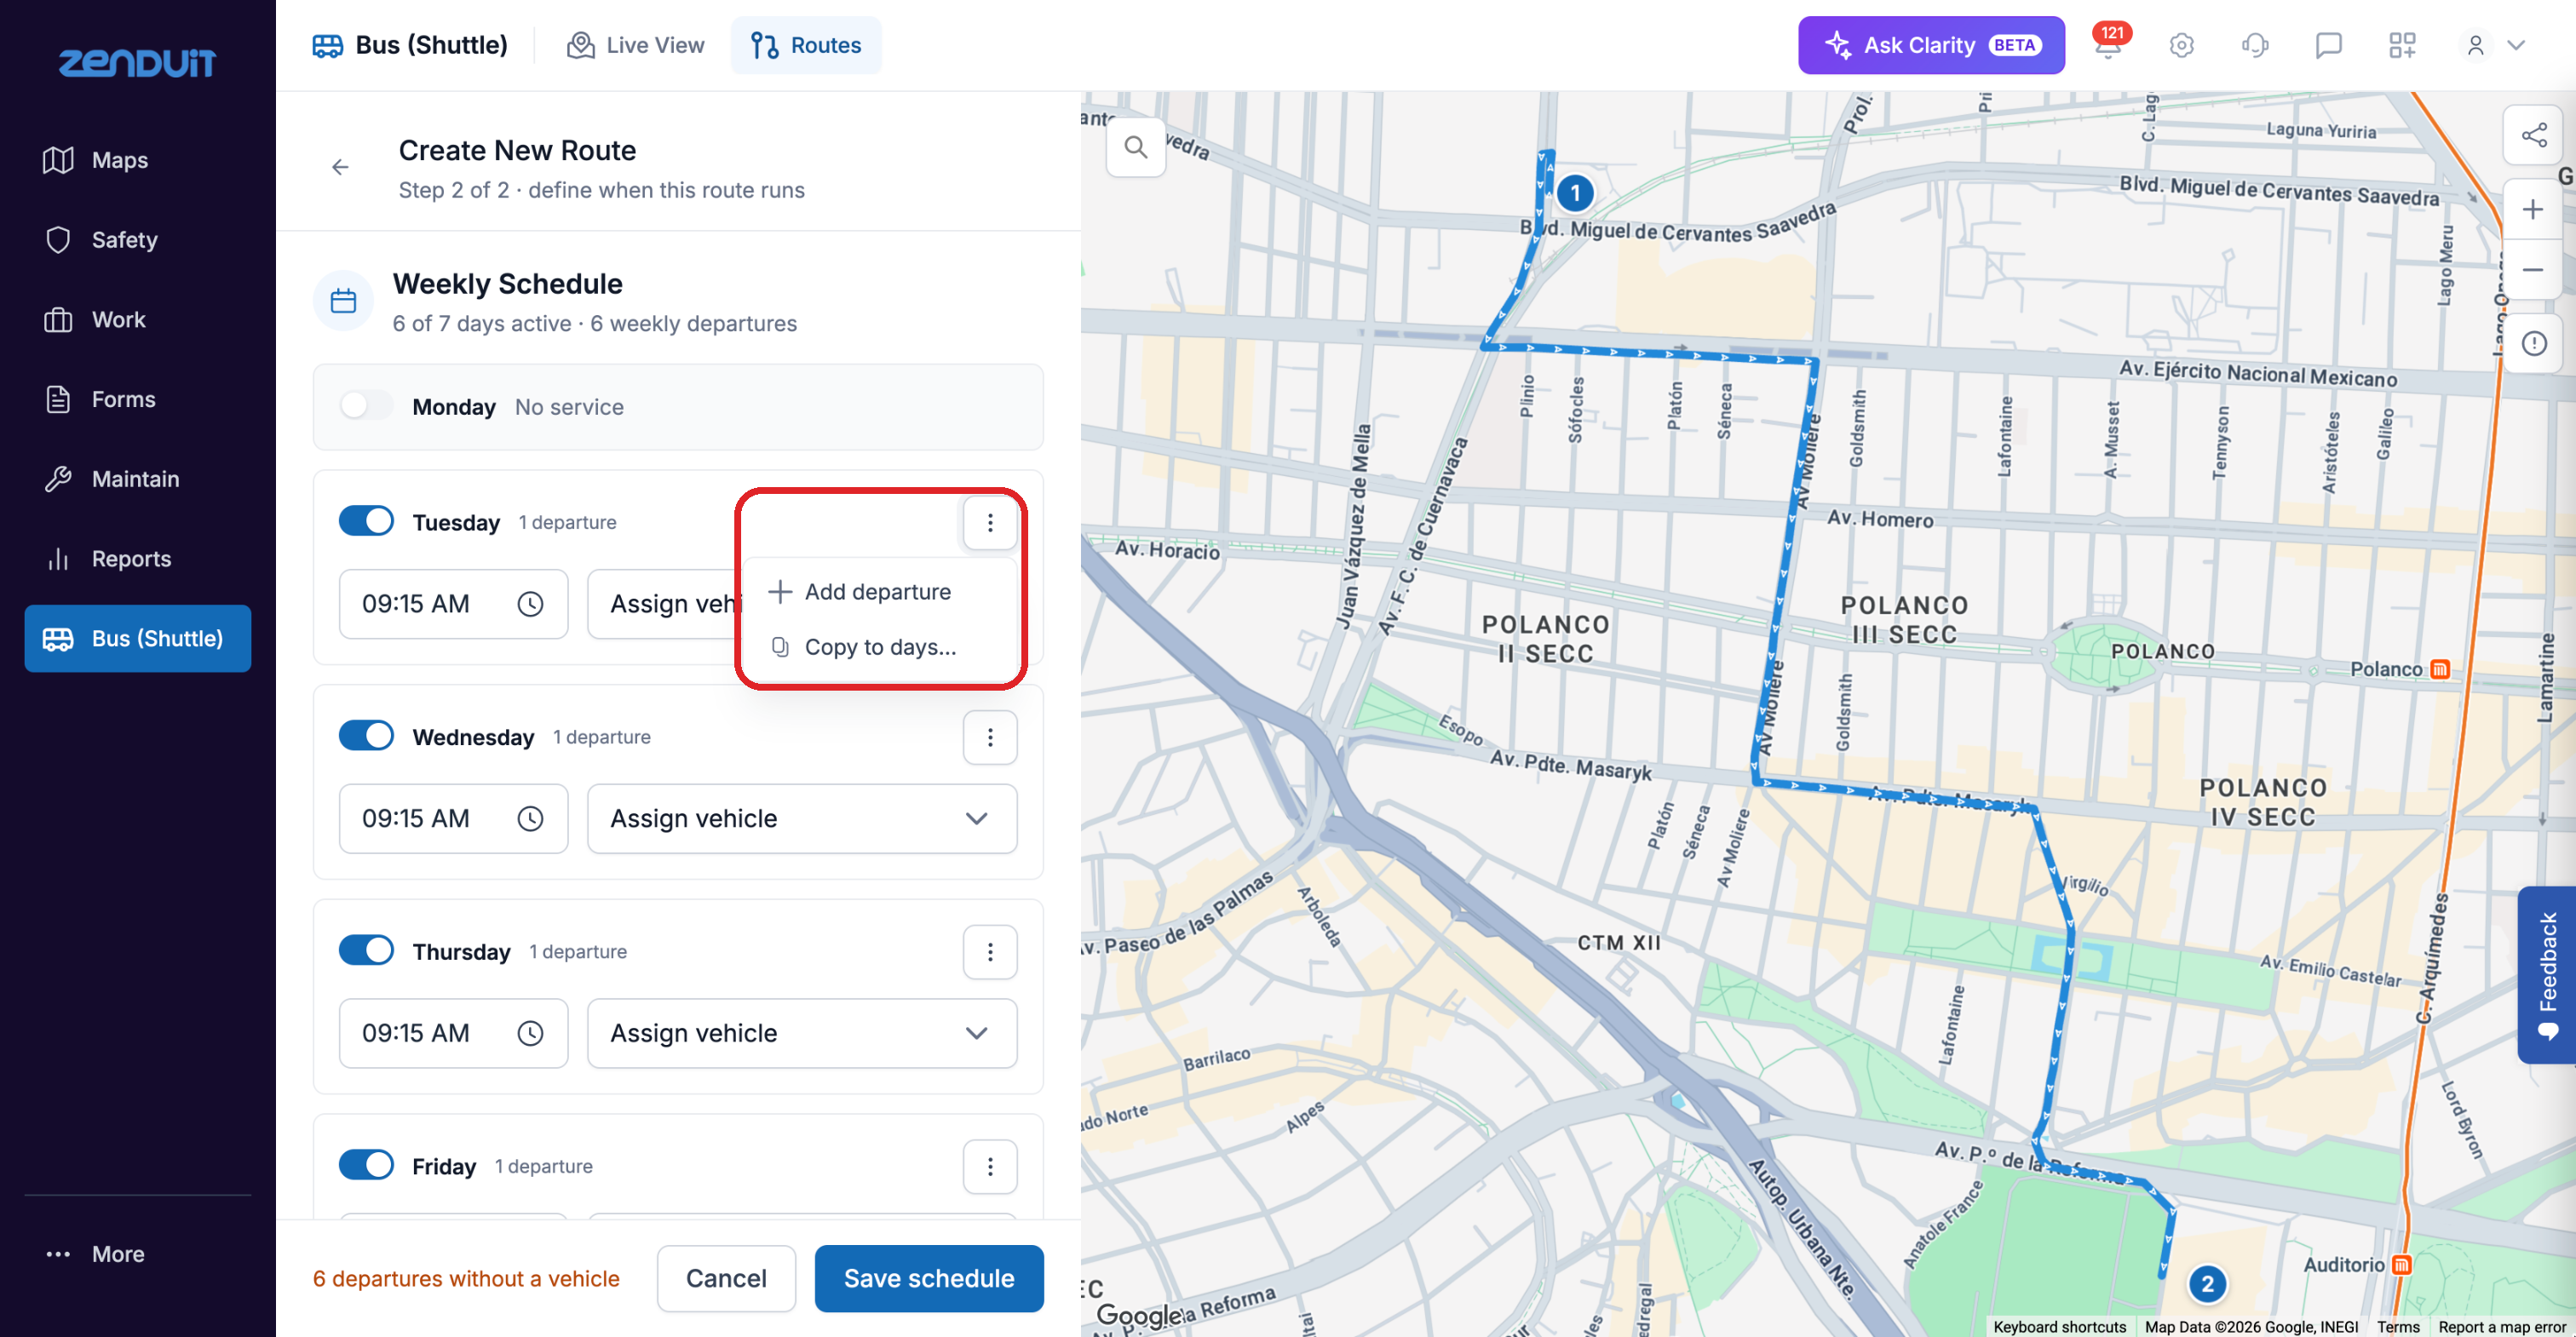
The day menu: Add departure, or Copy to days to reuse a day's schedule.
Good to know
Each scheduled departure becomes a trip that appears in Live View when it runs.
Schedule changes apply to future trips.
The bottom of the page shows how many departures still have no vehicle.
Assign one vehicle to each departure. A vehicle can't be assigned to two departures at the same time.
You assign vehicles, not drivers. The driver gets the route in the Driver App because they are assigned to that vehicle in Settings. See Show a route in the Driver App.
Was this helpful?
Still need help? Ask the team