Access ZenShuttle in ZenduONE
ZenShuttle is a native module inside ZenduONE, so there is nothing to install.
Written By Vishal Singh
ZenShuttle is a native module inside ZenduONE, so there is nothing to install: once it is enabled for your company, you open it from the App Center and can pin it to the side menu.
Before you start
Your company has a ZenShuttle plan (Standard or Enterprise).
ZenShuttle is enabled for your company. A company runs either the shuttle or the school bus service, set at company level.
Your vehicles have a supported tracking device and appear in ZenduONE.
Your user has access to the ZenShuttle module.
Enable ZenShuttle for a company
ZenShuttle is turned on in ONEADMIN, which only Zenduit staff and resellers can access. If you're a customer, ask your Zenduit representative or reseller to do this for you.
Sign in to ONEADMIN.
Click Customers, then click the customer's row.
On the Overview tab, click Edit.
Under Account Settings > Preferences, turn on Enable Shuttle Service. This setting chooses between Shuttle Service and ZenBus.
Click Save Changes.
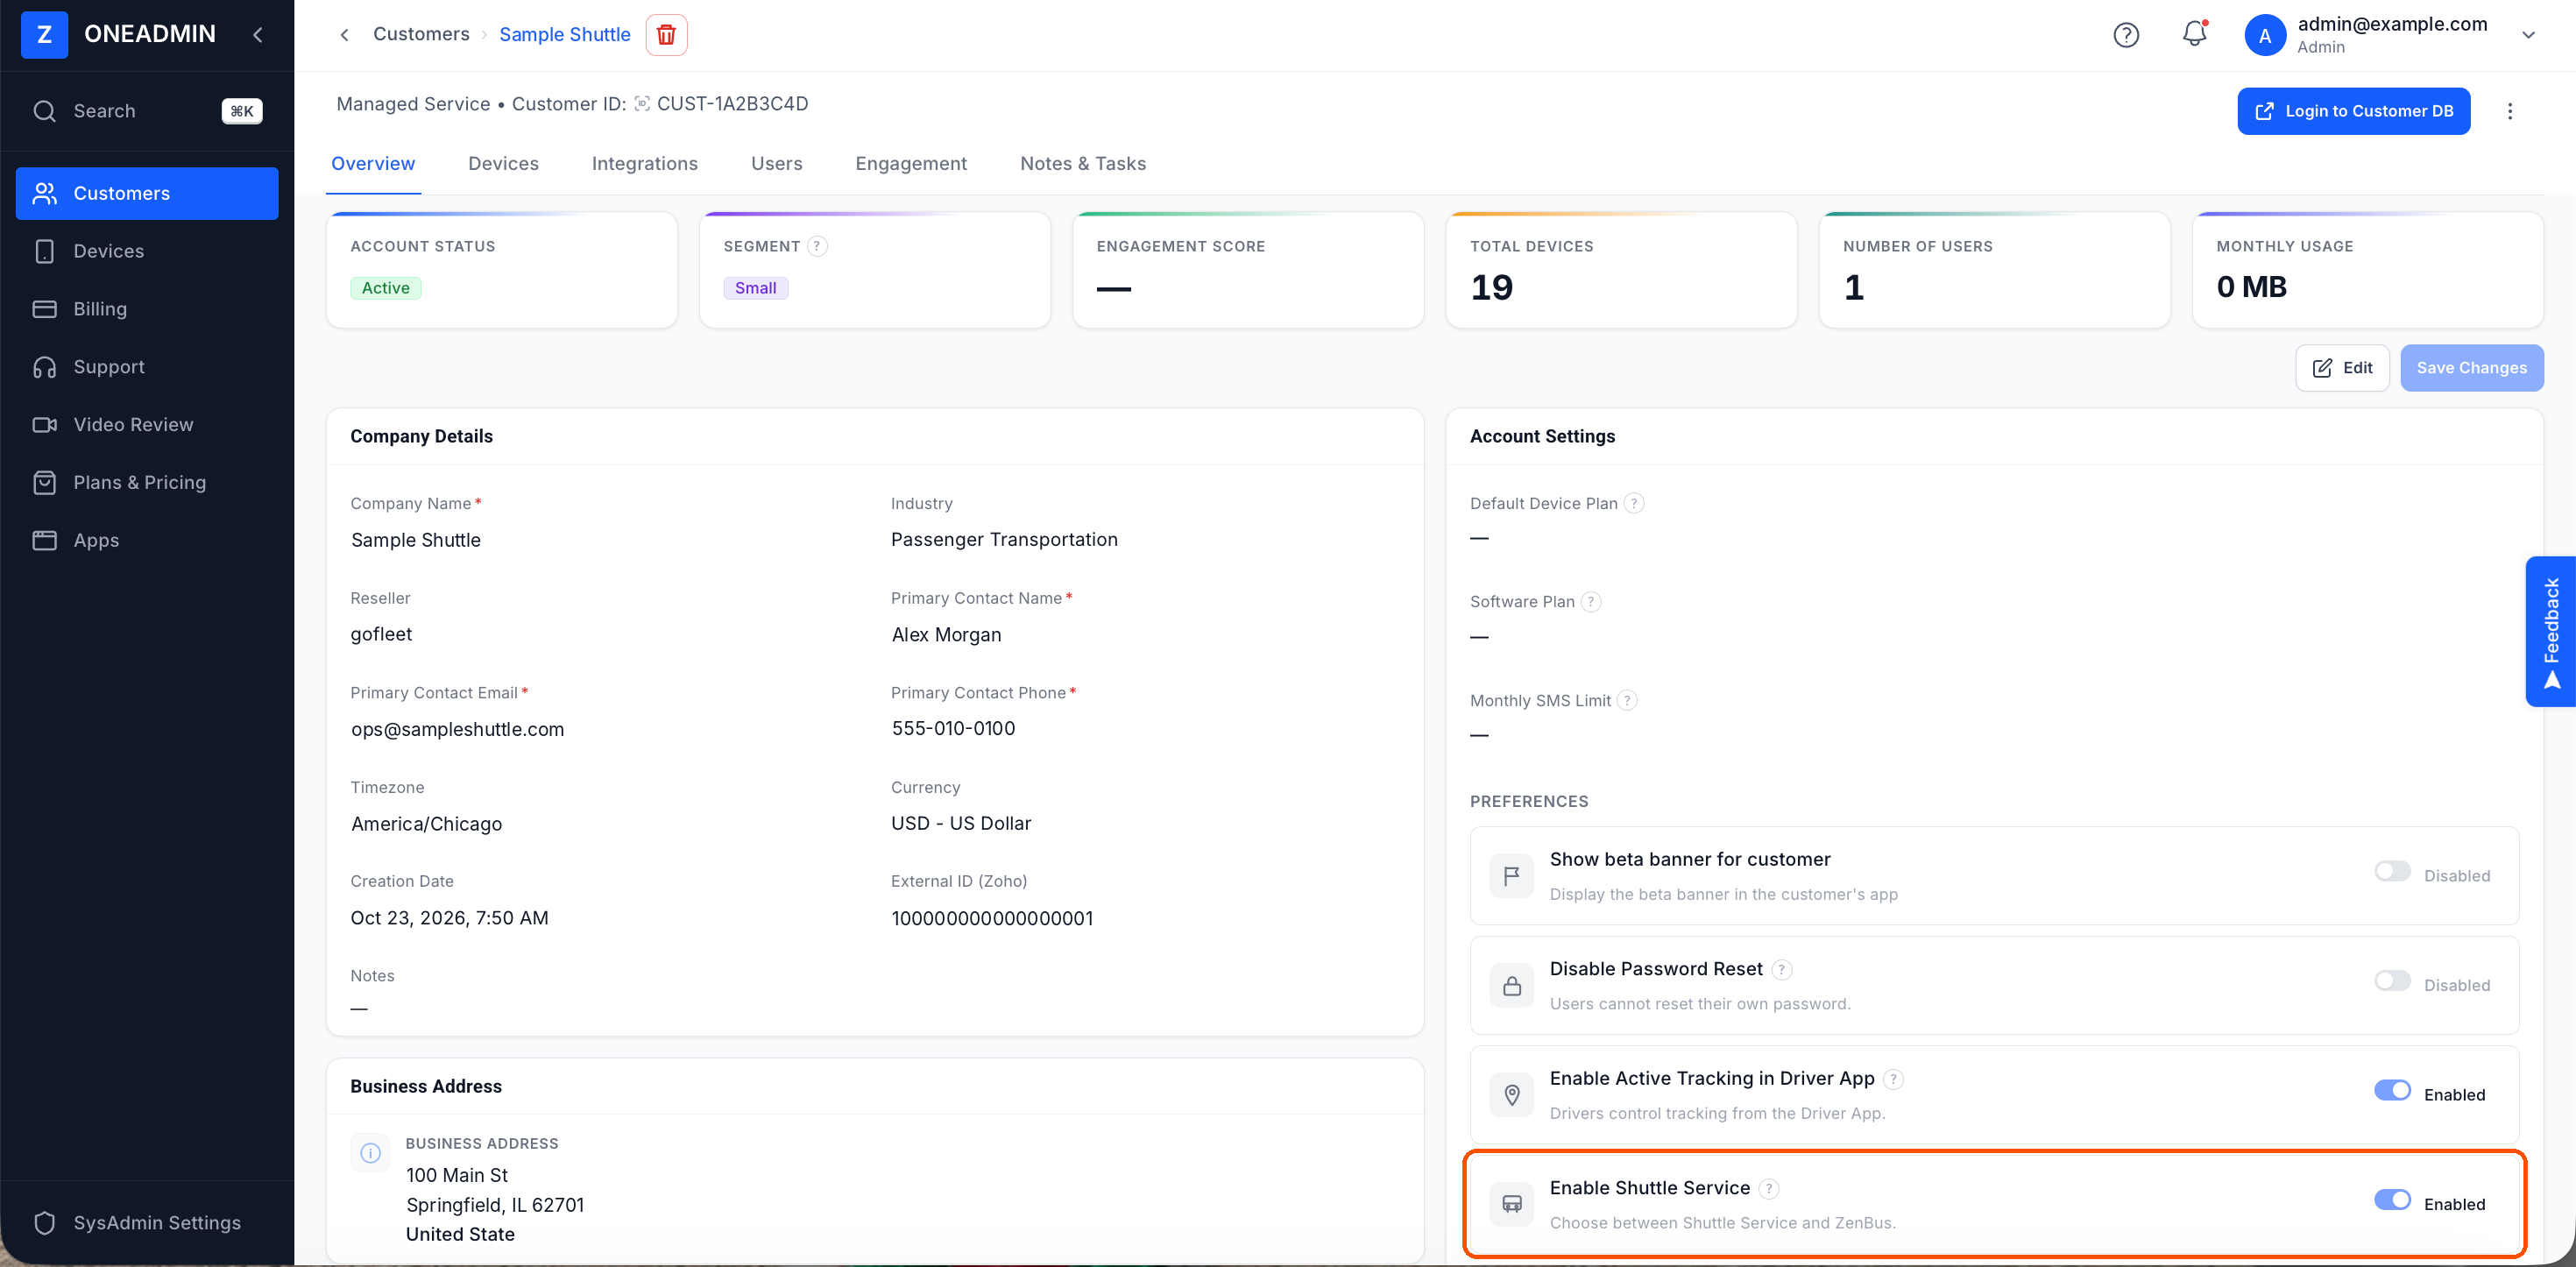
ONEADMIN > Customers > customer Overview. Enable Shuttle Service is highlighted.
Open ZenShuttle
Sign in to ZenduONE.
Select the Apps icon in the top-right corner to open the App Center.
In My Apps, find Bus (Shuttle). You can type its name in Search apps.
Select Open.
To keep it one click away, select the pin icon next to Open. Bus (Shuttle) then appears in the left-hand menu.
Choose a section: Live View to monitor active vehicles, or Routes to create, import, schedule and review routes.
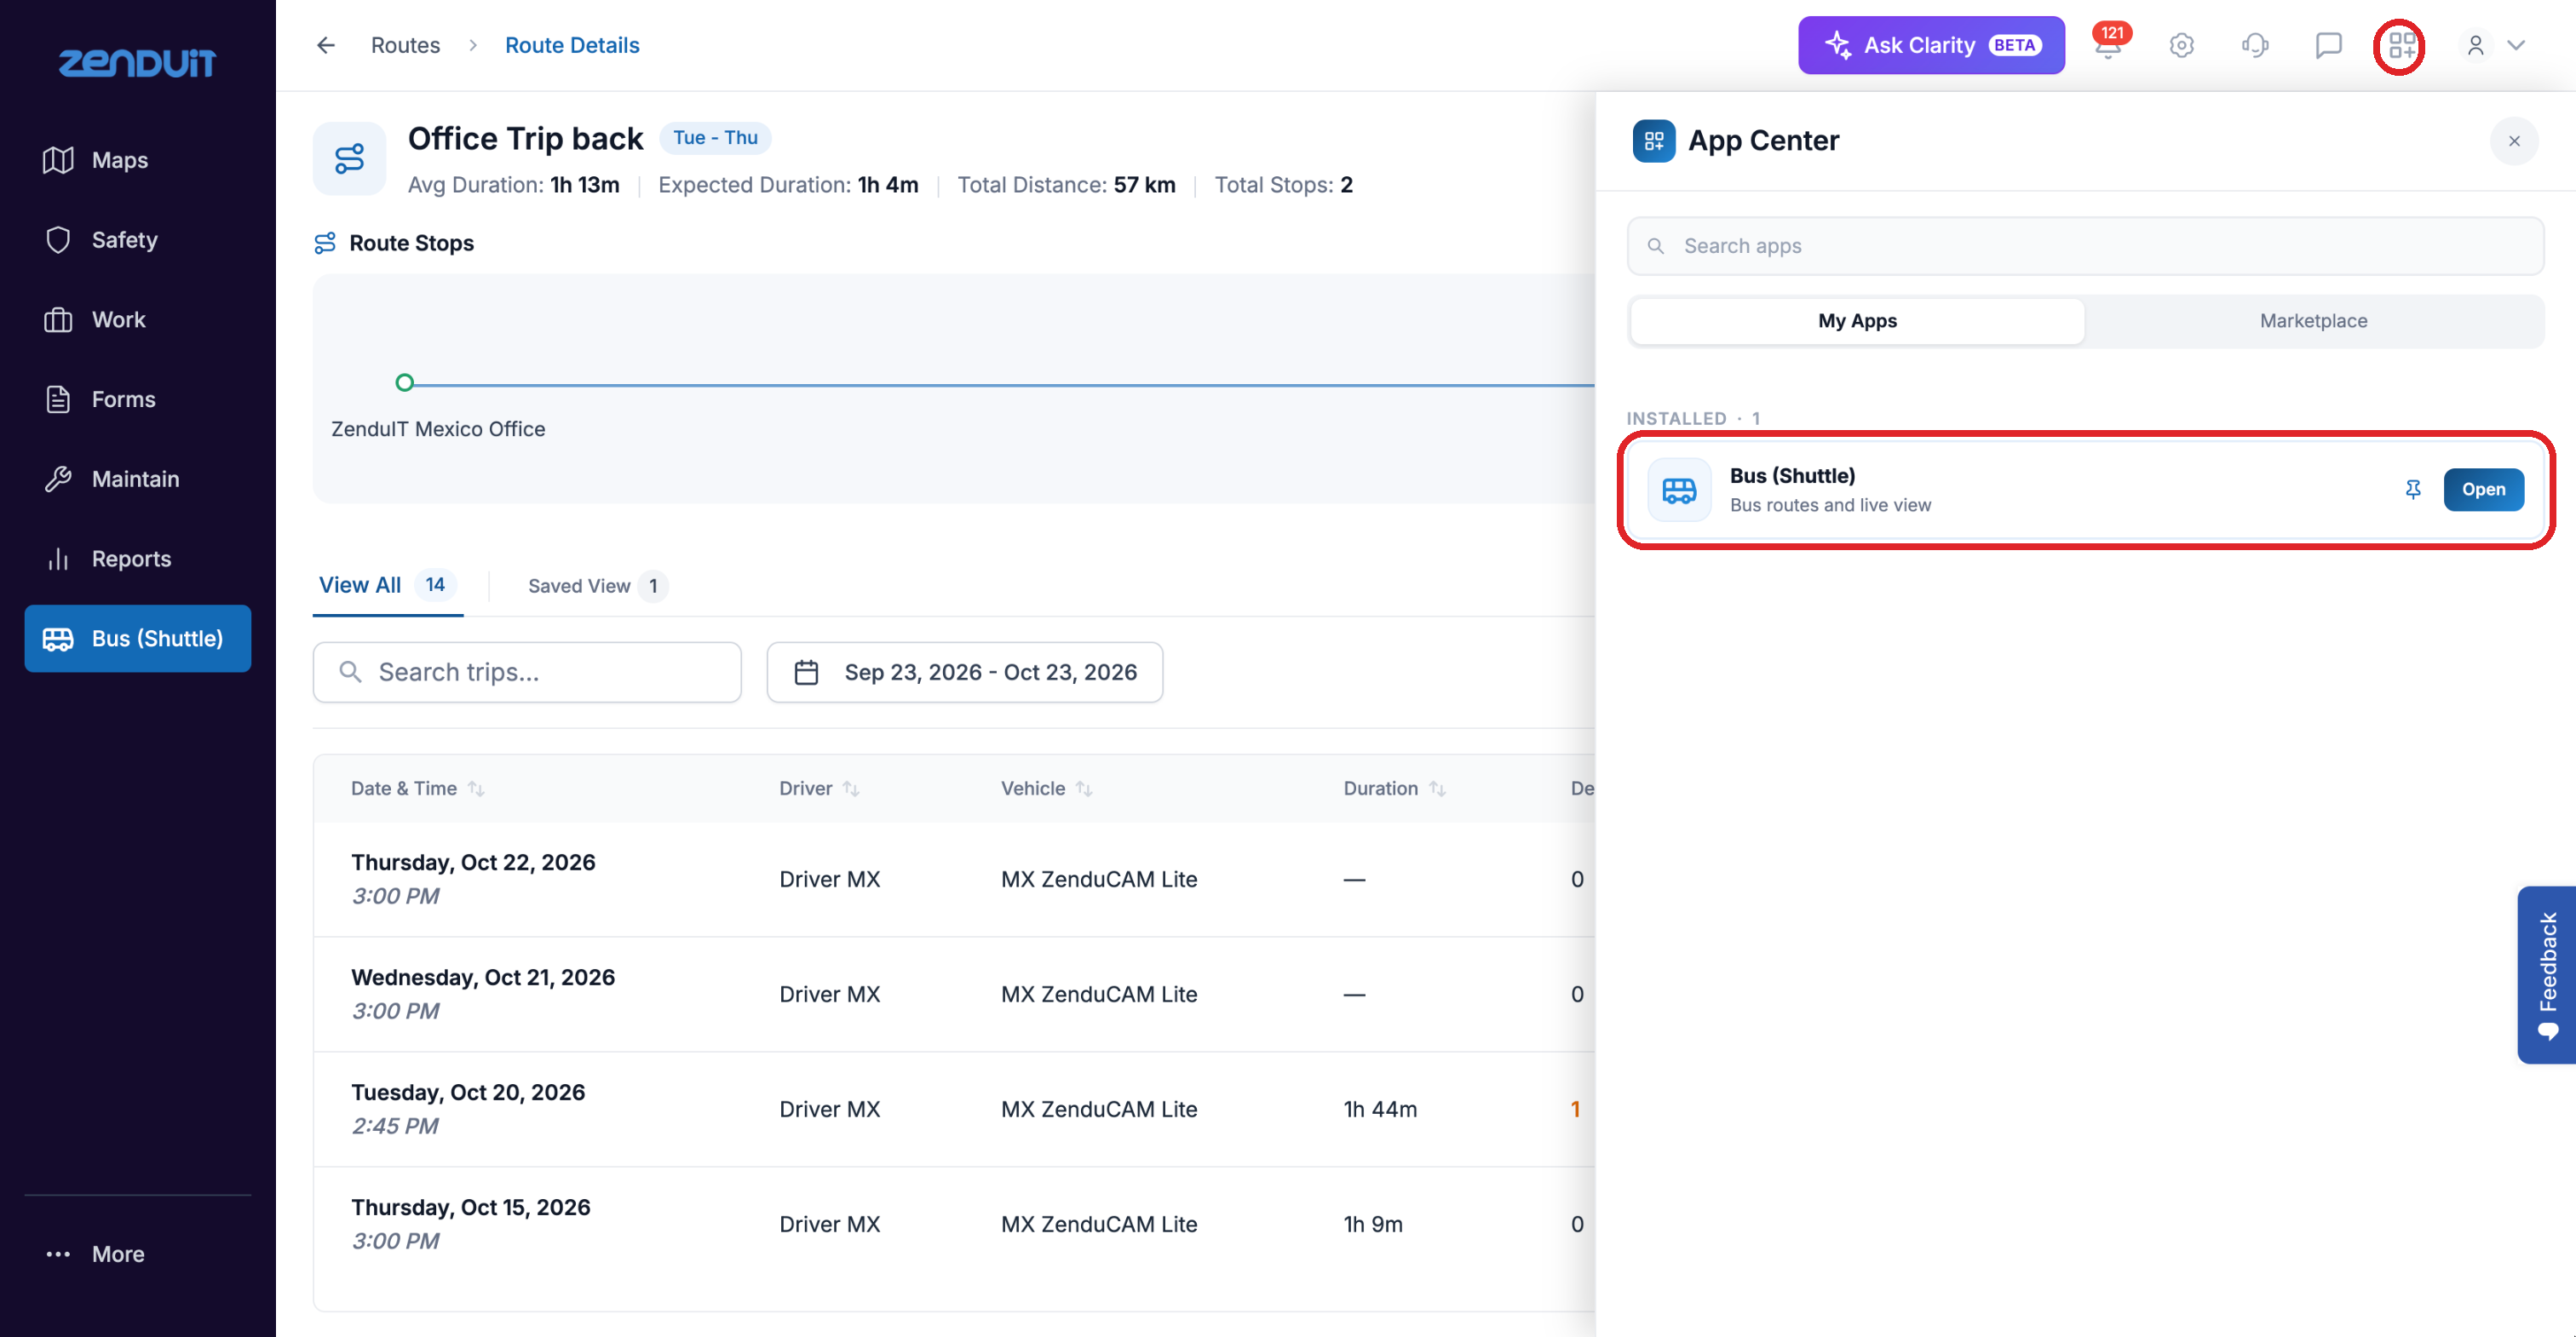
App Center > My Apps. Click Open on Bus (Shuttle); the pin icon adds it to the left menu.
Next steps
Create your first route, or import existing routes from a KMZ file.
Schedule the route and assign a vehicle to each departure.
Share Live View so passengers can track the shuttle.
Was this helpful?
Still need help? Ask the team