ZenANCHOR and ZenANCHOR+ Setup and Configuration
written by Nathan T., last updates Aug 1, 2025
Written By Support Team
Introduction
Welcome to the guide on ZenAnchor and ZenAnchor+! The ZenAnchor and ZenAnchor+ act as a gateway to collect beacon data from ZenBEACONS and transmit the data back to the ZenduONE platform. This guide will teach you how to set up and configure your ZenAnchor and ZenAnchor+ Indoor Gateways. This will allow you to set them up so they are ready to be added to a database and used with the Zenduit Indoor Tracking Solution.
Configuring the Gateway
Access Gateway Settings
Ensure that the Indoor Gateway is plugged in. The gateway should begin to flash red quickly. Give it a minute until you see a slower periodic red flashing light.
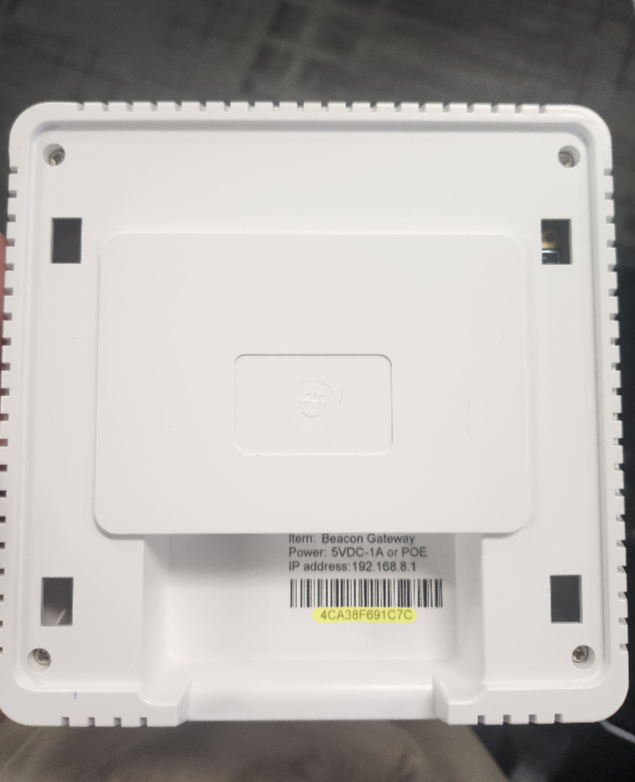
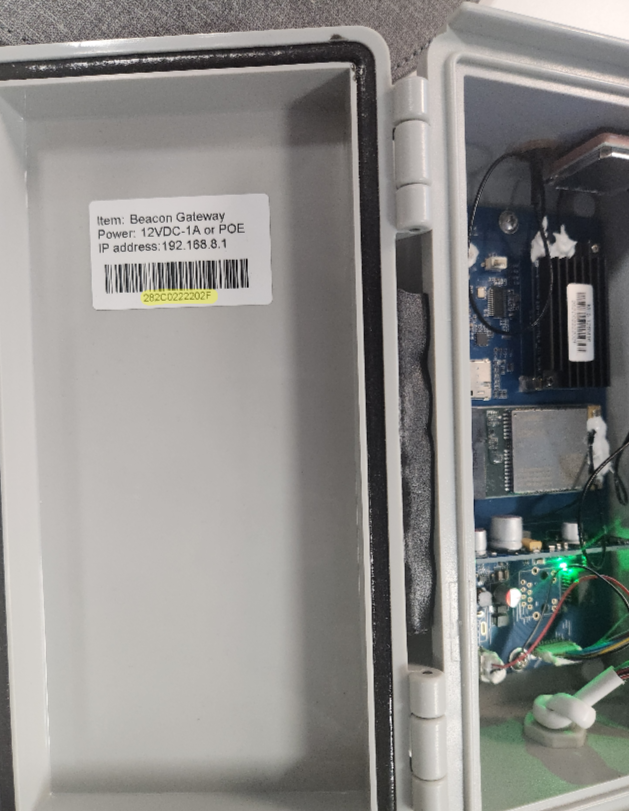
Then connect to the WiFi hotspot of the Indoor Gateway. Open your wifi settings on your device and connect to the wifi network ending in the serial number of the device, the password is 12345678. The serial number of the device can be found on the back of the device for the ZenAnchor or on the inside of the lid for the ZenAnchor+.
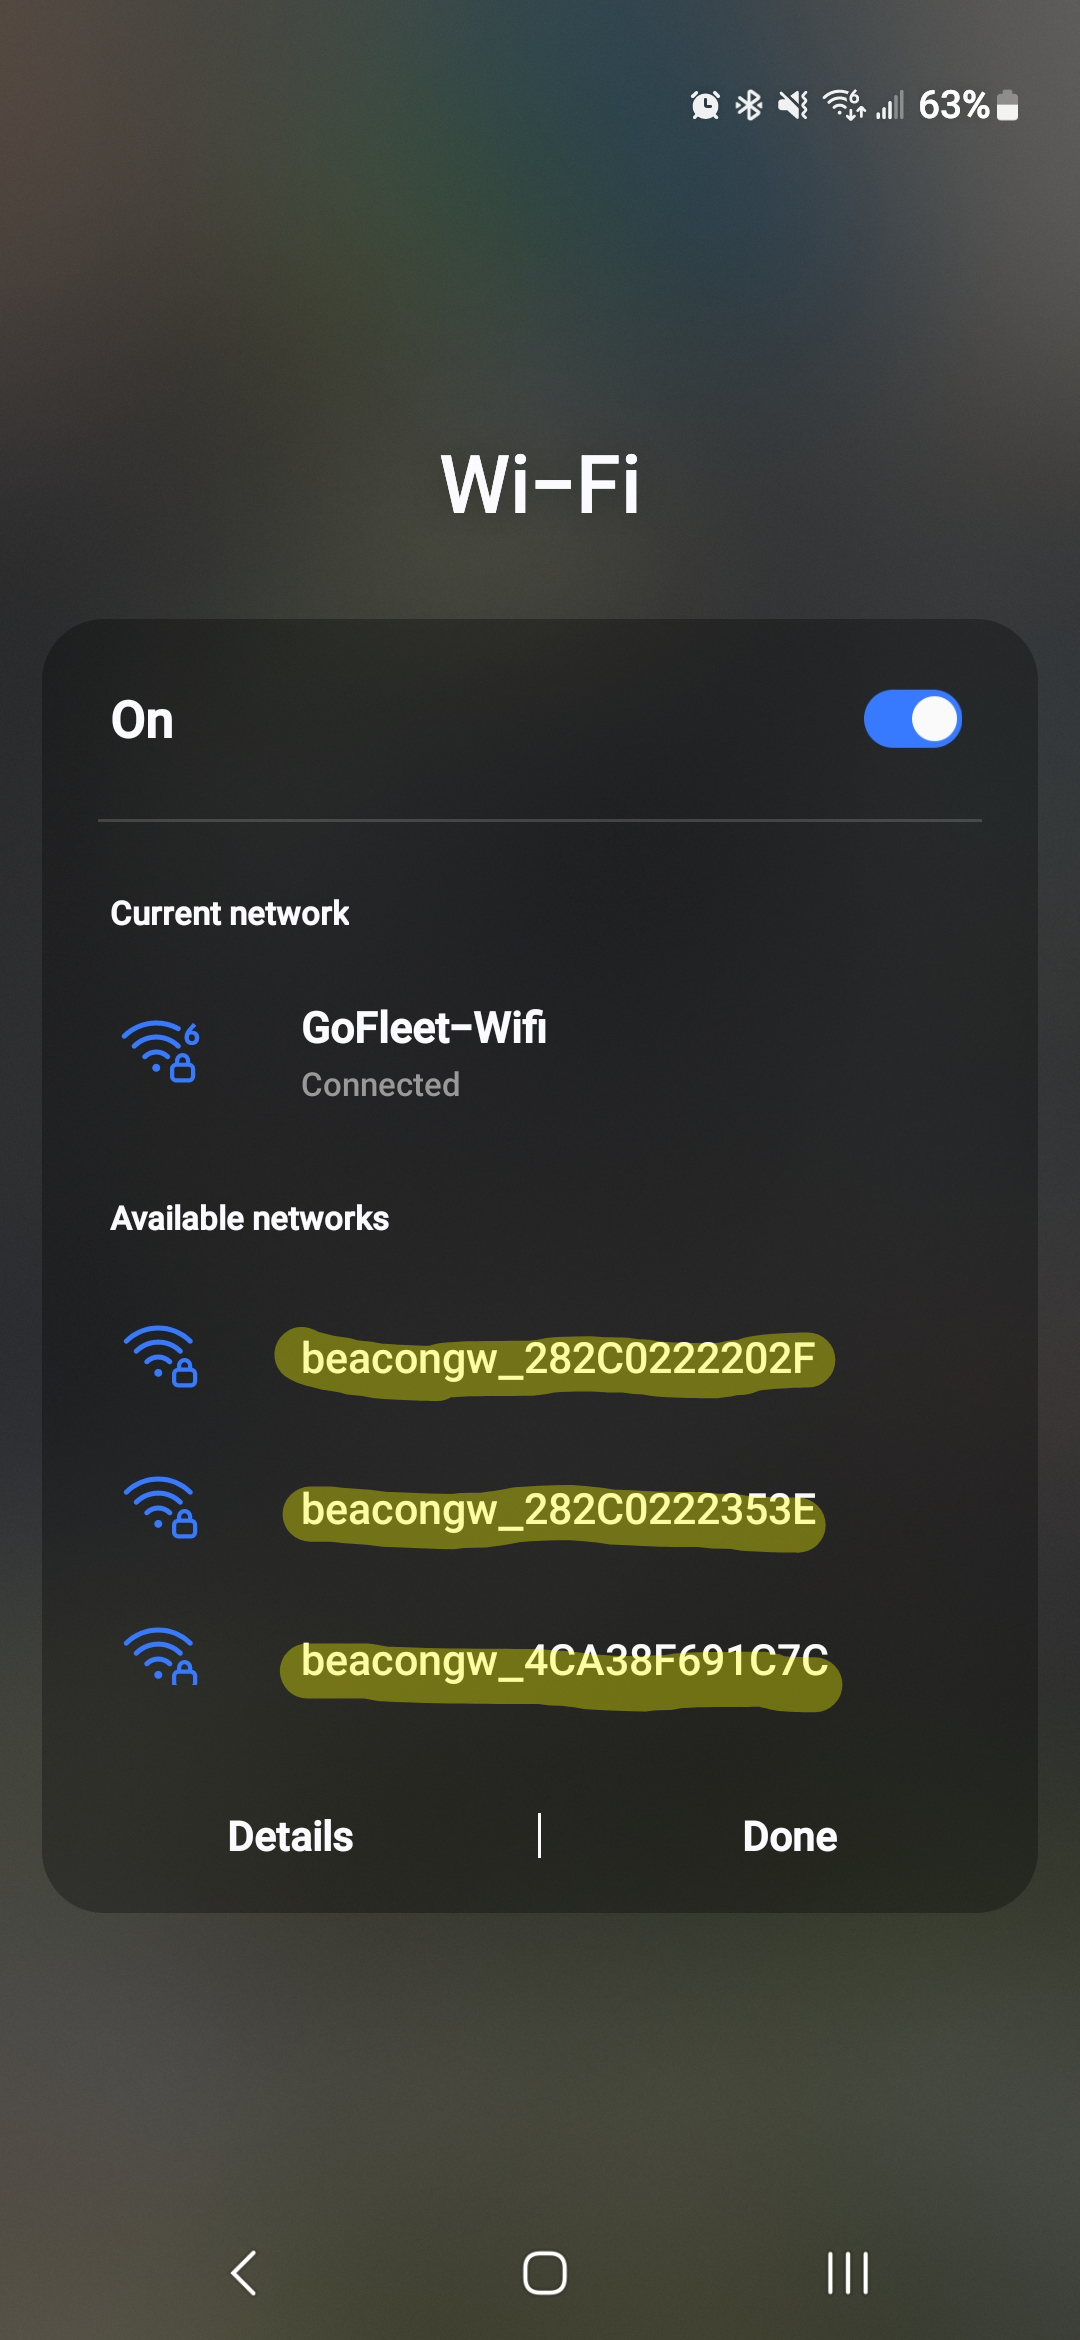
One connected, go to your web browser and go to 192.168.8.1 and log in with username: admin and password: admin
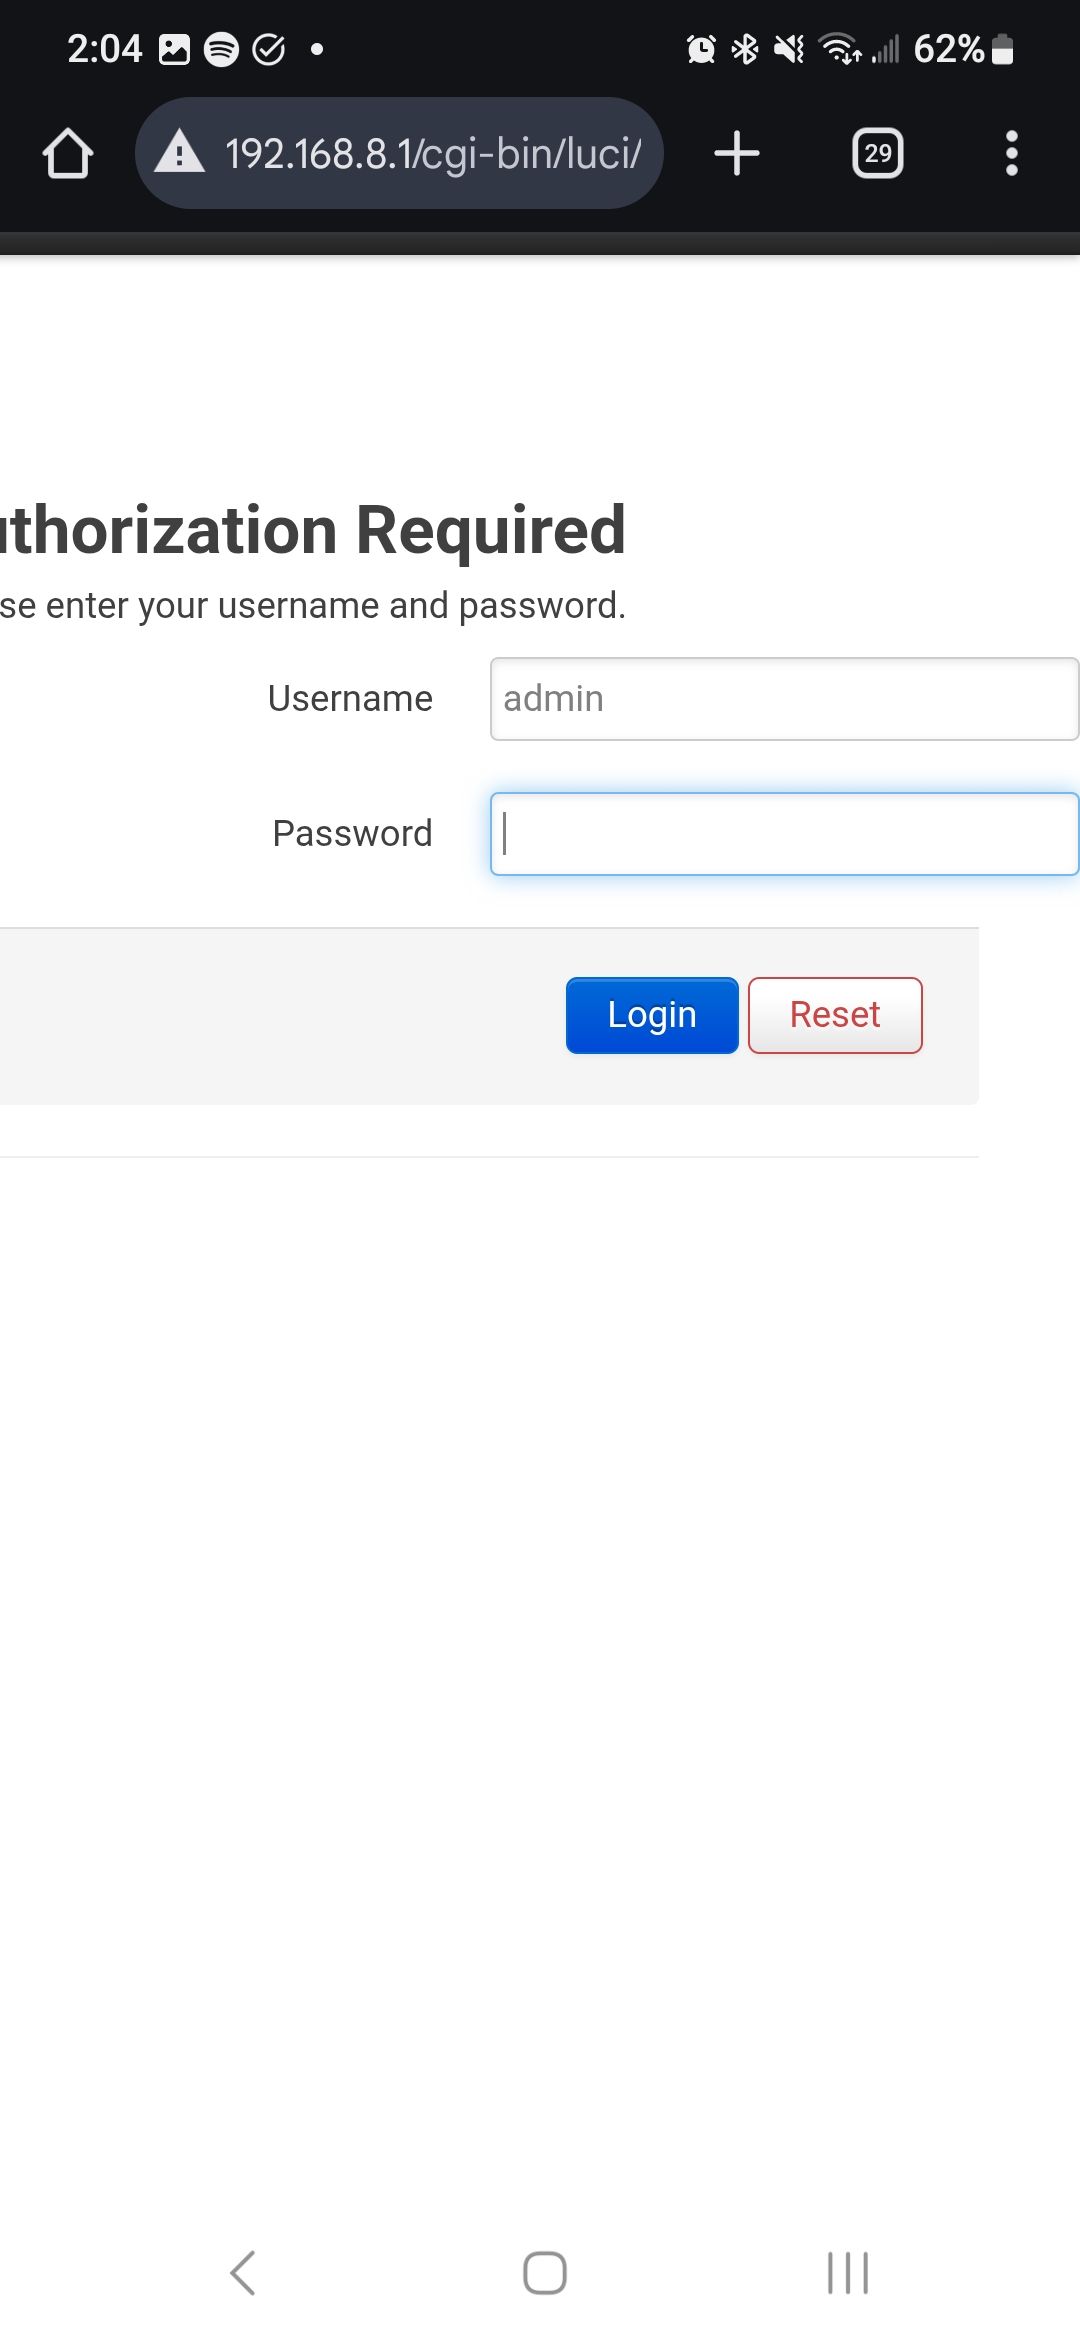
Great! Now you have access to the gateway’s configuration settings.
Configure the Cloud Settings
In order to send the data from the gateway to the ZenduONE platform, we’ll need to change the cloud settings so that the data can be sent to our servers via HTTP access. To do this:
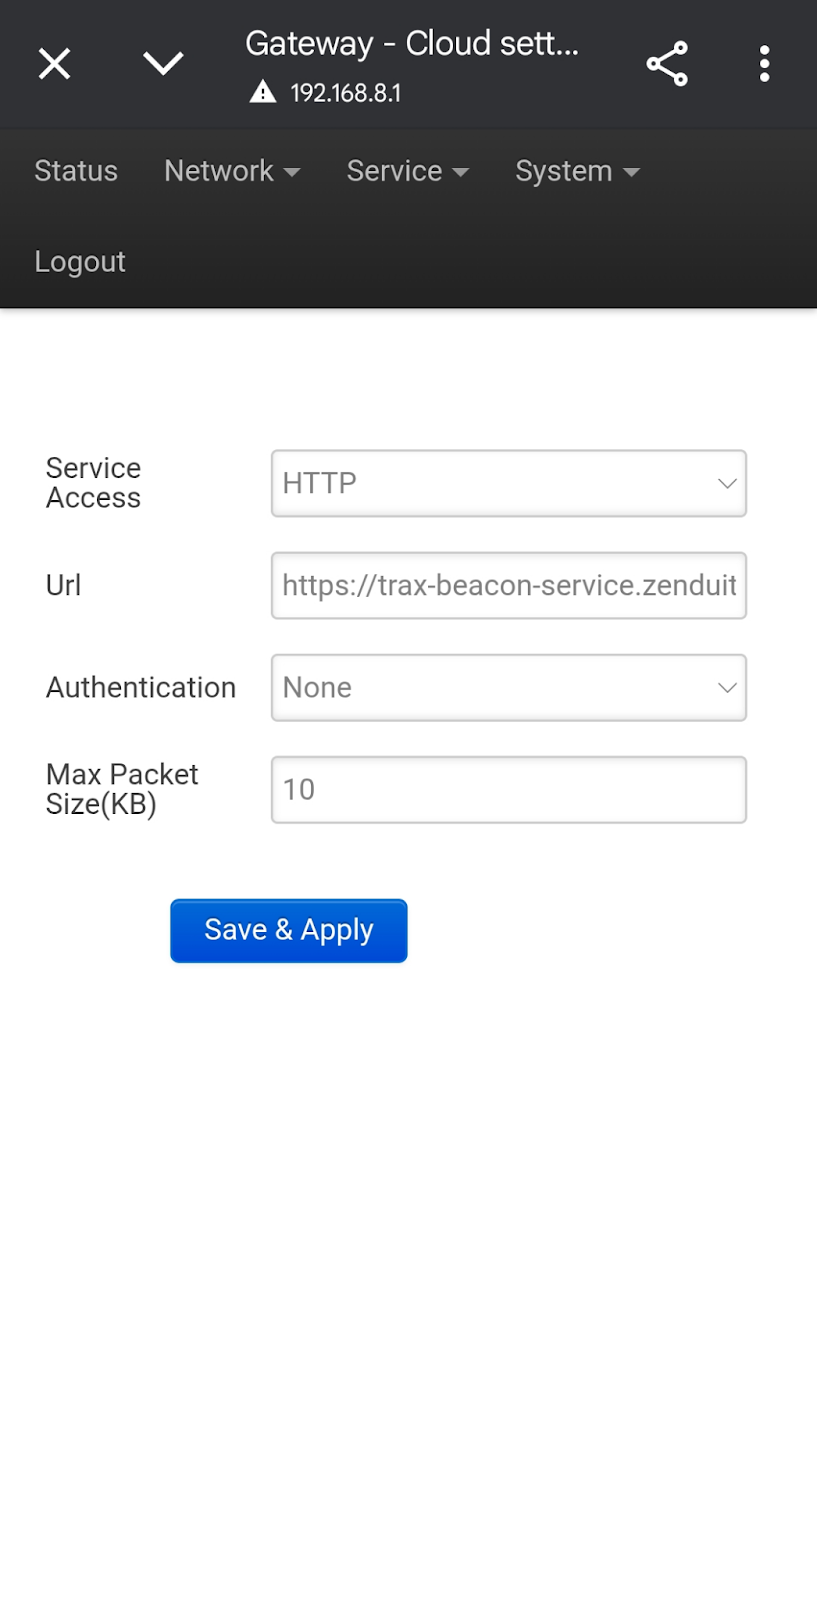
Go to Service > Cloud Settings
Change Service Access to HTTP
Type the following into the URL : https://trax-beacon-service.zenduit.com/callback/kkm
Set Authentication to None
Set Max Packet Size (KB) to 10
Press Save & Apply, you should see a success message
Configure the Network Settings
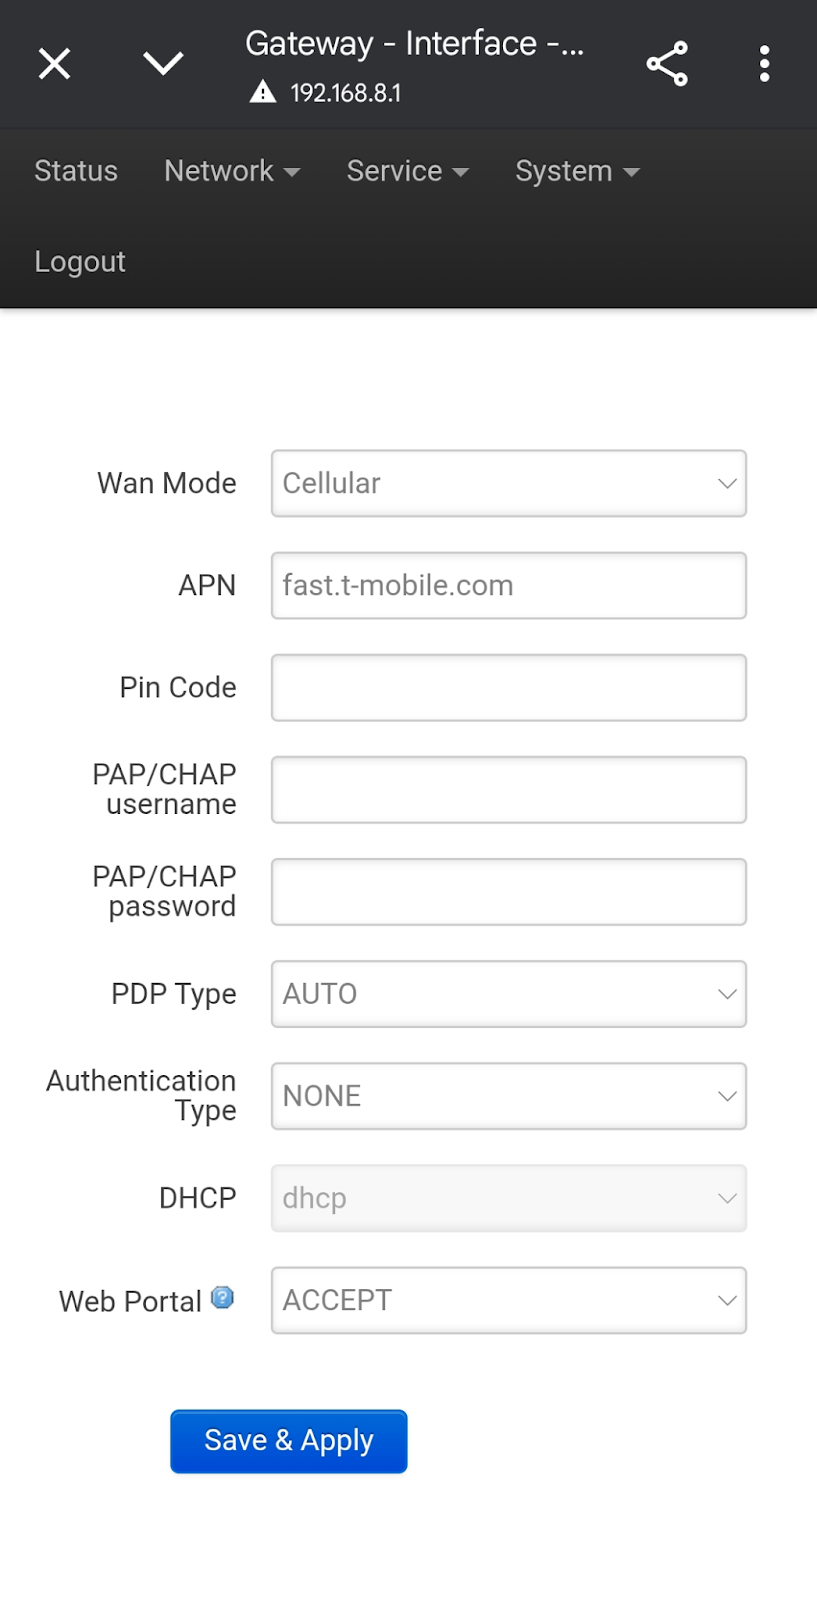
The gateways can connect via Cellular, Ethernet, or WiFi to transmit data. To change network settings, navigate to Network > Interface.
Cellular Connection
Change Wan Mode to Cellular
Change the APN corresponding to the APN of your sim provider
Leave Pin Code, PAP/CHAP username, PAP/CHAP password empty (unless applicable according to your sim provider, then fill it in accordingly)
Set PDP Type to AUTO
Set Authentication Type to NONE
Set Web Portal to ACCEPT
Hit Save and Apply
Wait for the system to reboot and then you will see a slow flashing red light
This red light should change to green if the device has successfully connected
Ethernet Connection
Connect the Ethernet cable to the Ethernet port of the Gateway. You can find the ethernet port on the backside of the ZenAnchor and along the wire for the ZenAnchor+.
Change Wan Mode to Ethernet
Set DHCP accordingly
Set Web Portal to ACCEPT
Hit Save and Apply
Wait for the system to reboot and then you will see a slow flashing red light
This red light should change to green if the device has successfully connected
Wifi Connection
Change Wan Mode to WiFi
Use Nearby WLAN to find your WiFi network
Set Encryption to WPA2-PSK
Set Cipher to auto
Enter your Wifi Password in Key
Set DHCP to dhcp
Set Web Portal to ACCEPT
Hit Save and Apply
Wait for the system to reboot and then you will see a slow flashing red light
This red light should change to green if the device has successfully connected

Conclusion
Awesome, the gateways are now configured and ready to be uploaded and used on the ZenduONE platform. See articles below to learn more about uploading and using these gateways in our ZenduONE Indoor Tracking Solution!
[Coming Soon]