ZenEye Sensor & ZenEye Beacon – Installation Guide
For installers / field techs
Written By Support Team
1. Purpose & Scope
This guide explains how to physically install:
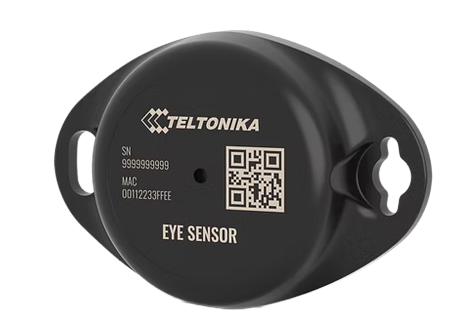
ZenEye Sensor – full sensor (ID + temperature + humidity + magnet/door/attachment + motion)
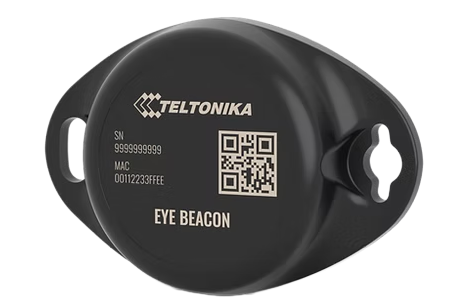
ZenEye Beacon – identification beacon (ID-only)
and how to ensure they are properly represented and associated in ZenduOne.
Note:
Device activation (turning the device ON and starting BLE advertising) is handled by the Fulfillment process.
Installers should assume devices are already activated and advertising when they receive them.
2. Device Overview
ZenEye Sensor
Full-feature BLE sensor providing:
Device ID (MAC)
Temperature
Humidity
Magnet/door/attachment status
Motion (where supported)
Typical use cases:
Trailer/container door monitoring
Environmental monitoring (temperature/humidity)
Attachment/detachment detection for assets
ZenEye Beacon
BLE identity beacon providing:
Device ID (MAC)
Typical use cases:
Asset/equipment tagging
Presence detection near a vehicle or gateway
3. Installation Prerequisites
Before going on-site:
Confirm a ZenTRACK gateway (OBD, Power, Power+, Solar, etc.) is:
Installed and powered
Pre-configured with the standard ZenduIT BLE configuration that supports Eye devices
Ensure each ZenEye device has:
A readable MAC Address printed on its label (this will be used as the Serial Number in ZenduOne)
Have appropriate mounting materials, e.g.:
Screws
Industrial double-sided tape
Brackets or cable ties (depending on the asset)
Door sensor: For door-status applications, the ZenEye Sensor can be paired with a standard coin-style magnet (not included with the product and must be acquired separately). Mount the ZenEye Sensor on the fixed surface (e.g., door frame or trailer body) and the magnet on the moving part of the door, aligned with the sensor’s magnet area. When the door is closed, the distance between the sensor and the magnet should be approximately 3 centimeters or less to ensure reliable detection of door open/closed status.
If you suspect a device is not functioning (no data appearing later), follow the Troubleshooting guide or contact operations/fulfillment.
4. Physical Placement & Mounting
4.1 ZenEye Sensor – Typical Use Cases
Door / magnet sensing:
Mount the ZenEye Sensor on a fixed surface (e.g., trailer body or door frame).
Mount the magnet on the moving part (e.g., the door) aligned with the sensor’s magnet area.
When the door is closed, the magnet should be within the manufacturer’s recommended distance from the sensor.
Ensure mounting is:
Firm and stable
Protected from impacts and vibration as much as possible
Environmental monitoring (temperature/humidity):
Mount in an area with air circulation (not sealed inside metal boxes).
Avoid:
Direct sunlight on dark surfaces
Proximity to heaters, exhausts, or other localized heat sources
Attachment detection:
Mount on the asset being tracked (e.g., trailer, container, equipment).
Ensure it cannot be easily dislodged.
4.2 ZenEye Beacon – Typical Use Cases
Mount on the asset you want to identify/tag:
Toolboxes, smaller equipment, pallets, trailers, etc.
Consider BLE performance:
Avoid fully enclosing in metal.
Prefer external or semi-exposed mounting where signal can reach the ZenTRACK gateway.
Secure with adhesive, screws, or ties according to the asset and environment.
5. Association with ZenTRACK Gateway & ZenduOne
5.1 Gateway Role
A ZenTRACK gateway (e.g., ZenTRACK OBD) will scan for nearby ZenEye devices and forward their data to the backend.
Installers do not typically need to change BLE scanning behavior if devices are using ZenduIT’s standard configuration.
5.2 Creating ZenEye Assets in ZenduOne
For each ZenEye device:
In ZenduOne, create a new asset.
Set:
Asset Name: Use something descriptive like
Trailer 12 – Rear Door SensorWarehouse Bay 3 – Temp SensorToolbox – ID Tag
Tracker Type:
BLE BeaconSerial Number: MAC Address printed on the device label.
5.3 Linking to Vehicles or Parent Assets
Once the ZenEye asset exists:
Associate it logically with:
A vehicle (e.g., truck pulling a trailer with a ZenEye door sensor)
A trailer or equipment asset
This allows:
Maps and dashboards to show vehicle + attached sensors
Reporting that includes sensor metrics (for ZenEye Sensor) or tag presence (for ZenEye Beacon)
6. Post-Installation Validation (High-Level)
Because activation is handled in Fulfillment, the installer’s validation is mostly about data flow:
Ensure the ZenTRACK gateway (OBD, other) is online and near the installed ZenEye device.
In ZenduOne:
Open the ZenEye asset created earlier.
Monitor for incoming data:
For ZenEye Sensor: temperature, humidity, door/magnet status, motion, etc.
For ZenEye Beacon: presence/ID events or proximity as defined by the product.
If no data appears after a reasonable time:
Verify physical mounting and distance to the gateway.
Confirm the gateway is powered and properly configured.
Escalate to operations/support following the Troubleshooting & FAQ document.
7. Documentation & Handover
After installation:
Record:
Asset ID in ZenduOne
MAC Address (Serial Number field)
Physical location (e.g., “Trailer 12 – rear door, top hinge”)
Date of installation and installer name
Inform the fleet admin or operations team that:
ZenEye Sensor/Beacon is installed and visible as an asset in ZenduOne.
The asset is associated with the relevant vehicle/trailer/equipment.
Supported Data Payload Formats
The EYE Sensor can broadcast data in different formats. The correct format depends on the gateway/hardware that will receive and forward the BLE data.
Recommended Configuration by Gateway Type
Important: If you need decoded values like temperature, humidity, and door status to be parsed reliably on Teltonika OBD or TopFly gateways, keep the EYE Sensor configured as Sensor (not iBeacon + Sensor or Eddystone + Sensor).
Configuration Steps (Using the Teltonika EYE App)
Prerequisites
A mobile phone with Bluetooth enabled
Teltonika EYE App installed:
Available on Google Play
Available on the Apple App Store
Step-by-Step Setup
Install and open the Teltonika EYE App.
The app will scan and list nearby beacons/sensors.
Tap the desired EYE Sensor from the list.
Enter the default password:
123456Tap Configure.
Set the Data Payload Format based on your gateway:
Teltonika OBD or TopFly gateways → select Sensor
ZenCam Plus (Streamax) or generic gateways → select iBeacon + Sensor
Save/apply the configuration.
Notes & Best Practices
Keep the phone close to the sensor during configuration to avoid BLE drops.
If door status is required, ensure the magnet is installed and aligned correctly with the sensor.
After configuration, validate in your platform/gateway logs that the expected payload format is being received.
What You Should See in the Platform
When configured correctly, the platform should be able to ingest and expose:
Sensor identity
Temperature and humidity readings
Door status (open/closed) when magnet is present
Movement state/status