ZenDoor Installation Guide
Product Overview: ZenDoor is a compact wireless beacon designed to monitor door status and temperature in light-to-moderate environments such as office doors, small storage areas, or light-duty vehicles. The device uses BLE iBeacon payloads to transmit door and temperature data to compatible gateways. It is designed for simple installation using pre-cut double-sided tape and a built-in tamper detection contact.
Written By Support Team
1. Key Features
Door status monitoring: Detects open/closed status using a magnet sensor.
Temperature monitoring: Measures ambient temperature near the installation area.
Compact, non-rugged design: Ideal for indoor or light-duty use.
Battery: Built-in, non-replaceable.
Wireless transmission: BLE iBeacon for simple presence and sensor reporting.
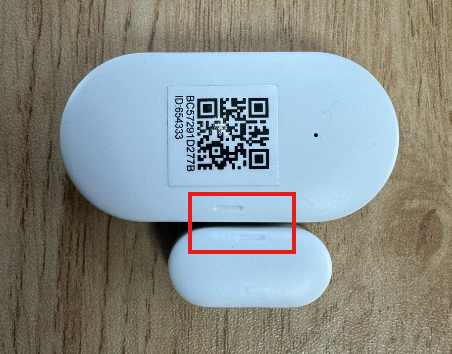
Tamper detection: A small black contact on the device must press against the mounting surface to detect tampering.
2. Before You Start
You will need:
ZenDoor beacon and accompanying magnet
Double-sided tape provided with the sensor (matches the shape of the magnetic parts)
Compatible BLE gateway for monitoring
Smartphone with KBeacon Pro app installed (iOS/Android)
No password is required to activate the device.
3. Step 1 – Prepare the Device
Remove the ZenDoor and magnet from packaging.
Ensure the battery is connected and the device is ready to broadcast.
Identify the small tamper contact (black tab) on the back of the device—it must make solid contact with the mounting surface.
4. Step 2 – Mounting the Device and Magnet
Attach the double-sided tape to the beacon and magnet:
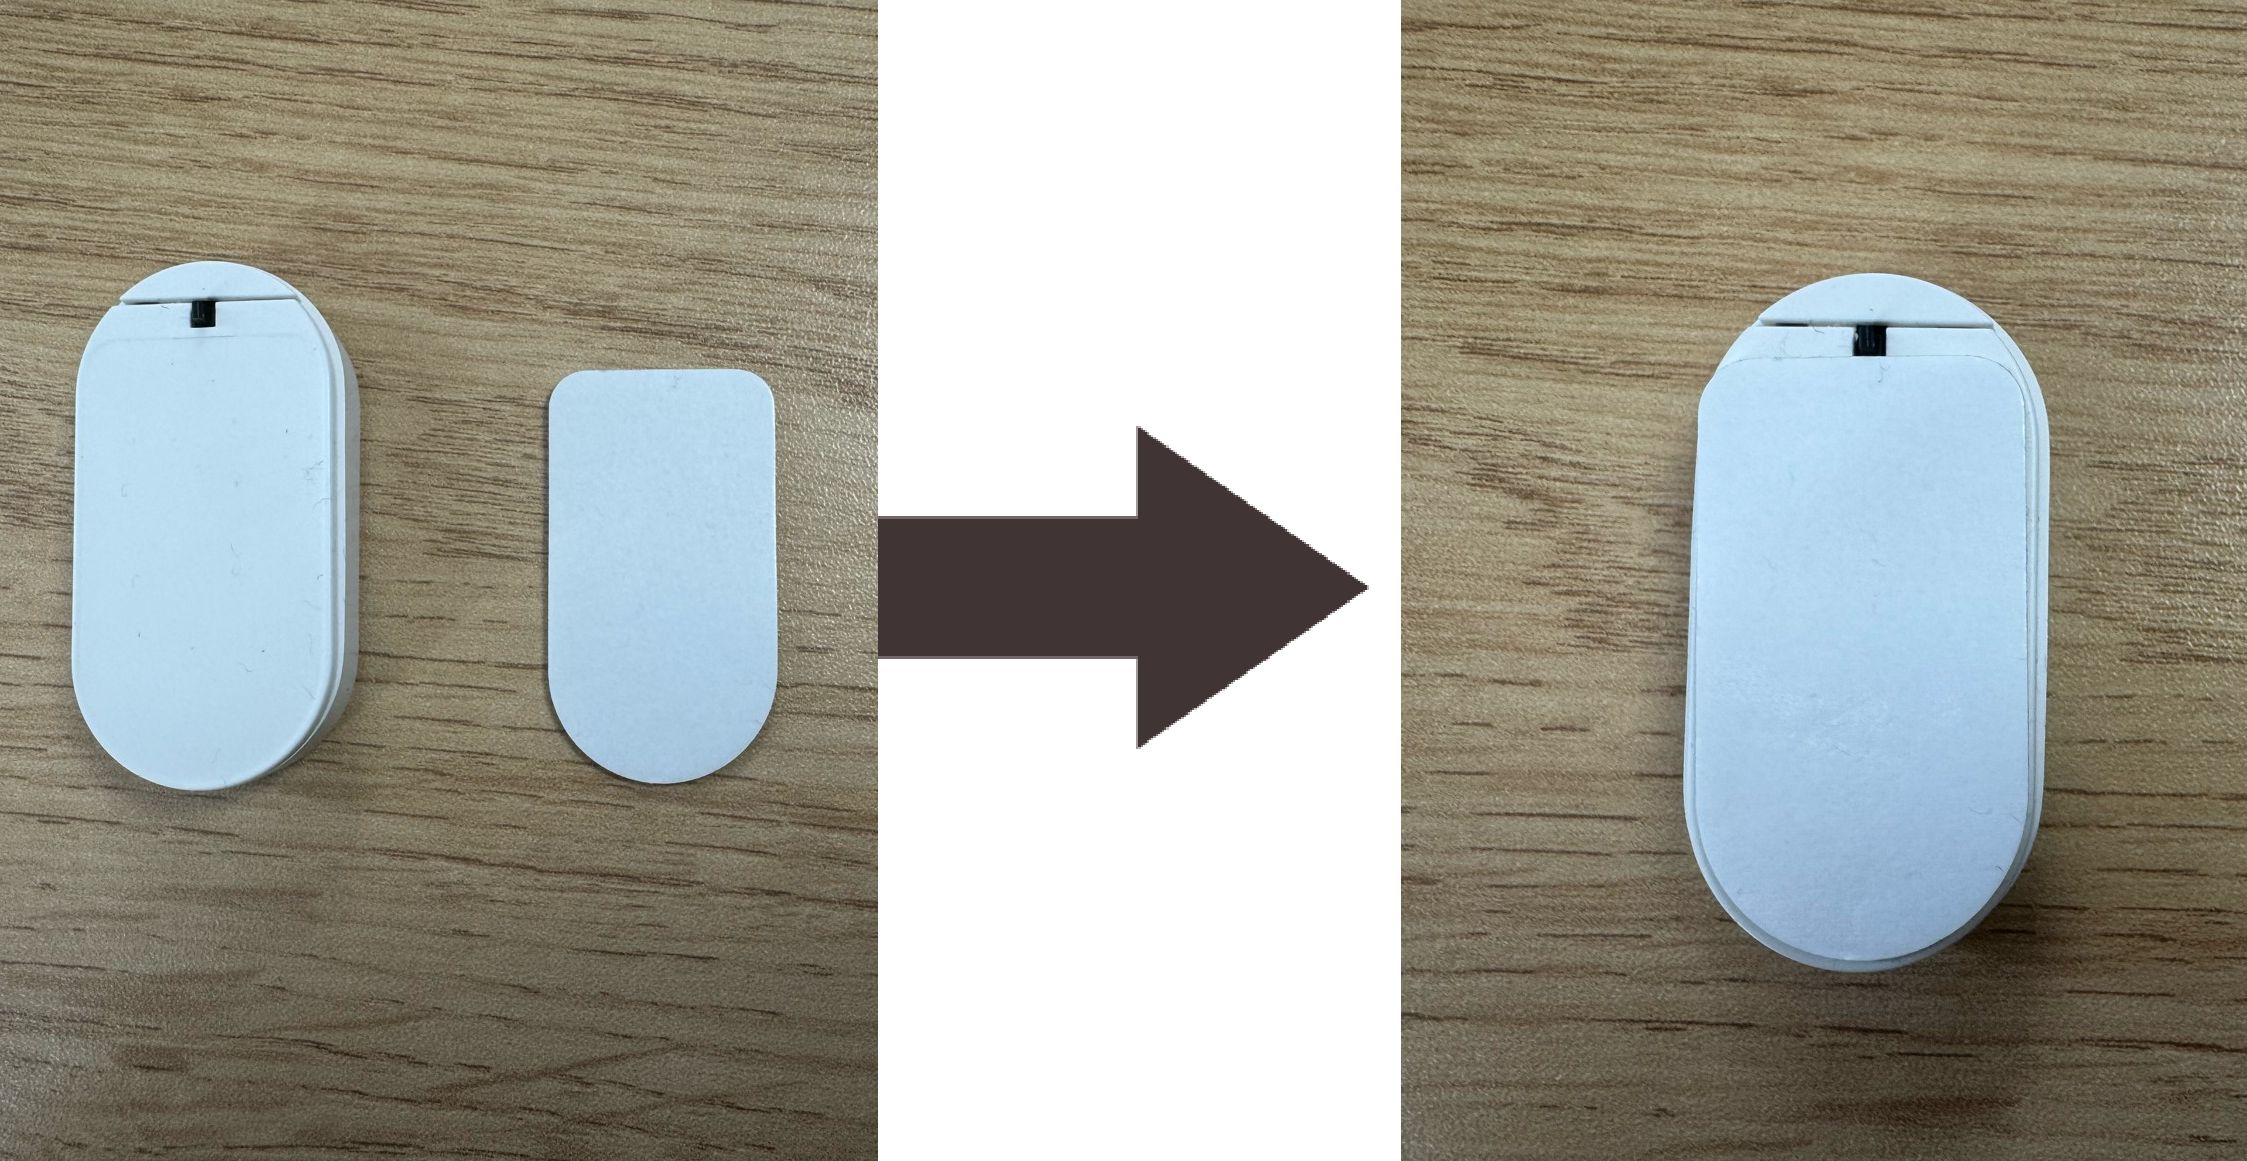
The tape matches the shape of the parts and ensures proper adhesion.
Placement:
Mount the ZenDoor on the fixed frame (door frame or wall).
Mount the magnet on the moving door, aligned with the sensor area.
When the door is closed, ensure the distance between the magnet and device is ≤ 1 cm.
Tamper contact:
Press the black tab firmly against the surface to ensure it will detect any unauthorized removal or tampering.
Tip: Make sure both parts are stable and do not shift during door operation.
5. Step 3 – Verifying Operation
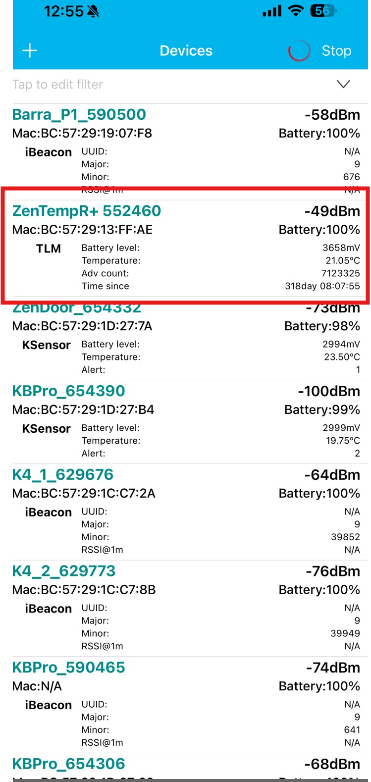
Open KBeacon Pro on your smartphone.
Scan for nearby BLE devices.
Confirm ZenDoor is broadcasting and visible in the app.
Check that:
Device identifier is correct
Temperature value is reasonable
Tamper contact is detected as engaged
6. Step 4 – Linking to ZenduOne
Log in to ZenduOne.
Navigate to the BLE Beacon / Devices section.
Add a new beacon:
Type: BLE Beacon
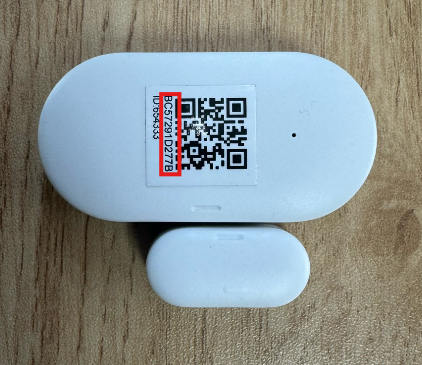
Enter ZenDoor serial/MAC
Assign to the correct customer/account and link to the relevant asset (vehicle or door location).
Test door status reporting:
Close the door and confirm “Closed” status in ZenduOne.
Open the door and confirm “Open” status is reported.
Verify temperature readings are reasonable and being updated on the platform.
7. Best Practices & Notes
Ensure tamper contact is pressed firmly on installation.
Align the magnet and beacon carefully; misalignment can cause false “open” readings.
Use only the KBeacon Pro app for configuration and testing.
Avoid installing the beacon on surfaces that move excessively or block BLE signals.
Document device serial and installation location for support or maintenance.