ZenTRACK OBD – Installation Guide
(For installers and field technicians)
Written By Support Team
1. Purpose & Scope
This guide explains how to physically install a pre-configured ZenTRACK OBD device in a vehicle and verify that it powers up and connects.
Pre-configuration (firmware, config file, APN, FOTA registration) should already be done by fulfillment or technical staff (see Fulfillment Guide).
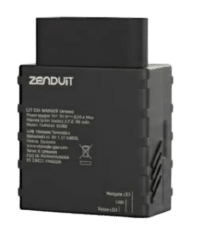
2. Device Overview
ZenTRACK OBD is a plug-and-play OBD-II tracker based on certified Teltonika hardware:
Models:
FMM00A – Certified for North America
FMC003 – Certified for LATAM and UAE
Current Firmware:
03.29.00.Rev.358(for both models)Key capabilities:
GNSS tracking (location, speed, heading)
Cellular communication to backend platform
OBD-II data (vehicle parameters, ignition, etc.)
BLE support (for sensors and beacons) when enabled in configuration
Important: Applying ZenTRACK OBD configuration steps to other Teltonika models may result in malfunctions or hardware damage. Always confirm the device model before proceeding.
3. Installation Prerequisites
Before going to the vehicle:
Confirm that:
The device IMEI and model match the deployment plan.
The device has been pre-configured (firmware & config file applied, APN set or auto-APN enabled).
Have:
Vehicle information (VIN, plate, fleet ID).
Access to the OBD-II port.
ZenduOne access (if you will validate on the platform).
4. Vehicle Installation Steps
4.1 Locate the OBD-II Port
In most vehicles, the OBD-II port is located:
Under the dashboard on the driver’s side.
Near the steering column or lower dash area.
If unsure, use vehicle documentation or an OBD-II locator guide.
4.2 Connect the ZenTRACK OBD
With the ignition off, plug the ZenTRACK OBD device into the vehicle’s OBD-II port.
Make sure the connection is firm and the device is not loose.
Ensure the device is positioned so it will not be:
Kicked by the driver’s feet
Hit by moving parts (pedals, covers)
Under tension from cables
If the OBD-II port location is exposed or vulnerable, use an extension cable and secure the device in a safer area.
4.3 Power On and Check LED Indicator
Turn the vehicle ignition to ON (or start the engine).
Verify the device LED indicator:
A steady green or appropriate sequence indicates the device is powered.
If there is no LED:
Check the OBD-II port for power.
Try another vehicle if needed to isolate a vehicle-port issue.
5. Basic Connectivity Check
These steps assume the device has already been configured (APN, config file, etc.) as described in the Fulfillment Guide.
Wait a few minutes with the ignition ON so the device can:
Acquire GNSS fix
Connect to the cellular network
In your backend platform (e.g., ZenduOne):
Search for the device by IMEI or assigned vehicle/asset.
Confirm:
Recent location/telemetry.
Ignition status changes when you turn the key OFF/ON.
If the device does not report:
See the Troubleshooting & FAQ document.
6. Finalize Installation
Secure the device and any extension cables so:
No cables hang loosely.
Nothing interferes with pedals or driver comfort.
Document:
Vehicle ID, VIN, plate
Device IMEI
Install date
OBD port location/notes (if non-standard)
Inform the customer or fleet admin that the vehicle is now active and monitored.
7. Installation Options – Light-Duty vs Heavy-Duty Vehicles
By default, ZenTRACK OBD is designed for a plug-and-play installation using the vehicle’s standard OBD-II port:
For light-duty vehicles (cars, vans, pickups, small trucks), simply plug the device into the OBD-II socket under the dashboard.
No additional wiring or harness is required in this scenario.
Heavy-Duty Vehicles (9-Pin CAN-J1939 Port)
For heavy-duty commercial vehicles, buses, construction machinery, and agricultural equipment that use the SAE J1939 standard, the vehicle usually provides a rounded 9-pin diagnostic connector instead of a standard OBD-II port.
In these cases, ZenTRACK OBD should be installed using an additional harness (accessory) that:
Adapts the 9-pin J1939 diagnostic port to the ZenTRACK OBD connector.
Provides access to power, ground, ignition, and CAN-High / CAN-Low signals through a plug-in solution rather than cutting into the vehicle wiring.
This is the recommended method for heavy-duty installs whenever a J1939 diagnostic port is available.
Custom Hardwired Installation (Last Alternative)
If there is no suitable diagnostic port or a custom wiring approach is required, ZenTRACK OBD can be installed using the harness and connecting all five wires manually:
Power (+12/24 V)
Ground
Ignition
CAN Low (CAN-L)
CAN High (CAN-H)
This approach should only be used by qualified technicians, following proper wiring diagrams and safety procedures, as incorrect wiring can cause device malfunction or vehicle communication issues.