ZenduONE Dashboard - Assets Overview
Written By Support Team
The Assets section allows you to efficiently organize, track, and manage all vehicles and devices within your account. This guide walks you through the Asset screen, filters, views, and how to create or import assets.
Asset Screen Overview
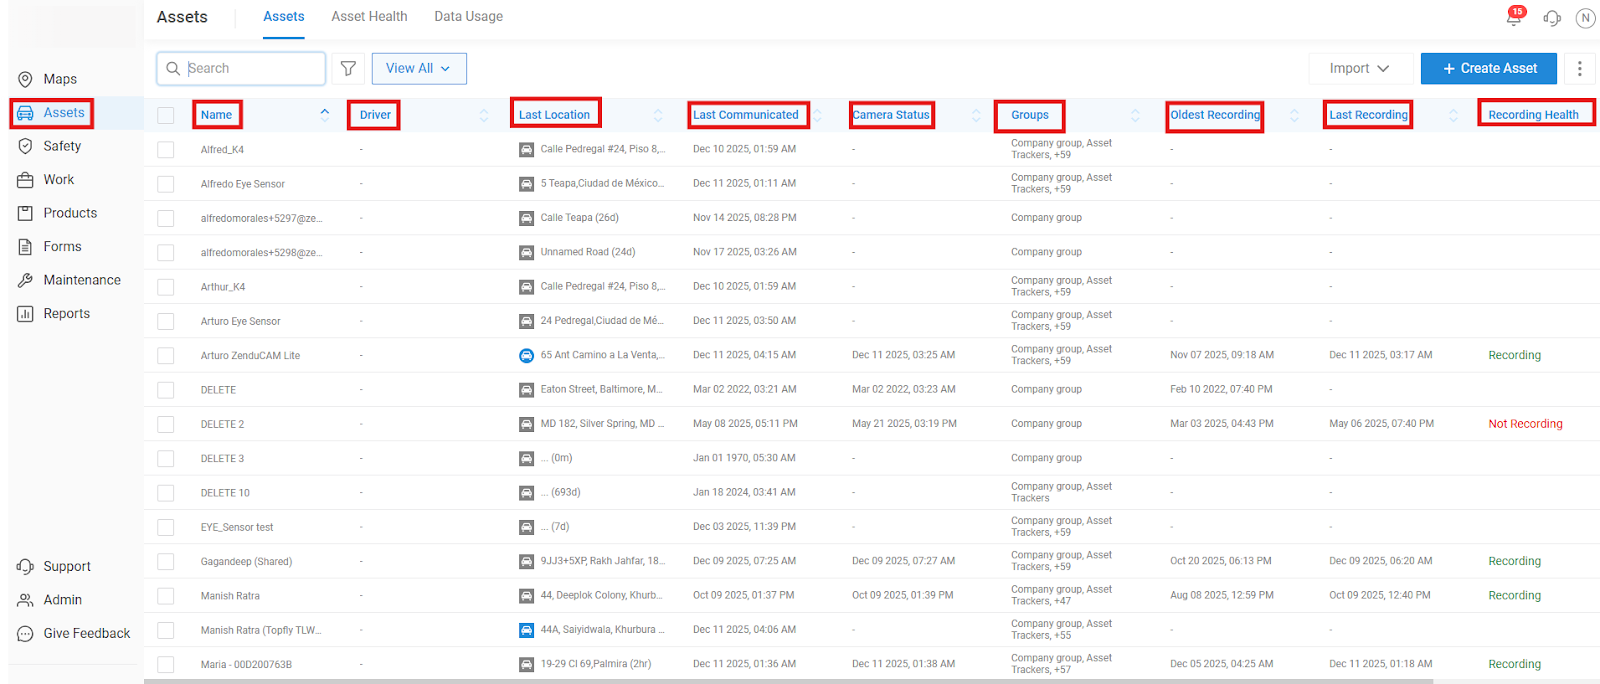
To begin, click on Assets in the left-side menu. This will display a list of all registered assets in your account.On this page, you can quickly view the following details for each asset:
Asset name
Assigned driver
Last recorded location
Last communication time
Camera status
Assigned groups
Oldest available recording
Latest recording
Recording health
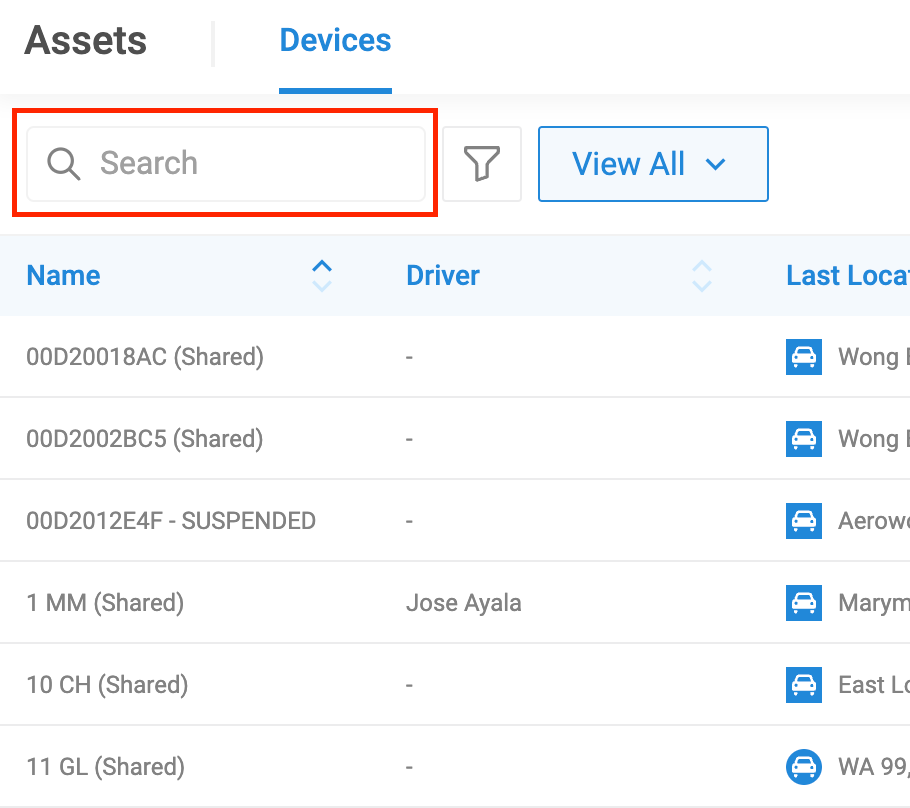
You can search for assets using key fields such as:
Asset name
Driver
Last location
Groups
Third-party telematics serial
VIN
Filters and Custom Views
To refine your asset list, click the Filter button next to the search bar.
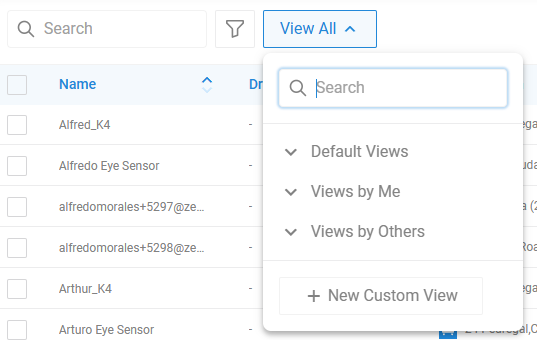
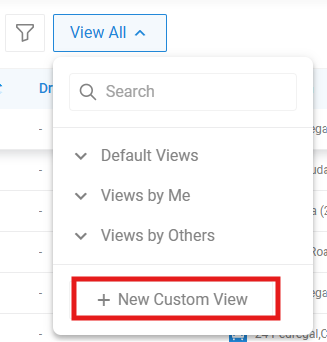
Next to it, you will find the Views options. These include:
Default Views: System-generated
Views by Me: Custom views you have created
Views by Others: Shared views from other users
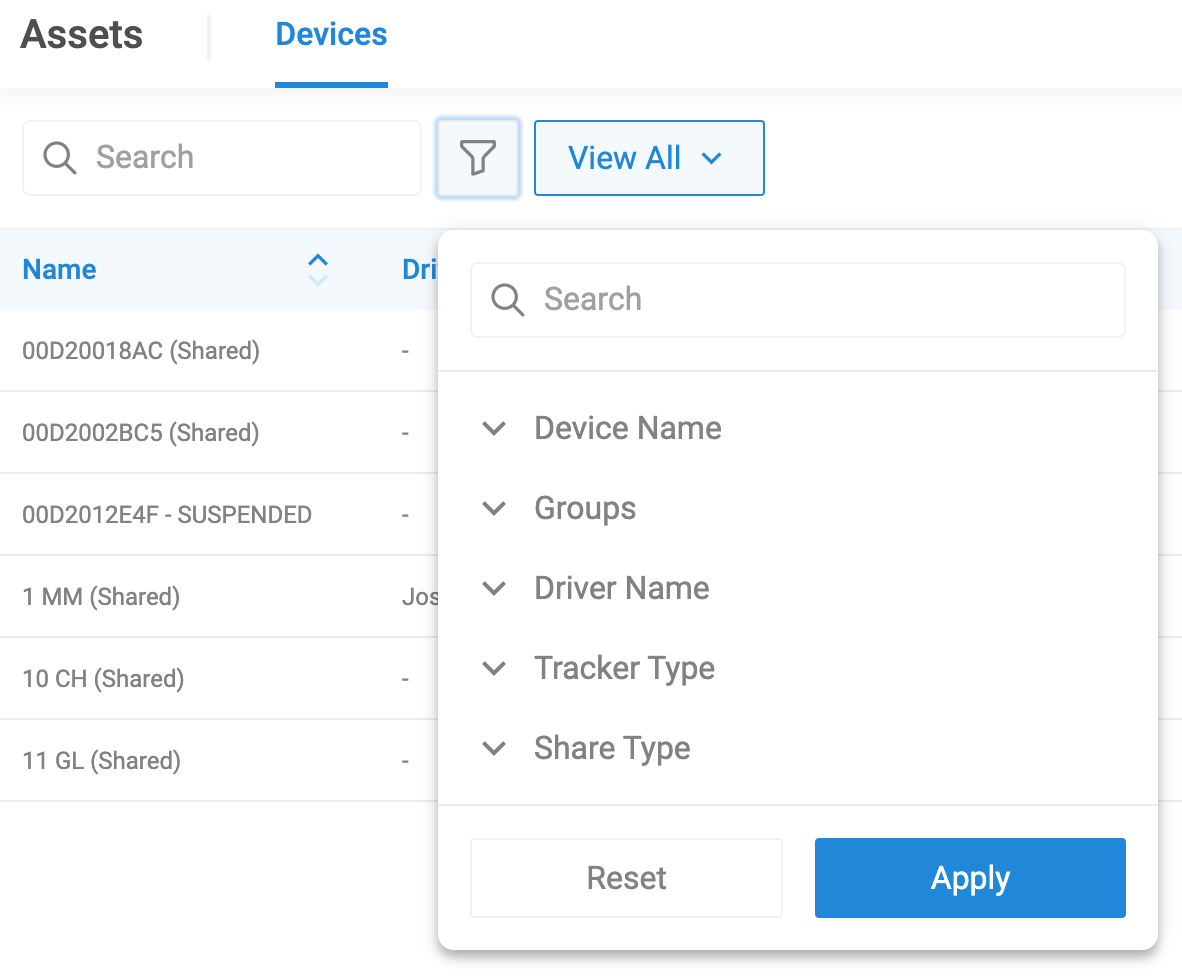
To create a new view, click + New Custom View.
In this window, you can:
Name your view
Select the columns to display
Choose whether the view is private or shared
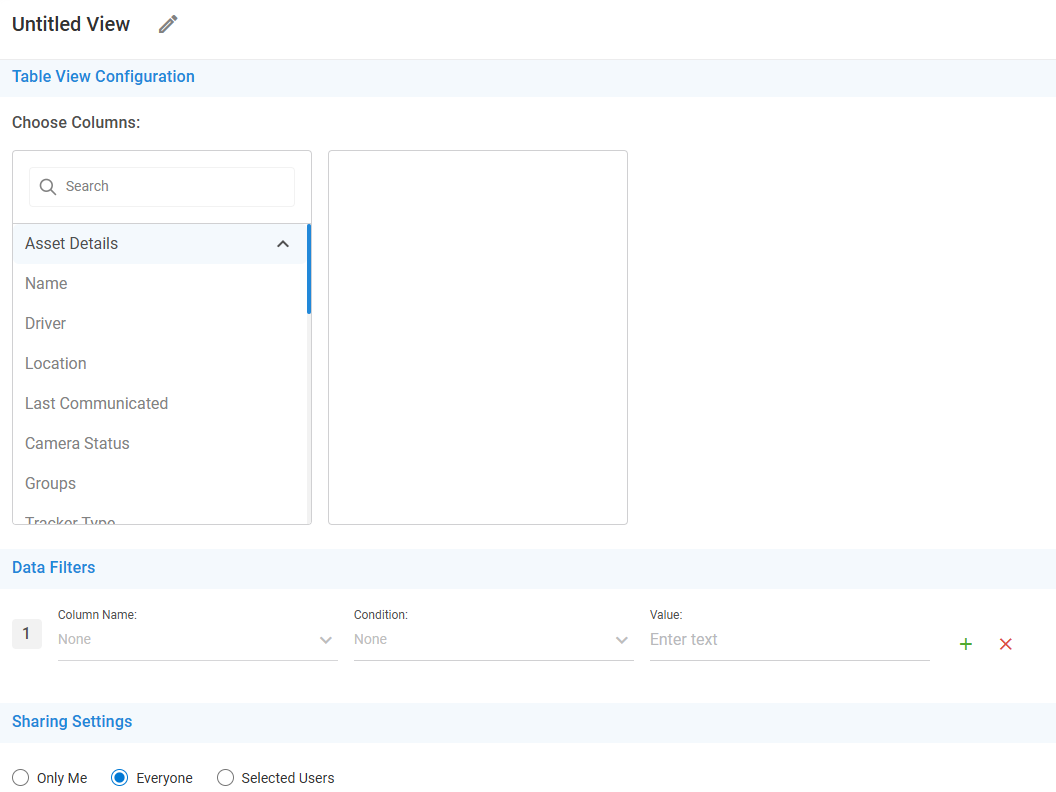
Start by naming your Asset view
Choose the columns you want to display
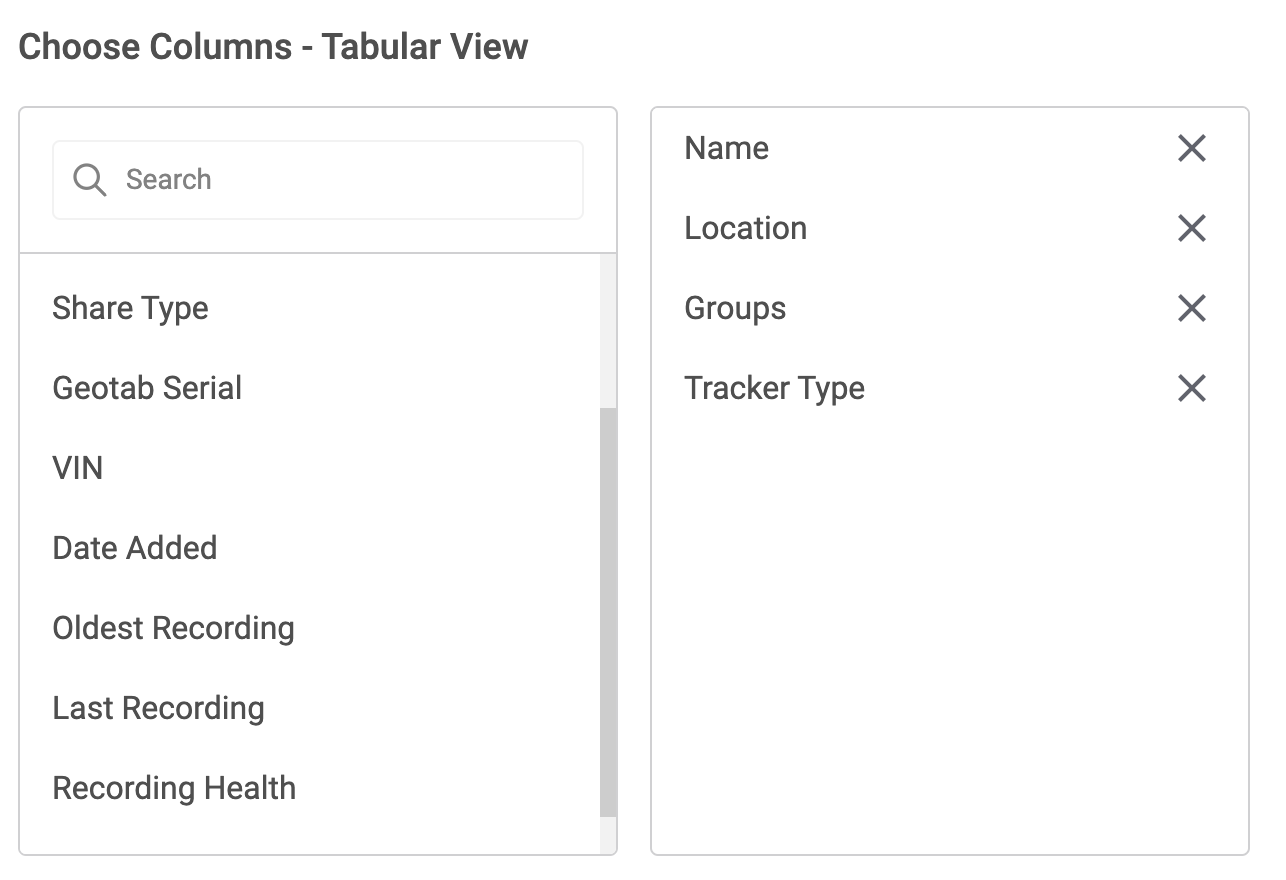
Select if you want this view to be private or if you want to share it with others
Adding a New Asset
Screenshot placement: Add a screenshot of the + Create Device button.
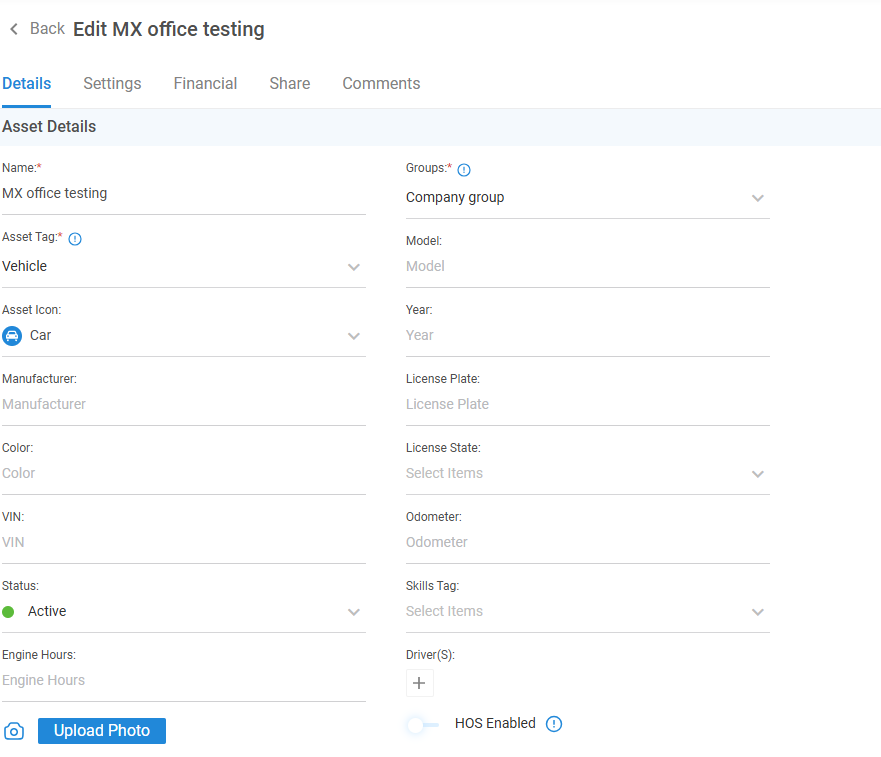
To add a new asset, click + Create Device at the top right of the screen. You will be asked to complete the following four sections:
1. Details
Enter required information such as the Asset Name and Groups.
Optional information includes:
Asset icon
Assigned driver
Manufacturer, model, color, year
VIN and license plate
Status
Odometer and engine hours
Skills tags
Asset photo
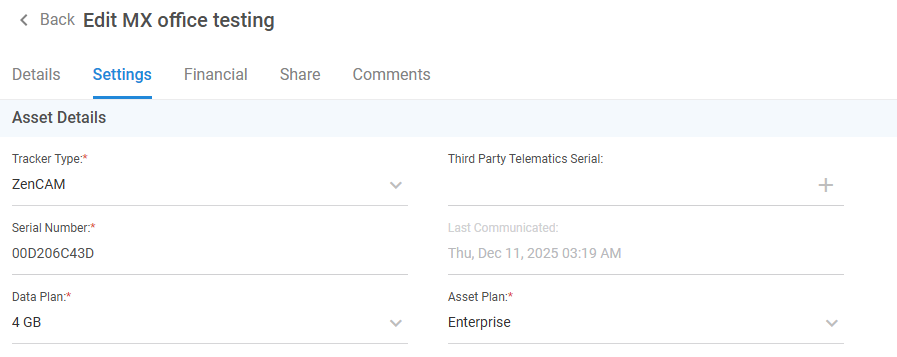
2. Settings
Provide device-related information such as:
Device serial number
Tracker type
Third-party telematics serial (example: linking ZenCam with Geotab)
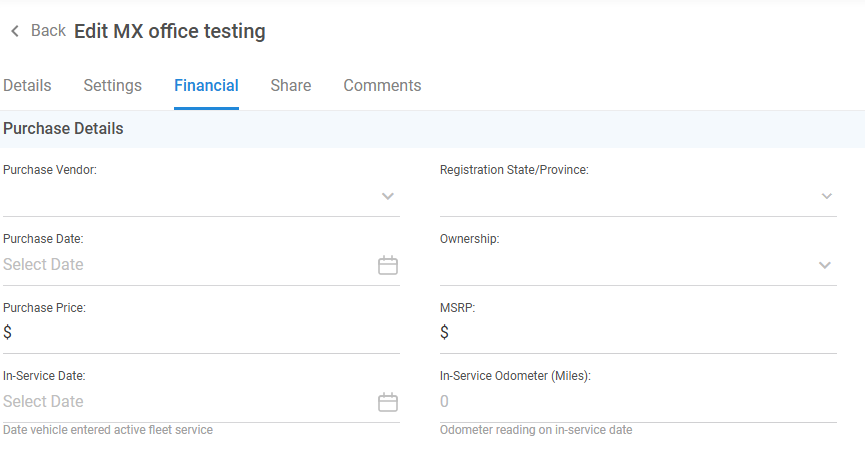
Record all financial information for reporting and insights.
Purchase Details: vendor, date, price, registration location, service date
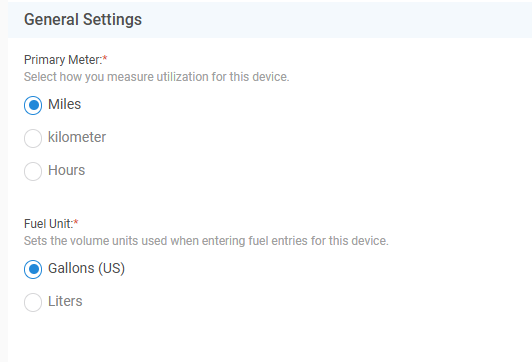
General Settings: utilization measurement and fuel volume units
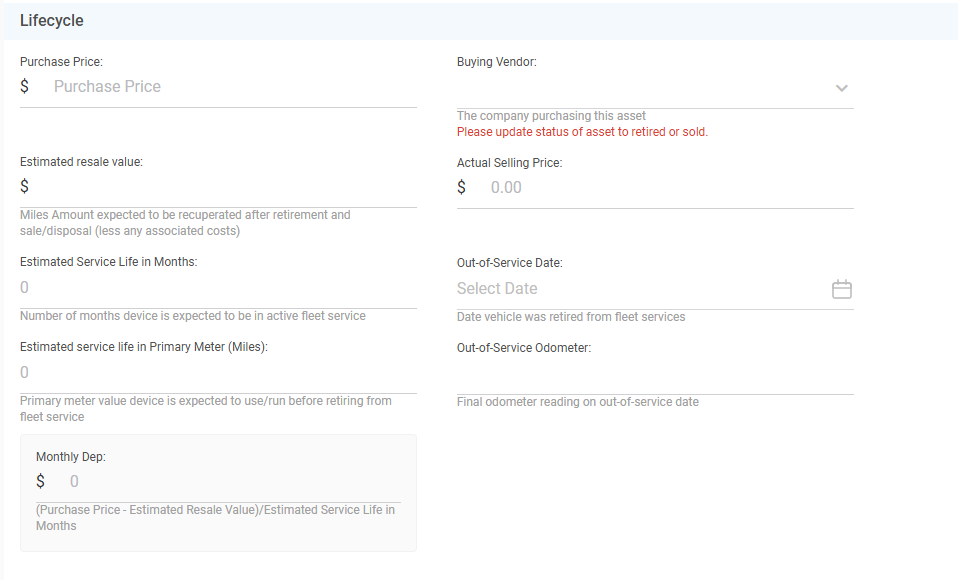
Lifecycle: service life, estimated resale value, planned or completed sale details
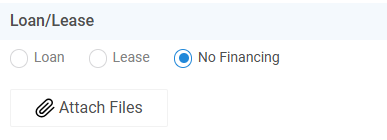
Warranty and Loan/Lease: terms, coverage, and agreement details
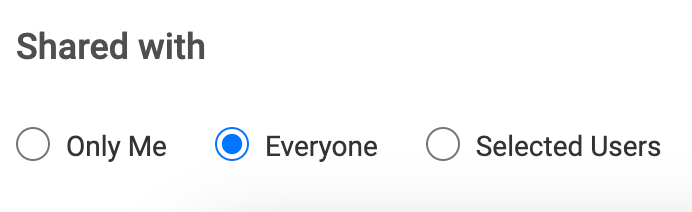
4. Share
You can share an asset with customers or other platform users.
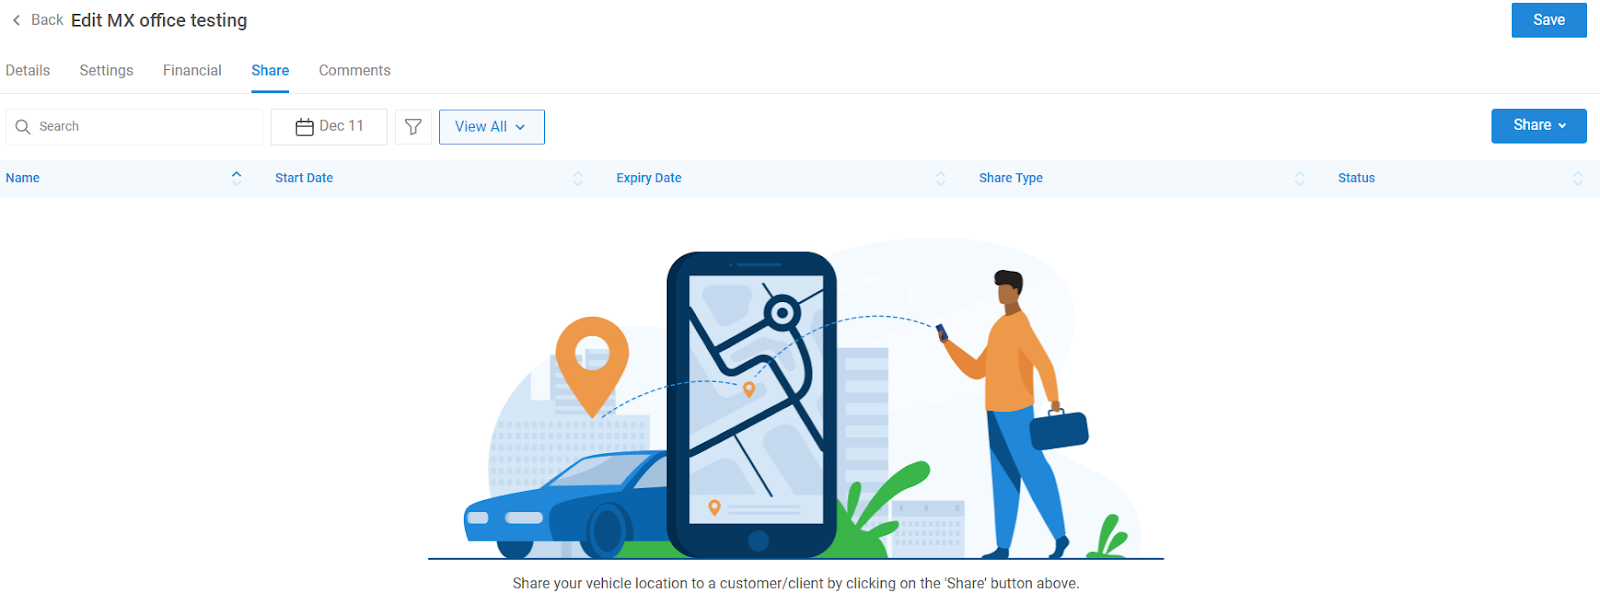
Ensure the asset is created first; then:
Open the asset
Click the Share button
Choose public or private sharing
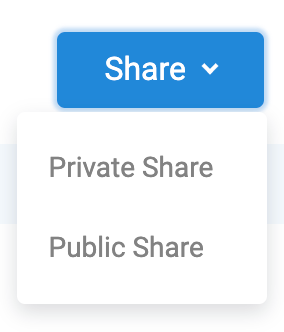
Enter the recipient’s details and share
5. Comments
The comments section serves as a central space for storing important notes and attachments related to each asset. Any time the driver calling feature is used, the corresponding call recording is automatically saved here. These recordings—as well as any additional files or notes added by users—remain accessible at all times for quality assurance, reference, or future review.
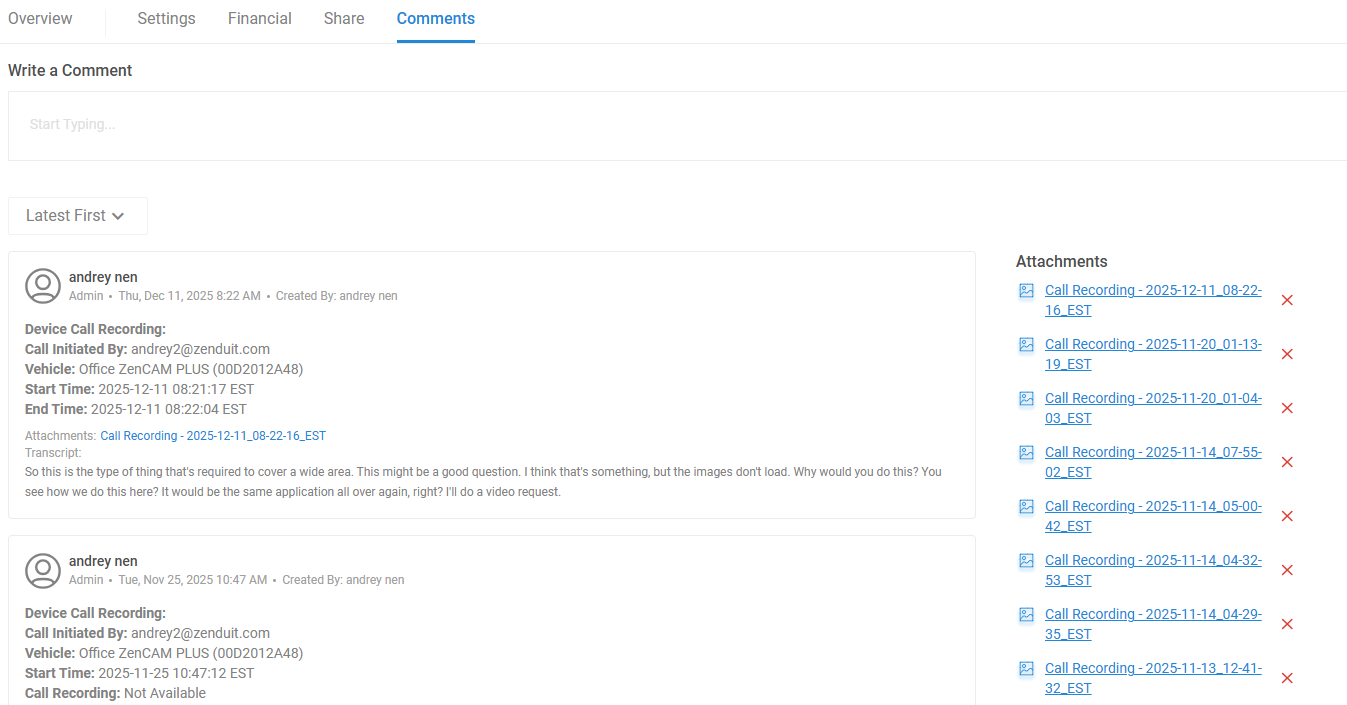
This ensures that all asset-specific communication and documentation is organized and easy to retrieve whenever needed.
Importing Assets
The Assets Overview page allows you to bulk import assets instead of adding them individually. Under the Import section, you will see three import methods:
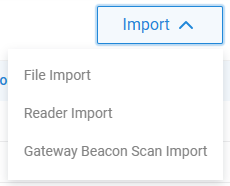
1. File Import
Use this option to upload all assets at once using the standard import template.
To complete the import, download the pre-defined Excel template and fill in the following details:
Asset Name
Serial Number (Required)
Third-Party Telematics (If applicable)
License Plate (Optional)
VIN Number (Optional)
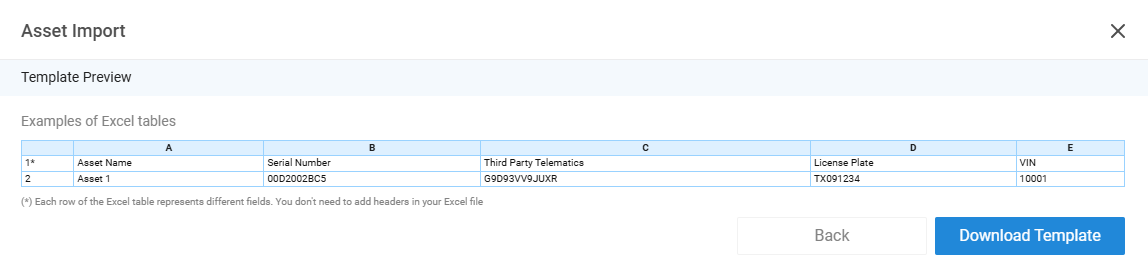
Once the information is added, upload the file to instantly register multiple assets at once.
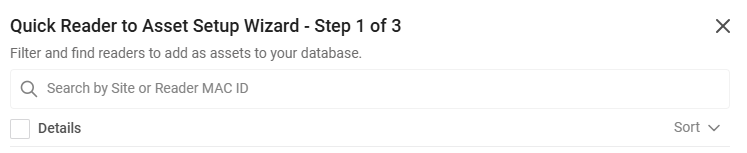
2. Reader Import
If you are importing cameras, you can automatically detect and register them using their MAC IDs.
This is a quick three-step process where the system reads the camera information and assigns it to your assets.
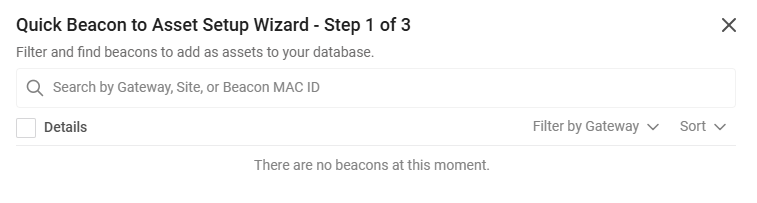
3. Gateway Beacon Scan Import
This option allows you to bulk import gateway beacons using the scanning method.
Since this is a beta feature, functionality may still be evolving, but it allows you to onboard multiple beacons efficiently.
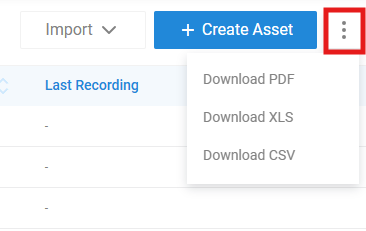
Asset Reports Download
Within the Assets Overview page, you also have the option to download a full report of your assets.
This report provides an overview of all asset details and can be used for audits, internal reviews, or record-keeping.