ZenDoor+ Operations-Guide
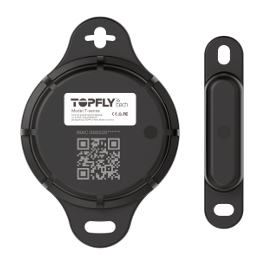
Product: ZenDoor+ Function: Wireless beacon for door status and temperature monitoring Protection: Rugged, IP67 water- and dust-resistant Battery: Built-in, non-replaceable, approx. 1650 days of life Wireless Protocol: TFT Eddystone (default) Typical Range: Up to 200 m (line-of-sight)
Written By Support Team
1. What ZenDoor+ Does
ZenDoor+ is a compact wireless sensor that:
Detects whether a door is open or closed using a magnet-based sensor
Monitors ambient temperature near the door
Sends data wirelessly to a compatible gateway or telematics system using TFT Eddystone data payloads
It is designed for trailers, containers, warehouse doors, and other rugged environments.
2. Before You Start
You’ll need:
A ZenDoor+ beacon and its magnet
Access to the QR code label on the device
A smartphone with Bluetooth enabled
The TFTBLE app:
Available on Apple App Store (iOS)
Available on Google Play Store (Android)
Default configuration password:
654321
3. Step 1 – Activate the Device
ZenDoor+ uses a front light sensor to power on:
Remove the device from any opaque packaging or cover.
Expose the front side (where the light sensor is located) to light.
The device powers on automatically and starts broadcasting at the default settings.
Tip: Avoid permanently covering the front sensor during activation.
4. Step 2 – Mounting the Device and Magnet
For reliable door detection:
Choose positions:
Mount ZenDoor+ on the fixed frame (e.g., door frame or wall).
Mount the magnet on the moving door (or vice versa).
Align the device and magnet:
When the door is closed, the magnet should be directly aligned with the sensor area of ZenDoor+.
Ensure the distance between device and magnet is ≤ 3 cm when the door is closed.
Secure both parts:
Use the recommended mounting method (screws, adhesive, or brackets as per your kit/instructions).
Make sure both components are firmly attached and do not move when the door operates.
If the gap is more than 3 cm when closed, the device may incorrectly report the door as open.
5. Step 3 – Enabling the Door Sensor in the TFTBLE App
Install TFTBLE:
Download TFTBLE from the App Store (iOS) or Google Play (Android).
Open the app and ensure Bluetooth is enabled on your phone.
Search for the beacon:
In the app, tap the search icon in the top-right corner.
Choose the option to scan using the camera.
Scan the QR code:
Point your camera at the QR code on the ZenDoor+ device.
Once recognized, the device will appear in the list.
Open configuration:
Select the device and tap Config.
Enter the password:
When prompted, enter the default password:
654321.
Enable the door sensor:
Locate the “Door” setting (door sensor configuration).
Toggle the “Door” option ON to activate door detection.
Save or apply:
Confirm and save the configuration so settings are written to the device.
⚠️ Important: Do not change other settings (intervals, TX power, protocol, etc.) unless advised by your support team. This may impact battery life, range, or compatibility with your platform.
6. Step 4 – Add ZenDoor+ to ZenduOne & Verify Door/Temperature Readings
To see door and temperature data from ZenDoor+, you must first configure it in the ZenduOne Platform and then verify that readings are coming through.
6.1 Add ZenDoor+ as a BLE Beacon in ZenduOne
Log in to ZenduOne Platform.
Go to the appropriate Tracker / Devices section (depending on your tenant configuration).
Add a new tracker:
Tracker Type: select BLE Beacon.
Enter the ZenDoor+ serial number and any other required details.
Make sure the beacon is assigned to the correct customer database (customer/account) so it can be linked to the right assets.
6.2 Link ZenDoor+ to the Asset (Vehicle) Acting as Gateway
ZenDoor+ sends data via Bluetooth. A compatible vehicle tracker (gateway) must be configured to listen to it.
In ZenduOne, open the Asset module.
Locate and edit the vehicle tracker that will act as the gateway for ZenDoor+ (the vehicle where ZenDoor+ is installed).
Enable BLE beacon support on this vehicle tracker:
Turn on the option to enable BLE beacons for the asset tracker.
In the BLE configuration for that vehicle/asset:
Add the ZenDoor+ serial number.
Set the beacon type (or sensor type) to Door Sensor.
(Optional but recommended):
Use the Whitelisting feature while editing the vehicle tracker to explicitly link the door sensor:
Add ZenDoor+ to the whitelist for that asset so the gateway only listens to approved beacons and improves reliability.
Save your changes.
6.3 Verify Door & Temperature in ZenduOne
Still in ZenduOne, open the Asset or Live view where this vehicle is visible.
Test the door status:
Close the door fully (magnet within 3 cm of the beacon).
Confirm the platform shows Door: Closed (or equivalent status).
Open the door.
Confirm the platform shows Door: Open.
Verify temperature readings:
Check that a temperature value is displayed for the asset/door sensor.
Wait a few minutes and refresh if necessary, depending on your reporting interval.
If door or temperature readings do not appear as expected, refer to the Troubleshooting section (e.g., door sensor config, magnet distance, BLE gateway setup, or whitelist settings).
7. Technical Summary (for quick reference)
Product: ZenDoor+
Functions: Door open/closed detection, temperature monitoring
Ingress Protection: IP67
Battery: Built-in, non-replaceable, ~1650 days (typical)
Protocol: TFT Eddystone (default)
Range: Up to 200 m (line-of-sight; environment-dependent)
Door Closed Detection Distance: ≤ 3 cm between device and magnet
Activation: Front light sensor (exposure to light)
Configuration App: TFTBLE (iOS/Android)
Default Password: 654321