ZenTRACK Power+
Written By Support Team
📄 Download PDF Version: Attached Below 🢃
TLW2-12B-User-Manual.pdf
5.4 MB• Document
Installation Video
Product Overview: ZenTRACK Power+ is a state-of-the-art asset tracking device using GNSS and LTE technologies for real-time tracking and monitoring of valuable assets, designed for fleet management, equipment monitoring, logistics, and vehicle rental applications.
Key Features:
Real-Time Tracking: Accurate, live location data transmission
Geo-Fencing: Virtual boundaries with entry/exit alerts
Movement Alerts: Unauthorized movement and tampering notifications
Long Battery Life: Extended operational periods without frequent recharging
Rugged Design: Built to withstand harsh environmental conditions
Pre-Installation Checklist:
Device Preparation: Unpack, inspect, charge fully, test functionality
Tools & Materials: Mounting brackets, screws, screwdriver, specified accessories
Location Selection: Clear sky view, avoid metal obstructions
Testing: Verify GPS signal acquisition and platform communication
Installation Process
Step 1: Unboxing
Inside the box, you will find:
ZenTrack Power+ device
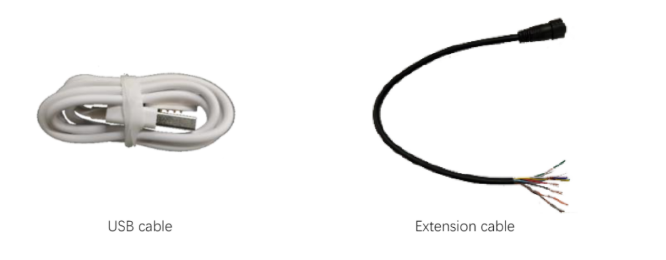
Configuration cable
Mounting screws
Step 2: Device Overview
Can be used as a standalone device or through hardwiring.
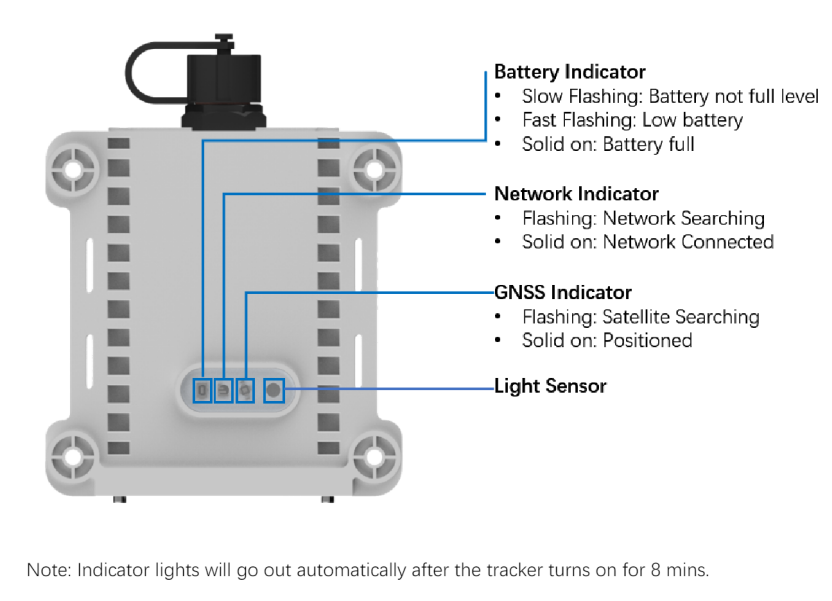
Status lights (located at the bottom):
Battery level
Cellular connectivity
GPS signal latch
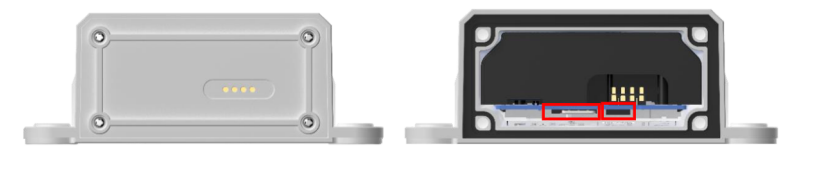
Step 3: Insert the SIM Card
Unscrew and remove the back cover.
Locate the ON/OFF switch and SIM card slot.
Insert the SIM card into the slot until you hear a click.
Push again to release if needed.
Ensure the SIM card is secured for proper connectivity.
Turn power switch from OFF to ON position
Close rear cover and secure tightly with screws
Step 4: Power On
Switch the device ON.
Watch the status lights:
Blinking = searching for network/GPS
Solid = successfully connected
Step 5: Hardwire Installation (Optional)
Open the wiring cover.
Connect the extension cable.
Use only 3 wires:
Red = Constant Power (12V–24V)
Black = Ground (Negative)
White = Accessories / Ignition
Tighten all connections securely to avoid loose wiring.
Critical Installation Requirements:
Waterproof Sealing: VERY IMPORTANT to fix all 4 rear cover screws to prevent water damage
Power Switch: Device ships in OFF position - must turn ON during setup
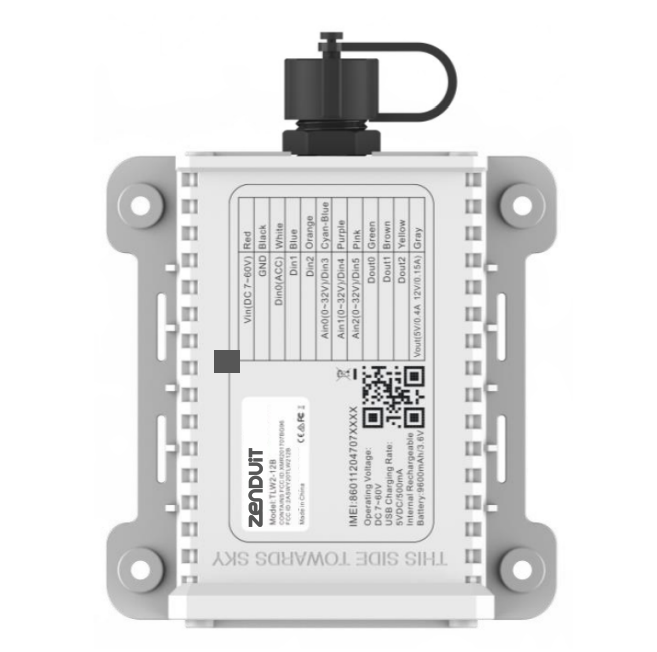
Orientation: "This Side Towards Sky" label must face upward for optimal GPS reception
Mounting Options:
Primary: Four self-tapping screws to flat surface (don't overtighten)
Alternative: Zip ties, industrial Velcro, or 3M double-backed tape
Flexibility: Can install vertically or sideways if GPS antenna points skyward
Installation Location Guidelines:
Optimal: Clear sky view for GPS signal, avoid metallic enclosures
Prohibited: Trailer rear doors, flatbeds, chassis
Recommended: Trailer roof (bridge clearance), trailer front below roofline
Avoid: Physical damage areas, emission sources, communication interference
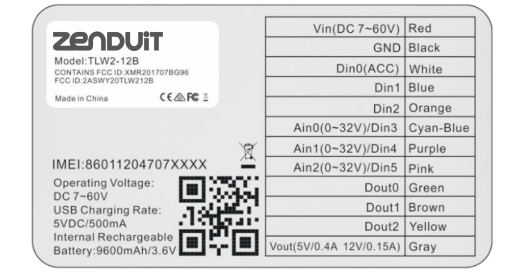
Wiring & Power Connection:
Untighten tracker cap
Connect extension cable until firmly seated
Tighten cap completely (critical for moisture protection)
Use pinout chart on device for power source connections
Comprehensive Troubleshooting:
Connection Issues: Check APN/IP settings, SIM compatibility, server whitelist, balance/signal
Offline Status: Verify power connections, network coverage, data limits
Location Problems: Ensure proper orientation, satellite coverage, account for urban drift
Command Issues: Check formatting, SIM insertion, network availability
Key Advantages Over Standard ZenTRACK Power:
Enhanced Battery: Longer operational life
Advanced Features: Geo-fencing, movement alerts, light sensor
Improved Ruggedness: Better environmental protection
Professional Installation: More comprehensive setup requirements