Configuración de ZenduBUS en Geotab
Escrito por Maria Daniela
Descripción General
ZenduBUS es una aplicación de software que equipa a la administración escolar y de transporte (gerentes) con la capacidad de crear rutas de autobús, proporcionando notificaciones y actualizaciones en tiempo real sobre la ubicación y llegada del autobús. La aplicación móvil ZenduBUS es una forma simple y efectiva de entregar datos del autobús escolar mientras aumenta la seguridad de los estudiantes.
Resumen de la Solución
¿Cómo funciona esta solución?
La aplicación ZenduBUS funciona comunicándose con el hardware telemático instalado en los autobuses. El hardware transmite datos en tiempo real sobre la actividad/ubicación del autobús junto con otra información. Esta información es recopilada y enviada a la aplicación para que los padres y pasajeros puedan consultarla fácilmente.
La solución ZenduBUS tiene dos servicios: (1) Escolar y (2) Transporte. Dependiendo del servicio comprado, la experiencia y configuración variarán.
Preguntas Comunes y Preocupaciones Abordadas por ZenduBUS
Preocupaciones de Pasajeros/Padres
"Quiero saber cuándo el autobús llega tarde o está cancelado."
"¿A qué hora llegará el autobús a mi parada?"
"¿Mi hijo está en el autobús?"
"¿Mi hijo se bajó del autobús? Si es así, ¿dónde?"
Beneficios para la Escuela/Organización
"Quiero reducir las consultas y llamadas relacionadas con la actividad del autobús."
"Quiero monitorear la actividad del autobús para seguridad y fines operativos."
"Quiero aumentar la adopción del autobús escolar y de transporte proporcionando una experiencia positiva."
Terminología ZenduBUS
Definiciones Clave
Viajero: La persona que subirá y bajará del autobús escolar (por ejemplo, el estudiante).
Tutor: La persona responsable del “Viajero” y que monitoreará la actividad del autobús escolar y del estudiante a través de la aplicación ZenduBUS.
Punto de Ruta: Puntos o ubicaciones específicas definidas por un usuario para crear una ruta personalizada que se desvía del camino generado automáticamente. Al agregar puntos de ruta, los usuarios pueden dirigir el sistema de navegación para seguir un curso particular, evitar ciertas áreas o incluir destinos específicos durante el recorrido, proporcionando un mayor control sobre la ruta tomada.
Configuración del Add-in
¿Qué es un Add-in?
Un add-in, también conocido como complemento o plugin, es un componente de software que agrega funciones o características específicas a una aplicación o programa existente. Está diseñado para extender las capacidades de la aplicación y proporcionar herramientas o servicios adicionales.
Pasos de Instalación
Para agregar el Add-in de ZenduBUS, siga estos pasos:
Inicie sesión en su cuenta de MyGeotab.
Navegue a Sistema > Configuración del Sistema.
Haga clic en la pestaña "Add-Ins".
Configure “Permitir Add-Ins no verificados” a "Sí".
Haga clic en "+ Add-In".
Copie y pegue la siguiente configuración JSON en el campo de texto bajo la pestaña Configuración:
{
   "name": "ZenBUS",
   "supportEmail": "support@zenduit.com",
   "version": "1.0.0",
   "items": [
         {
             "url": "https://zendu-bus-eta.firebaseapp.com/assets/geotab-addin.html",
             "path": "",
             "menuName": {
                   "en": "ZenBUS",
                   "fr": "ZenBUS"
             },
             "icon": "https://storage.googleapis.com/zenduit-icons/BusETA.svg"
         }
   ],
   "isSigned": false
}
Click "OK" to add your add-in to the list
Click "Save" on the top left to finish the installation
For additional information: https://community.geotab.com/s/article/How-to-install-add-an-add-in-I-have-developed-into-a-MyGeotab-database?language=en_US
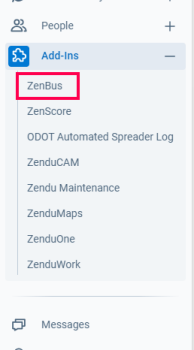
The Add-in should now be installed and you can find the ZenduBUS application on the side menu bar on your MyGeotab account.
System Setup - School Service
For safety and security reasons, Travellers and Guardians must be registered to ZenduBUS by the school administration via the Admin portal. There is no option for individuals to self-register. Only registered users setup by the school will be able to view the data on ZenduBUS. This means that the school must create the user accounts for both the Guardians and Travellers with the appropriate assigned pairing.
Setup Order
Please setup in the following order:
Route Configuration
Guardian Registration
Traveller Registration
Route Configuration
Navigate to the "Routes" tab
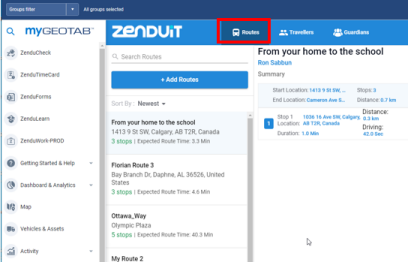
Select "+ Add Routes"
Populate the Route fields and Save
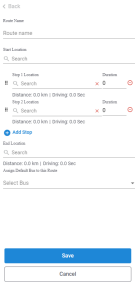
This route has now been saved and can be assigned to Travellers. Alternatively, the routes can be configured and setup using APIs. Please contact GoZen Service for support.
Guardian Registration
Guardians can be added either individually or through Excel file import.
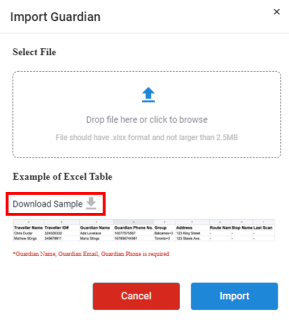
Importing Guardians via Excel
When adding many Guardians, it will be very tedious to individually enter the information. Therefore, for bulk adding we recommend selecting on the "Import" tab and downloading the Excel template. Once the template is downloaded, you can go ahead and populate the Excel sheet with the Guardian data and then upload the populated Excel file. This will allow the system to automatically create the Guardian users without hassle.
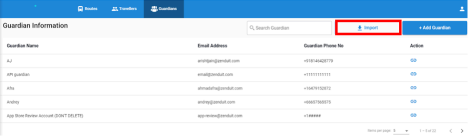
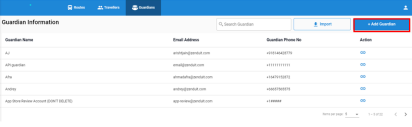
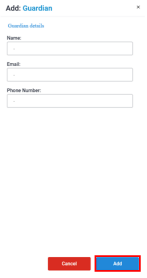
Adding Guardians Individually
For the addition of a single Guardian, select on "+Add Guardian", populate the fields and select "Add" to save.
Traveller Registration
Travellers can be added either individually or through Excel file import.
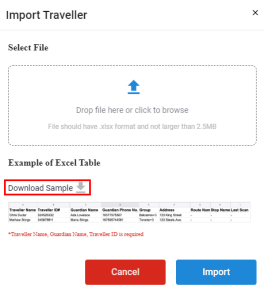
Importing Travellers via Excel
When adding many Travellers, it will be very tedious to individually enter the information. Therefore, for bulk adding we recommend selecting on the "Import" tab and downloading the Excel template. Once the template is downloaded, you can go ahead and populate the Excel sheet with the Traveller data and then upload the populated Excel file. This will allow the system to automatically create the Traveller users without hassle.
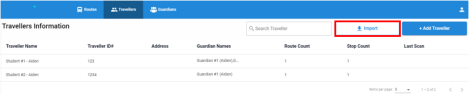
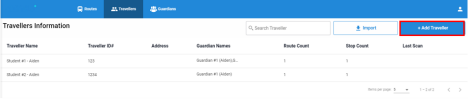
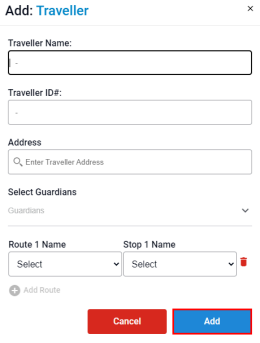
Adding Travellers Individually
For the addition of a single Traveller, select on "+Add Traveller", populate the fields and select "Add" to save. A traveller can only have one stop per route.
System Setup - Shuttle Service
Route Configuration
Navigate to the "Routes" tab
Select "+ Add Routes"
Populate the Route fields and Save

This route has now been saved and can be accessed and viewed by passengers. Alternatively, the routes can be configured and setup using APIs. Please contact GoZen Service for support.
Shuttle Settings
The shuttle service includes additional configuration options:
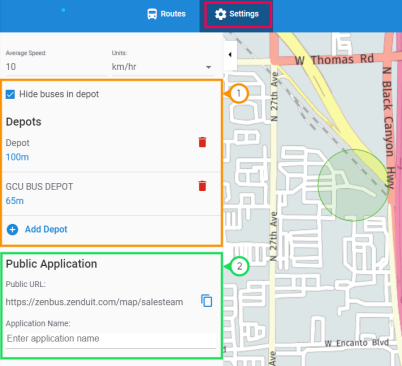
Depot Configuration
This is where you have the option to establish a depot. It could be a designated facility or location where buses are stored, maintained, and dispatched. To uphold privacy and reduce passenger confusion, you can implement a geofence that conceals buses from public view once they enter the specified radius. This ensures that buses remain hidden while within the depot.
Public Application
The "Public Application" setting allows you to access the URL leading to a public web view of your routes. Additionally, you can assign a specific name to the portal, which will be visible on the public view.
Accessing & Viewing ZenduBUS
Via the ZenduBUS Mobile Application
Both ZenduBUS School and Shuttle services are viewable by our dedicated mobile app.
Download Links:
iOS Store Download (Apple Devices): https://apps.apple.com/ca/app/zenbus/id1576474079
Google Play Store Download (Android Devices):
https://play.google.com/store/apps/details?id=com.zenduit.eta&hl=en&pli=1
Via the ZenduBUS Web Application
Both ZenduBUS School and Shuttle services are viewable by our dedicated web app.
Web App Link: https://zenbus.zenduit.com/select-service