MyInstallHub User Guide - For Installers
MyInstallHub is a mobile-first marketplace that connects fleet managers who need telematics devices installed in their vehicles with qualified installers who can do the work. This guide walks you through every step — from creating an account to completing your first installation.
Written By Support Team
MyInstallHub
A step-by-step guide for fleet managers and installers
— — —
PART 1 · For Fleet Managers
PART 2 · For Installers
Version 1.0 · April 2026
Welcome to MyInstallHub
MyInstallHub is a mobile-first marketplace that connects fleet managers who need telematics devices installed in their vehicles with qualified installers who can do the work. This guide walks you through every step — from creating an account to completing your first installation.
How the platform works
MyInstallHub connects two types of users:
Fleet Managers (customers) post installation projects, receive bids, select an installer, and track progress through to completion.
Installers browse available projects in their service area, submit competitive bids, win work, and log each installation directly in the app.
Everything happens in a single app — no email chains, no scattered spreadsheets, no chasing updates.
How to use this guide
This guide is split into two parts. Start with the section that matches your role:
Part 1 — For Fleet Managers
Part 2 — For Installers
An appendix at the end covers account recovery and general support.
Before you begin
Download the MyInstallHub app from the App Store (iOS) or Google Play (Android).
Have your business details ready — company name, service addresses, and contact information.
Fleet Managers will need a vehicle list; Installers will need business credentials and service area details.
For Installers
Find real installation work in your service area,
bid competitively, and log every install from the app.
1. Creating Your Installer Account
Open the MyInstallHub app and tap Sign up. Select the Installer card on the welcome screen.
Installer registration
Fill in your business information:
Full name, phone, and email.
Business name and business address (pick from the dropdown for accurate geocoding).
Website (optional).
Number of active technicians on your team.
Installation warranty duration (months).
Whether you hold valid liability insurance.
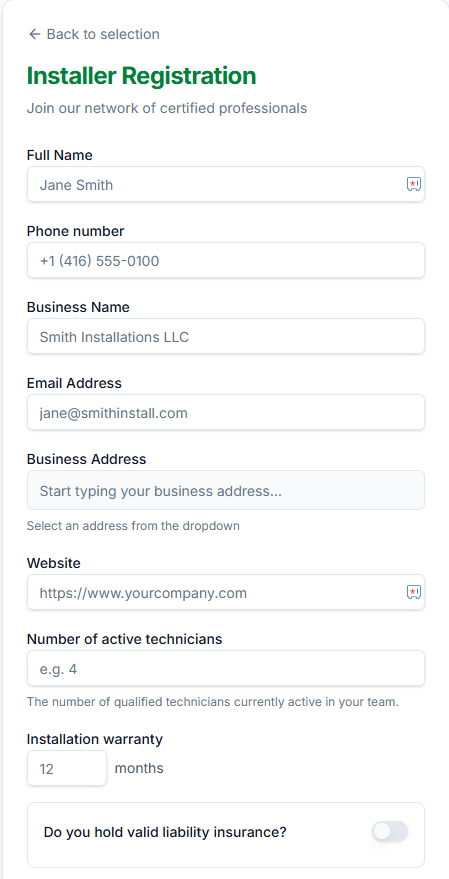
The Installer registration form.
Certifications, specialties, and service area
Certifications & Qualifications — describe your training and licenses.
Specialties — check every device category you install (GPS Trackers, Camera Systems, ELD Compliance, Sensors, Trailer Tracking, Indoor Tracking).
Service Area — Nationwide, or specific states/provinces.
Set a password, accept the Installer Agreement and Privacy Policy, and tap Create Installer Account.
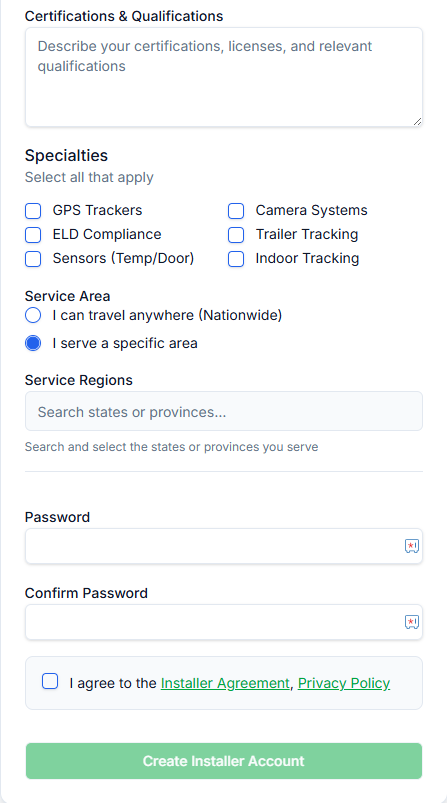
Specialties, service area, and agreement.
2. Your Installer Profile
Your profile is what customers see when evaluating your bid. A complete profile signals professionalism and builds trust.
Viewing and editing your profile
From the main menu, tap Profile. Review every section, then tap Edit to update any field.
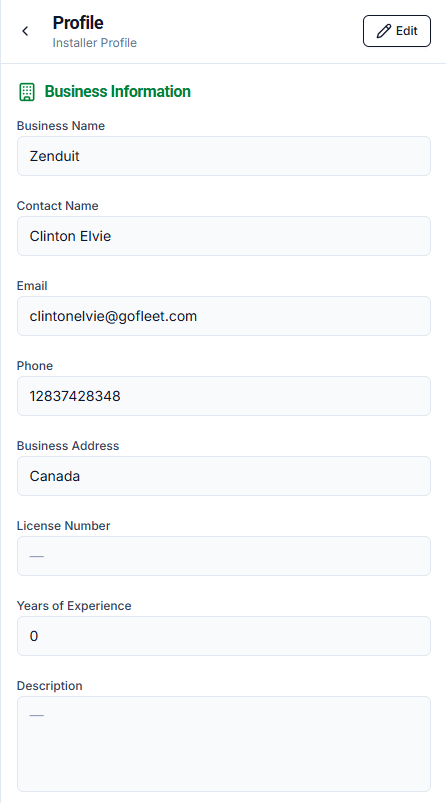
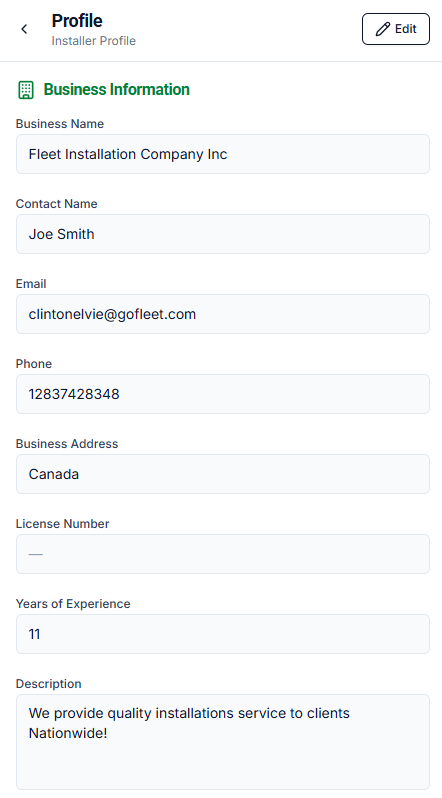
What your profile includes
Business Information — name, contact, address, license, years of experience, website, description.
Active technicians and liability insurance status.
Specialties — device categories you install.
Certifications & Qualifications — free-text description of your credentials.
Team Members — add admins and regular users to collaborate on bids and installs.
Service Settings — Nationwide toggle, push notification toggle, and specific service regions.
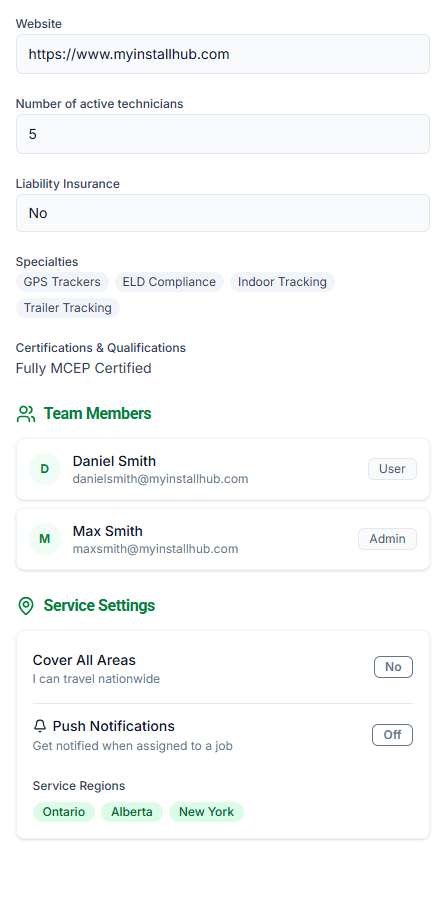
Specialties, team members, and service settings.
3. Finding Work
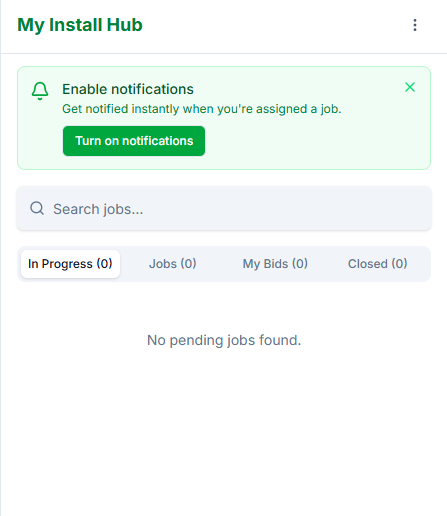
The main dashboard is your job hub. It's organized into four tabs so you always know where every project stands.
The four job tabs
In Progress — jobs you've won and are actively working on.
Jobs — newly posted projects in your service area, available for bidding.
My Bids — bids you've submitted, waiting for the customer's decision.
Closed — completed jobs and bids that weren't awarded.
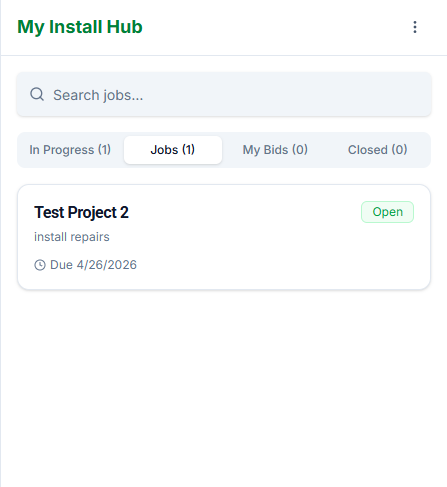
Finding a job that fits
Tap any open job card to view the full project details: location, start date, bid deadline, job scope (number of vehicles and devices), description, and any customer-provided notes. Use this to decide whether to bid — and at what price.
4. Submitting a Bid
Tap a job to open it, then tap Submit Bid to open the bid form.
Review customer information
Every bid starts with the job details already populated: customer company, site address, start date, bid deadline, total vehicle count, devices to install, and the customer's description.
Choose your pricing structure
MyInstallHub supports two bid styles. Choose the one that best matches how you price your work:
All-inclusive rate — one per-device rate covering everything (labour, travel, materials). Simplest for customers to compare.
Itemised: per-unit + travel — separate labour rate per device plus one total travel expense for the whole job. More transparent for out-of-area jobs.
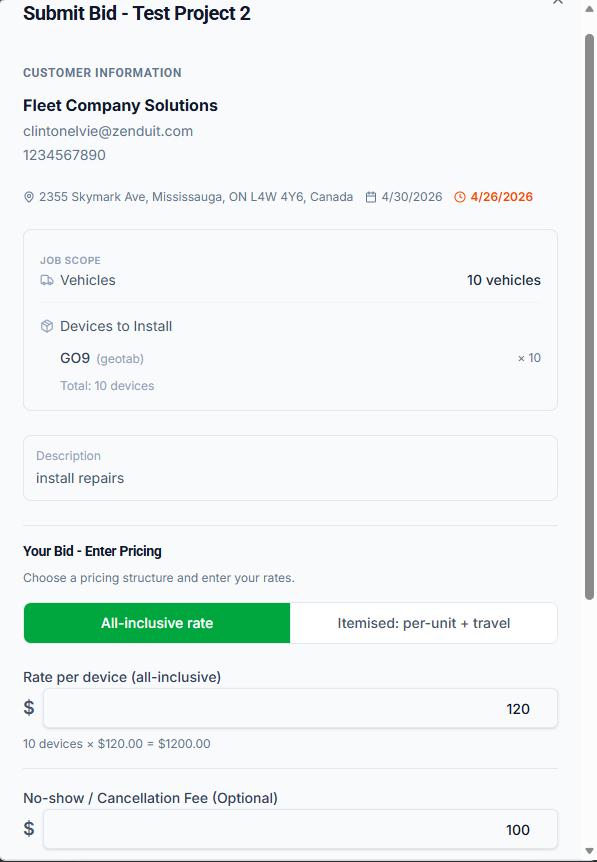
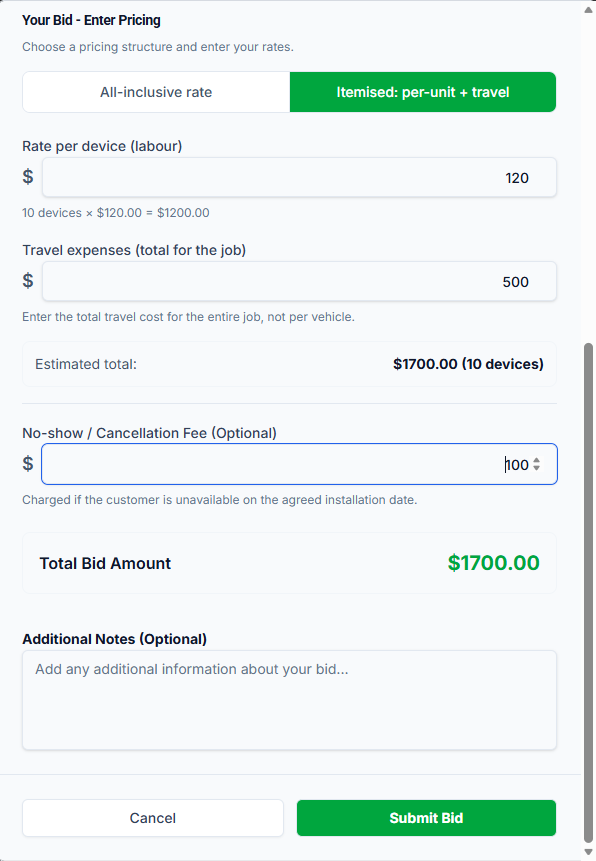
Optional extras
No-show / cancellation fee — charged if the customer is unavailable on the agreed install date.
Additional notes — anything the customer should know about your bid or approach.
When ready, tap Submit Bid. Your bid moves to the My Bids tab with an Awaiting customer review status.
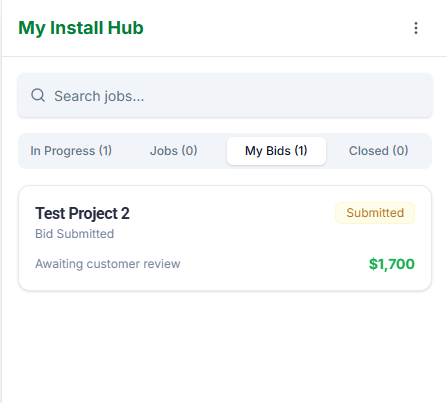
Your submitted bid awaiting customer review.
5. Starting an Accepted Job
When a customer accepts your bid, you'll receive a notification and the job moves to your In Progress tab. Open the job to see the full project details and begin work.
Your project view
The project screen shows:
Project overview — description, location, start date, bid deadline.
Installer details — your assignment is confirmed.
Installation progress — tracked as you log each install.
Devices — what's being installed and how many.
When you're ready to record an install, tap the green + Log Install button.
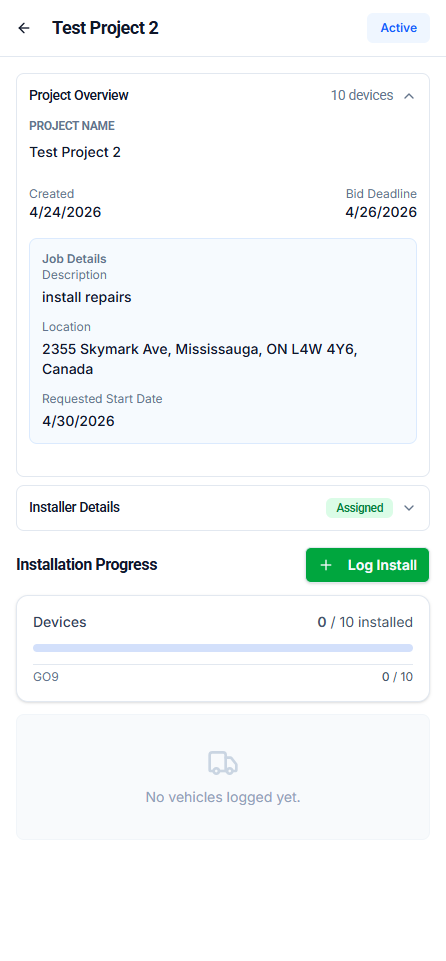
The active project view with Log Install button.
6. Logging Installations
Every vehicle you install gets logged in the app. This creates a real-time progress feed for the customer and builds the final Installation Report automatically.
Add a vehicle
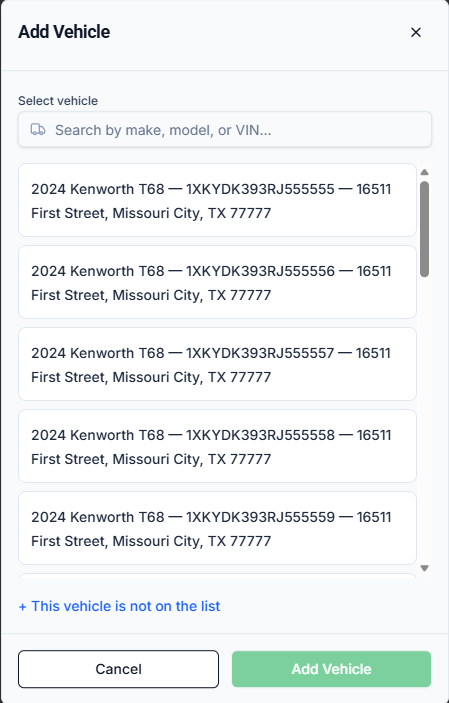
1. Tap + Add First Vehicle. On the Log Installation screen, add the vehicle you've just worked on.
2. Select the vehicle. Choose from the customer's vehicle list — every vehicle on the list is preloaded. You can also tap "This vehicle is not on the list" if needed.
3. Take a vehicle photo. A photo is required. This confirms which vehicle was serviced.
4. Tap Add Vehicle. The vehicle appears in the installation list with a 0 devices status.
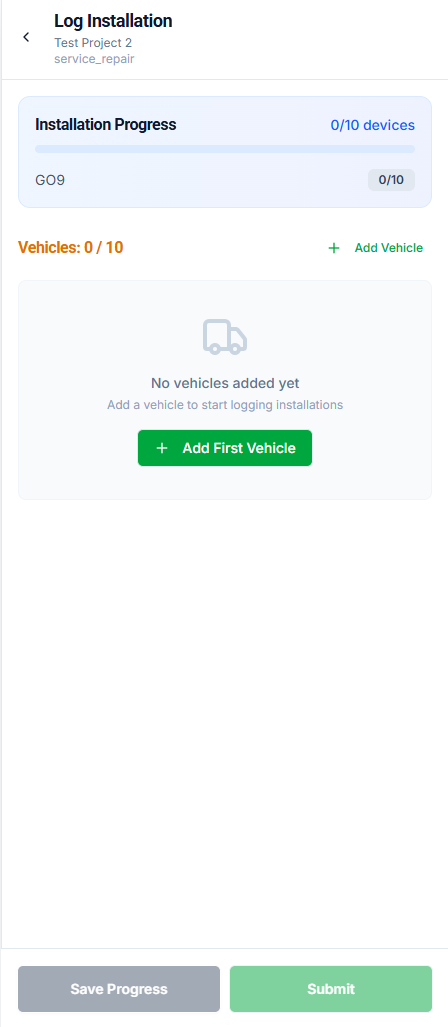
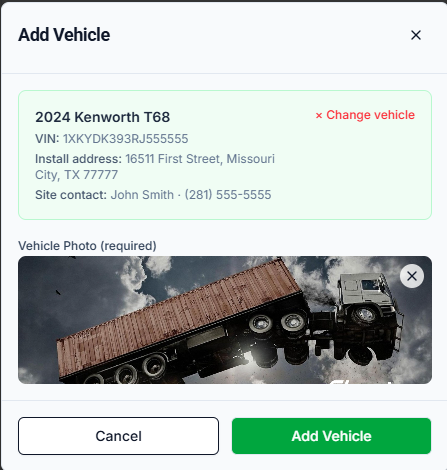
Add the required vehicle photo and confirm.
Add the installed device
1. Tap + Add Device. On the vehicle card, tap Add Device to begin.
2. Select device type. Choose the device model you installed (e.g. GO9).
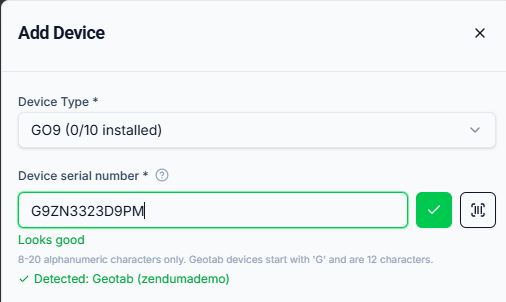
3. Enter the serial number. Type it or tap the barcode scanner icon to scan. Geotab serials start with "G" and are 12 characters.
4. Confirm the serial. The app validates it against the connected Geotab database. A green checkmark + "Detected" badge confirms success.
5. Take device photos. At least one photo of the installed device is required.
6. (Optional) Add accessories. For each accessory installed alongside the main device, add its name and serial number (e.g. NFC Reader, cameras, monitors, backup sensors).
7. (Optional) Add notes. Any comments about the install.
8. Tap Add Device. The device is logged and your progress count increments.
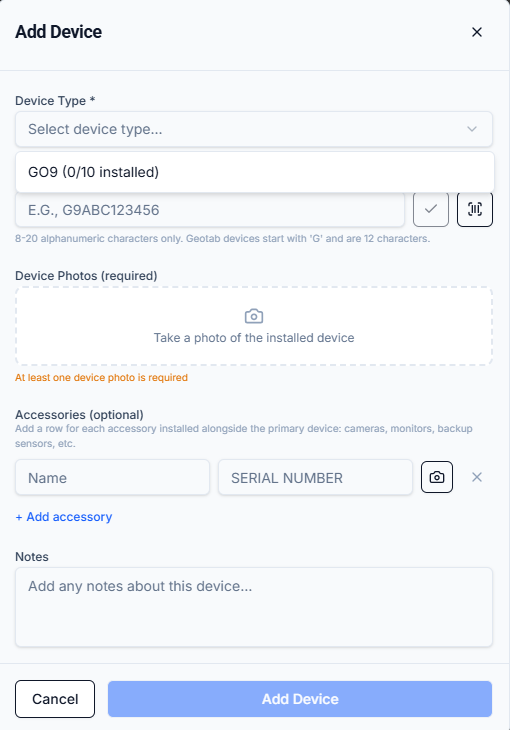
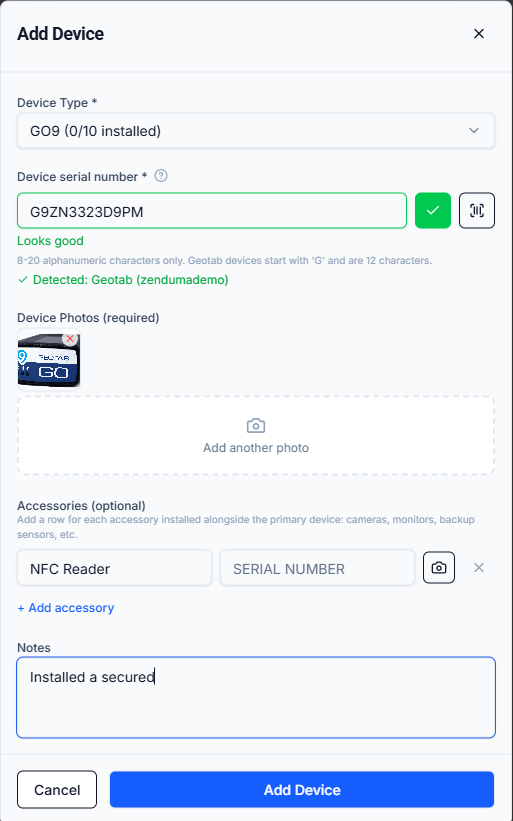
Device photo, accessories, and notes.
After adding a device
The device card shows Installed, Online (for Geotab devices once active), and lists any accessories. The installation progress bar updates automatically. Continue adding vehicles and devices until every install is logged.
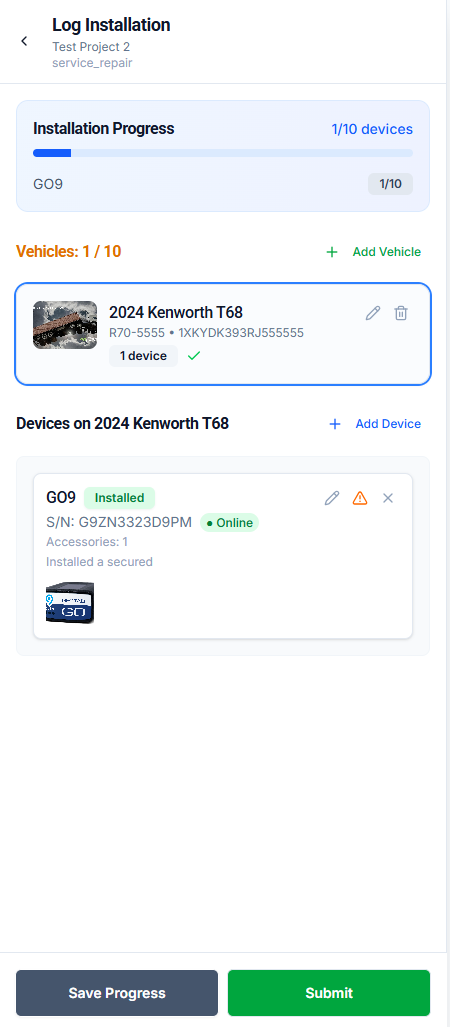
A fully logged device — Installed + Online status.
Handling edge cases
Serial not recognized
If the serial isn't in the Geotab database, you'll see a Serial Not Recognized dialog. Tap Add Anyway to log the device — the customer will be notified to add it to their Geotab database manually.
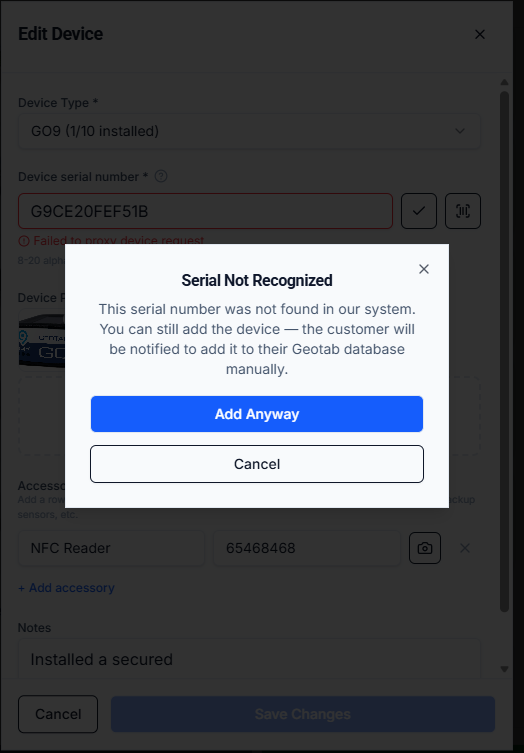
Serial Not Recognized — add anyway if the device is legitimate.
Incomplete installation warning
If you try to submit a job before all vehicles and devices are logged, the app shows an Incomplete Installation confirmation dialog. Tap No to go back and finish logging, or Yes to submit anyway (the final report will show unfinished vehicles).
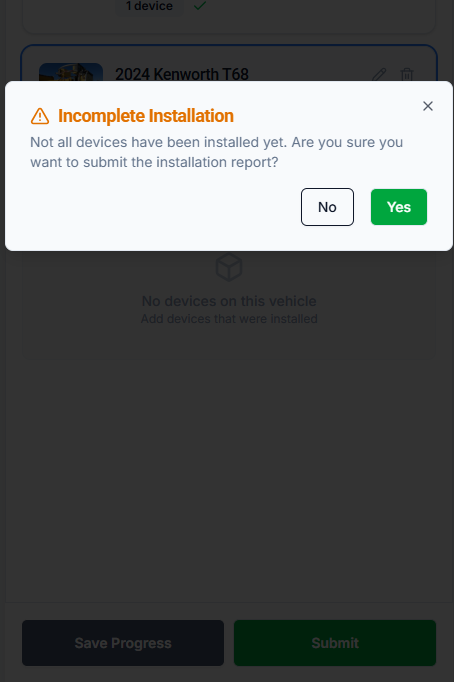
Incomplete Installation warning.
7. Completing the Job
When every vehicle is logged and every device is installed, tap Submit on the Log Installation screen. The project moves to the Closed tab with a Completed status, and the customer automatically receives the finalized Installation Report.
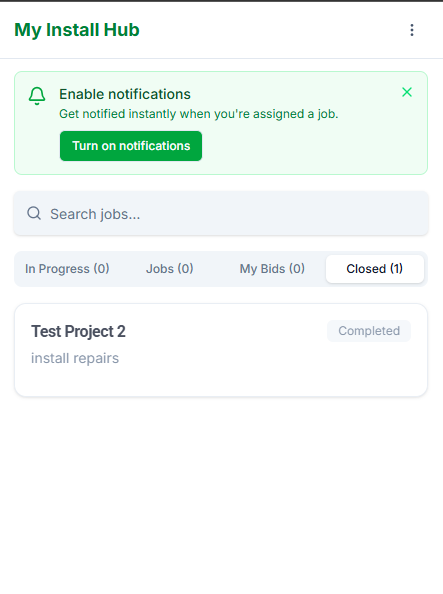
A completed job in the Closed tab.
After submission
Once submitted:
The customer sees their project move to Closed with the full Job Report available.
The full Installation Report PDF becomes available to both parties — listing every device serial, every vehicle, every photo.
The customer handles payment with you directly, outside the app, based on the terms of your accepted bid.
Appendix: Account and Support
Forgot your password
If you can't remember your password:
1. On the sign-in screen, tap Forgot password? You'll be asked for your email address.
2. Enter your email. Use the email you registered with.
3. Check your inbox for the verification code. Enter the code when prompted and set a new password.
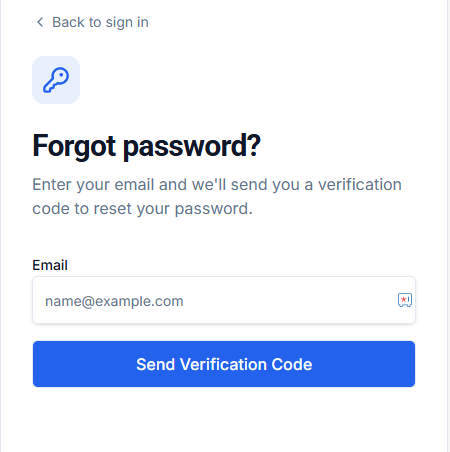
Password recovery — enter your email to receive a verification code.
Profile menu
The three-dot menu in the top-right of the main screen opens Profile, Feedback, and Logout options.
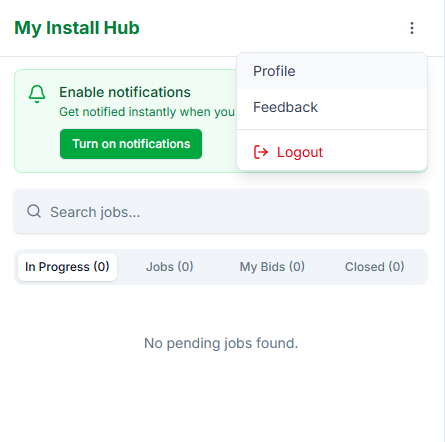
The main profile menu.
Getting help
For questions, technical issues, or feedback:
Email — installrequest@myinstallhub.com
Web — myinstallhub.com
In-app — Profile menu → Feedback